
Which survey method do I need?
Tell the tool what you are studying, what you need to know, where and when, and it picks the field method, the effort, the season, the kit and the mistake to avoid on day one. 188 methods across 14 groups.
Enter your email and every datasheet on this page unlocks, and the full pack of 188 sheets arrives as one PDF.
Point counts
Stand at a fixed point and record every bird seen or heard, usually within 50 or 100 m bands. The workhorse of breeding bird monitoring because it needs one person and no kit.
How to run it
- Place points at least 200 m apart (250 m in open country) and mark them on GPS the day before.
- Start within 30 minutes of sunrise; stop by mid morning or when wind exceeds Beaufort 3 or it rains.
- Wait 1 minute after arriving, then record for the fixed time, noting distance band, detection type (seen, song, call) and flyovers separately.
- Repeat every point 2 or 3 times across the season in the same order reversed.
- Enter data the same day; unreadable field sheets are the main data loss.
The day one mistake: Counting the same singing male twice from two points. Note direction and distance so duplicates can be removed.
| Point ID | Date | Start time | Observer | Wind and cloud | Species | Number | Distance band | Detection type | Flyover (Y/N) | Time interval |
|---|---|---|---|---|---|---|---|---|---|---|
Line transects
Walk a fixed line and record birds with their perpendicular distance from the line. Suited to open country where detections happen over long distances and you want density.
How to run it
- Lay out straight lines that cross habitat gradients, not along tracks or edges.
- Walk at a steady pace, recording species, number, side, and perpendicular distance (estimate or rangefinder).
- Never leave the line to chase a bird; record where it was first detected.
- Two visits, early season and late season, same time of day.
- Keep distance bands consistent if you are not measuring exactly (0 to 25, 25 to 100, over 100 m).
The day one mistake: Recording distance to where the bird flew, not where it was first seen. Distance sampling only works with first detection distances.
| Transect ID | Section | Date | Start and end time | Observer | Species | Number | Side (L/R) | Perpendicular distance (m) | Behaviour | Distance band | Section length (m) |
|---|---|---|---|---|---|---|---|---|---|---|---|
Territory mapping
Map every singing male and breeding behaviour on repeated visits, then cluster the registrations into territories. The most accurate small plot method and the most labour hungry.
How to run it
- Prepare a plot map at 1:2,500 with landmarks; number the visits.
- Walk within 50 m of every part of the plot each visit, alternating direction and start point.
- Plot each registration with species code and activity symbol (singing, alarm, nest material, food carrying, simultaneous singers).
- Transfer to species maps the same evening.
- After the final visit, draw territory clusters using at least 2 or 3 registrations per cluster.
The day one mistake: Missing simultaneous singers. Two males heard at once are two territories; write the double headed arrow every time.
| Visit number | Date | Time | Weather | Species code | Activity symbol | Map reference | Simultaneous with |
|---|---|---|---|---|---|---|---|
Nest searching and monitoring
Find nests by behaviour cues and check them on a fixed schedule to measure clutch size, hatching and fledging success.
How to run it
- Watch adults from a distance; nest material, food carrying and repeated flights to one spot lead you in.
- Approach only when no predator is watching, never in rain, and leave no dead end trail in vegetation.
- Record contents in under a minute; use a mirror pole for high nests.
- Return every 3 to 4 days; predict fledge date and check just before it.
- Record fate codes exactly as the protocol defines them; ambiguous fates get their own code.
The day one mistake: Flagging the nest itself. Mark a point 10 m away with a bearing and distance, or predators will follow your tape.
| Nest ID | Species | Found date | Stage at finding | Visit date | Eggs | Chicks | Adult present | Fate code | Notes |
|---|---|---|---|---|---|---|---|---|---|
Acoustic recorders (passive monitoring)
Leave autonomous recorders to capture dawn chorus or night calls, then identify species with software and manual checking. Scales to many sites with one person.
How to run it
- Set the schedule (for example 1 h before to 3 h after sunrise) and test one unit at home first.
- Mount at 1.5 m on a post or tree facing open habitat, away from running water and roads.
- Log GPS, deployment time, card ID and battery level for every unit.
- Retrieve, back up cards immediately, and label folders by site and date.
- Run automated ID (BirdNET or similar) then verify every new species by ear.
Kit list
- AudioMoth recorder (Open Acoustic Devices via GroupGets or LabMaker)
- SD cards 64GB
- Lithium AA batteries
- Cable ties and straps
The day one mistake: Trusting automated IDs. Confidence scores are not detections; check spectrograms before anything enters the dataset.
| Site | Recorder ID | Card ID | Deploy date and time | Retrieve date and time | Schedule | Battery on retrieval | Species | Detections | Verified (Y/N) |
|---|---|---|---|---|---|---|---|---|---|
Mist netting and ringing
Catch birds in fine nets for ringing, measurement and survival estimates. Only ever under a licensed ringer.
How to run it
- Set nets the evening before along flight lines and edges, furled.
- Open at first light; close in rain, strong wind or heat.
- Check every 20 to 30 minutes; extract feet first, bird held in ringer's grip.
- Ring, age, sex, wing, weight, fat, then release at the net.
- Record net hours exactly; effort is the denominator for every analysis.
Kit list
- Mist nets
- Net poles (Avinet (US) or NHBS (UK))
- Bird bags (Avinet (US) or NHBS (UK))
- Wing rule (Avinet (US) or NHBS (UK))
- Spring balance (Pesola, via Forestry Suppliers (US) or NHBS (UK))
The day one mistake: Leaving a net unattended past 30 minutes. Bird welfare comes before data, and one dead bird ends most training relationships.
| Net number | Open time | Close time | Species | Ring number | Age | Sex | Wing (mm) | Weight (g) | Fat score | Time extracted |
|---|---|---|---|---|---|---|---|---|---|---|
Nocturnal playback surveys (owls, nightjars, rails)
Broadcast the species' call at fixed points and record responses. The only practical way to survey secretive nocturnal birds.
How to run it
- Load calls at a fixed volume and test the range in daylight.
- Listen 2 minutes silent, play 30 seconds, listen 2 minutes; repeat once.
- Record distance, direction and response type for each bird.
- Stop playback the moment a bird responds; do not draw it in.
- Three visits spread over the calling season.
Kit list
- Bluetooth speaker
- Headlamp
- Compass (Suunto or Silva, via an outdoor shop)
The day one mistake: Playing the call too long or too loud. It pulls birds off territory and biases every later point.
| Point ID | Date | Time | Moon and wind | Species played | Response (Y/N) | Response time | Direction | Estimated distance | Number of birds |
|---|---|---|---|---|---|---|---|---|---|
Roost emergence and re entry counts
Surveyors watch a building or tree and count bats leaving at dusk, with a detector to identify species. The standard for roost assessment.
How to run it
- Inspect the structure by day for droppings, staining and gaps; assign one surveyor per emergence point.
- Position with the sky as a backdrop, 5 to 10 m back, detector on.
- Count every bat out and every bat in; note time, exit point and species from calls.
- Surveys spaced at least 2 weeks apart across May to September in the north.
- Log weather; abandon below 10 C or in rain.
- North America: follow the USFWS white nose syndrome decontamination protocol for every item that enters a roost or touches a bat.
Kit list
- Heterodyne bat detector (Wildlife Acoustics or Titley Scientific; NHBS (UK))
- Thermal imaging camera
- Headlamp with red light
- Tally counter
The day one mistake: Arriving at sunset. The first bats can leave 10 minutes before sunset on warm evenings and you will miss the count that matters.
| Roost ID | Date | Sunset time | Start and end time | Temperature and wind | Exit point | Time out | Time in | Species | Running total |
|---|---|---|---|---|---|---|---|---|---|
Activity transects with a handheld detector
Walk a fixed route after sunset with a detector, recording passes and species. Shows where bats feed and commute across a site.
How to run it
- Design the route to cross every habitat and include linear features (hedges, water).
- Start at sunset; walk slowly with the detector recording continuously.
- At each stop, listen and note species, passes and behaviour (feeding buzzes, social calls).
- Record GPS tracklog so passes can be mapped.
- Analyse recordings with software and check species by hand.
Kit list
- Full spectrum bat detector (Wildlife Acoustics)
- Handheld GPS
- Headlamp with red light
The day one mistake: Pointing the detector at the ground. Hold it at chest height, angled slightly up and away from you, or you record your own footsteps.
| Transect ID | Date | Sunset | Start time | Stop number | Time | Species | Passes | Feeding buzz (Y/N) | Habitat | GPS |
|---|---|---|---|---|---|---|---|---|---|---|
Static detectors (automated)
Leave recording detectors out for several nights per month to capture activity you would never hear on a walk. The standard for occupancy and seasonal patterns.
How to run it
- Mount the microphone 1.5 to 2 m up, clear of vegetation, pointing across open space.
- Programme sunset to sunrise; check battery lasts 5 nights.
- Record GPS, deployment time and microphone direction.
- Retrieve; back up immediately; run automated ID then verify.
- Keep locations identical between months.
Kit list
- Song Meter Mini Bat (Wildlife Acoustics)
- SD cards 64GB
- Lithium AA batteries
- Straps and cable ties
The day one mistake: Placing the detector in dense vegetation. Clutter echoes bury the calls and you get thousands of unidentifiable files.
| Site | Detector ID | Microphone ID | Deploy date and time | Retrieve date and time | Nights recorded | Species | Passes per night | Weather notes | Microphone height (m) | Microphone direction |
|---|---|---|---|---|---|---|---|---|---|---|
Harp trapping and mist netting
Capture bats on commuting routes for identification, measurement and tagging. Licensed work; you assist under a licence holder.
How to run it
- Set traps across flyways: rides, streams, gaps in hedges.
- Open at sunset; check every 15 minutes without fail.
- Process in a warm shelter: species, sex, age, forearm, weight, breeding status.
- Release at the capture point within 30 minutes.
- Record trap hours for effort.
- North America: follow the USFWS white nose syndrome decontamination protocol for every item that enters a roost or touches a bat.
Kit list
The day one mistake: Handling without gloves and without vaccination. Nobody will train you again after that.
| Trap ID | Open time | Close time | Time caught | Species | Sex | Age | Forearm (mm) | Weight (g) | Breeding condition | Released time |
|---|---|---|---|---|---|---|---|---|---|---|
Live trapping grids (Sherman or Longworth)
Set baited box traps in a grid, mark and release animals, and estimate abundance by mark recapture. The core small mammal method.
How to run it
- Pre bait traps locked open for 2 nights so animals learn them.
- Set at dusk with bedding, seed and insect food (blowfly casters or mealworms) so shrews survive the night.
- Check at dawn and again at dusk, never later; where shrews are likely use escape holes or shorter intervals as the licence requires.
- Process: species, sex, weight, mark (fur clip or ear tag), trap position.
- Release at the trap. Record every trap as caught, empty, closed or missing.
- Close or remove traps on the last morning; count them all.
Kit list
- Sherman traps (H.B. Sherman (US) or NHBS (UK))
- Longworth traps (NHBS (UK); H.B. Sherman (US))
- Pesola spring balance (Pesola, via Forestry Suppliers (US) or NHBS (UK))
- Holding bags (Avinet (US) or NHBS (UK))
- Headlamp
The day one mistake: Checking traps late. An animal in a trap for 12 hours in the sun is a dead animal and a failed ethics review.
| Grid | Trap number | Night | Check time | Status | Species | Sex | Weight (g) | Mark ID | Recapture (Y/N) | Notes |
|---|---|---|---|---|---|---|---|---|---|---|
Footprint tunnels and tracking plates
Baited tunnels with inked pads and paper record footprints of hedgehogs, small mammals and mustelids without handling.
How to run it
- Place tunnels along hedges and edges, 50 m apart, entrances flush with the ground.
- Ink the pads, insert fresh paper, bait the middle.
- Check every morning for 5 nights; replace paper and bait and photograph every sheet.
- Identify prints with a key; keep unidentified sheets.
- Fifty tunnel nights (10 tunnels for 5 nights) before recording absence.
Kit list
- Footprint tunnels (NHBS (UK) or make from corrugated plastic)
- Tracking ink (NHBS (UK) or Forestry Suppliers (US))
- Cat food bait
The day one mistake: Too little ink or too much. Prints should be crisp; test on your own hand.
| Site | Tunnel ID | Set date | Check date | Species | Number of print sets | Photo ID | Bait taken (Y/N) |
|---|---|---|---|---|---|---|---|
Hair tubes and hair traps
Baited tubes with sticky pads collect hair for identification of dormice, squirrels and martens.
How to run it
- Attach tubes to branches or place on the ground along runs.
- Bait and fit fresh sticky pads.
- Collect pads after 2 to 4 weeks into labelled bags.
- Identify hair under a microscope or send for DNA.
- Record every tube, including empty ones.
Kit list
- Hair tubes (NHBS (UK) or Forestry Suppliers (US))
- Sticky pads
- Microscope
The day one mistake: Not labelling pads at collection. Twenty identical pads in a bag are worth nothing.
| Site | Tube ID | Set date | Collect date | Hair present (Y/N) | Species | ID method |
|---|---|---|---|---|---|---|
Owl pellet analysis
Dissect barn owl or other pellets to recover skulls and jaws, giving a cheap picture of small mammal communities across an area.
How to run it
- Collect pellets from known roosts and bag by site and date.
- Soak in water, tease apart, recover skulls, jaws and pelvic bones.
- Identify with a key; count minimum number of individuals per species.
- Record pellet count per site as effort.
- Store bones dry and labelled.
Kit list
- Small mammal bone key (the Mammal Society (UK) or Carolina Biological (US))
- Forceps and dissecting tools
- Hand lens
The day one mistake: Counting jaws without pairing them. Use the higher of left or right counts per species.
| Roost | Collection date | Pellet number | Species | Left jaws | Right jaws | Skulls | MNI |
|---|---|---|---|---|---|---|---|
Camera trapping
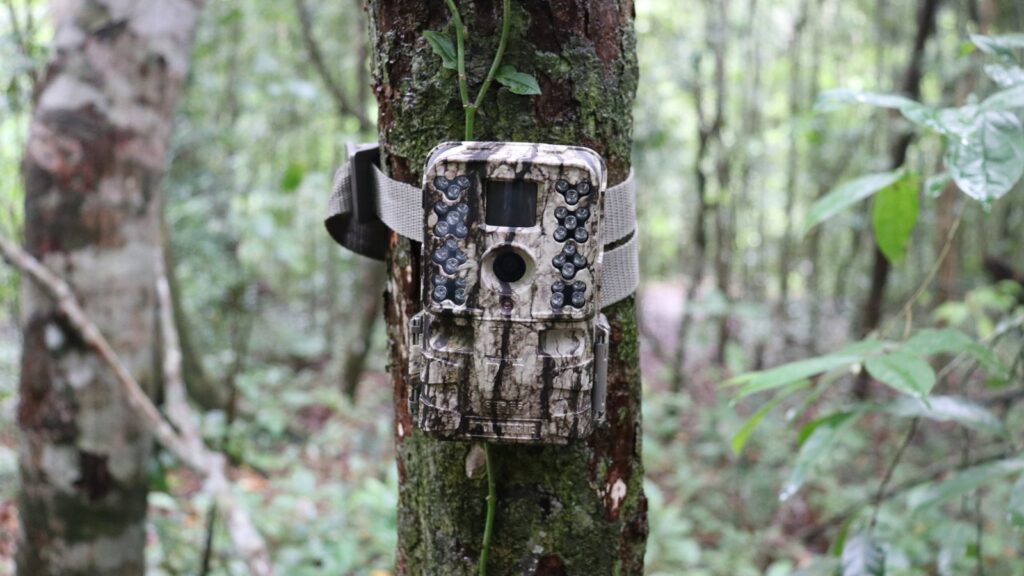
Motion triggered cameras record mammals day and night. Occupancy from detection histories, abundance from spatial capture recapture for marked species, activity patterns from timestamps.
How to run it
- Design the grid in GIS first; random or systematic points, then micro site within 50 m on a trail.
- Mount at 30 to 50 cm, angled slightly down, facing along the trail (north or south), 3 to 5 m from it.
- Set date and time, high sensitivity, 3 shot burst, 0 to 1 second delay (a 10 second delay misses the second animal in a pair); walk test and photograph a site card.
- Log GPS, camera ID, card ID, height, angle and vegetation clearance.
- Rename and tag images by site and date; record every camera day as effort, including failures.
The day one mistake: Not photographing a whiteboard with site and date at deployment. Months later you will not know which card came from where.
| Site | Camera ID | Card ID | GPS | Deploy date and time | Retrieve date and time | Height (cm) | Trail type | Failure (Y/N) | Species | Count | Timestamp | Independent event (Y/N) |
|---|---|---|---|---|---|---|---|---|---|---|---|---|
Sign surveys: tracks, scat and trails
Walk transects recording tracks, scat, digging and trails. Cheap, fast, and fine for presence and relative abundance indices.
How to run it
- Walk after rain or fresh snow when substrate is best.
- Record every sign with species, age class (fresh, old), substrate and GPS.
- Photograph tracks with a scale bar; measure length and width.
- Collect scat in labelled bags if DNA or diet analysis is planned.
- Keep transect length and walking speed constant for indices.
Kit list
- Track and sign guide (NHBS (UK) or a bookshop (US))
- Ruler and scale card
- Sample bags
- Handheld GPS
The day one mistake: Recording sign of uncertain species as a species. Use a confidence code; certain, probable, possible.
| Transect | Date | Substrate | Sign type | Species | Confidence | Age | GPS | Photo ID | Sample ID |
|---|---|---|---|---|---|---|---|---|---|
Distance sampling line transects (deer, antelope, primates)
Walk or drive straight lines and record the perpendicular distance to every group seen. Density is estimated from how detection drops with distance.
How to run it
- Place lines randomly or systematically with a random start; never along roads.
- Walk at 1 km per hour in silence, scanning ahead.
- On detection: species, cluster size, sighting angle and radial distance (rangefinder and compass), convert to perpendicular later.
- Do not count animals flushed behind you.
- Repeat lines until you have at least 60 detections.
Kit list
- Rangefinder
- Sighting compass (Suunto or Silva, via an outdoor shop)
- Binoculars 10×42
- Handheld GPS
The day one mistake: Guessing distance. The whole model rests on the first 50 m being measured accurately; use the rangefinder every time.
| Transect | Date | Start time | Observer | Species | Cluster size | Radial distance (m) | Angle (degrees) | Perpendicular distance (m) | Habitat | Transect length (km) | Detection cue |
|---|---|---|---|---|---|---|---|---|---|---|---|
Spotlight counts
Drive fixed routes at night with a spotlight and count eyeshine. Standard for hares, deer, foxes and nocturnal marsupials.
How to run it
- Fix the route and the side each observer scans.
- Sweep the light slowly in an arc; stop to identify with binoculars.
- Record species, number, distance and side.
- Same route, same speed, same season each year.
- Do not survey in rain, fog or bright moon without noting it.
The day one mistake: Counting eyeshine as one species. Two eyes can be a rabbit, a cat or a nightjar; confirm every record.
| Route | Date | Start time | Driver | Observer | Km | Species | Number | Distance (m) | Side | Weather |
|---|---|---|---|---|---|---|---|---|---|---|
Pellet group counts (deer, hares, lagomorphs)
Count dung pellet groups in plots to index or estimate deer and lagomorph density from defecation and decay rates.
How to run it
- Lay out plots along transects; clear all pellets on the first visit or record them as standing crop.
- Return after a fixed interval and count new groups (6 or more pellets, same age).
- Record decay state and vegetation.
- Use published defecation rates for the species and season, or measure your own.
- Walk slowly; searchers miss half the groups when rushed.
The day one mistake: Not clearing plots on visit one. Standing crop counts need decay rates you do not have.
| Transect | Plot | Date | Visit | Species | Pellet groups | Decay state | Habitat | Observer |
|---|---|---|---|---|---|---|---|---|
Burrow, sett and den surveys
Systematic search for badger setts, fox earths, rabbit warrens and burrow systems, classified by activity.
How to run it
- Walk parallel strips so every part of the site is within 10 m of your path.
- Record every entrance: GPS, size, spoil, bedding, hair, prints, activity level.
- Group entrances into setts or warrens; classify main, annexe, subsidiary, outlier.
- Photograph and sketch each system.
- Repeat in the other season if activity is uncertain.
The day one mistake: Surveying in July. Bracken and nettles hide half the entrances; wait for the vegetation to die back.
| Site | System ID | Entrance number | GPS | Activity (well used, partially used, disused) | Spoil | Bedding | Prints or hair | Species | Photo ID |
|---|---|---|---|---|---|---|---|---|---|
GPS collaring and telemetry
Capture and fit GPS collars to track movement, home range and habitat selection. Funded project work; you will assist a vet and a licensed team.
How to run it
- Capture protocol is written by the vet and licence holder; learn your role before the day.
- Collar fit: two fingers under the belt; record weight, collar ID, frequency.
- Download or receive fixes on schedule; screen for errors (DOP, impossible speeds).
- Ground truth a sample of fixes with the handheld receiver.
- Plan collar removal before deployment.
Kit list
- VHF receiver and antenna (Lotek, ATS or Biotrack)
- Handheld GPS
- Collar and drop off unit (Lotek, Vectronic or ATS)
The day one mistake: Trusting every fix. Filter by DOP and speed before any analysis.
| Animal ID | Collar ID | Capture date | Weight (kg) | Sex | Age | Fix time | Lat | Long | DOP | Fix type |
|---|---|---|---|---|---|---|---|---|---|---|
Pond surveys: torch counts and netting
Walk the pond edge at night with a torch counting newts and frogs, then net the margins. Combined with egg searching and bottle traps this is the standard newt method.
How to run it
- Visit in calm, mild conditions (over 5 C), after dark; use at least 3 of the 4 methods (torch, net, bottle trap, egg search) on every visit.
- Torch first: walk the whole margin slowly with one beam through the water, counting by species and sex.
- Net after torching, about 15 minutes per 50 m of shoreline, and identify catches in a tray.
- Search submerged leaves for folded eggs; stop unfolding leaves the moment the first great crested newt egg is confirmed, because unfolding kills them.
- Record pond conditions: turbidity, weed cover, shading, fish, and the Habitat Suitability Index.
- Disinfect nets, waders, trays and traps between sites (Virkon S at 1 percent for 1 minute) and dry fully; chytrid and ranavirus travel on wet kit.
The day one mistake: Torching in a group. Three lights make three sets of shadows and the newts vanish; one torch, one counter.
| Pond ID | Date | Time | Air temp | Water temp | Species | Sex | Life stage | Count method | Count | Eggs found (Y/N) |
|---|---|---|---|---|---|---|---|---|---|---|
Egg mass counts
Count frog and salamander egg masses in a pond to estimate the breeding female population without handling adults.
How to run it
- Survey in daylight when masses are freshly laid and before they disperse.
- Walk the margin and wade shallow water, counting masses by species.
- Mark counted masses on a sketch map or with small flags to avoid double counts.
- Record depth, attachment and development stage.
- Repeat a week later; use the maximum count.
- Disinfect nets, waders, trays and traps between sites (Virkon S at 1 percent for 1 minute) and dry fully; chytrid and ranavirus travel on wet kit.
The day one mistake: Counting after a warm week. Masses hatch and disappear fast; time the visit to the local laying peak.
| Pond ID | Date | Visit | Species | Egg masses | Stage | Depth (cm) | Substrate | Sketch reference |
|---|---|---|---|---|---|---|---|---|
Bottle and funnel trapping
Funnel traps set overnight along pond margins catch newts and larvae that torching misses.
How to run it
- Set traps at dusk, angled so the top is above water for air.
- Do not trap when the overnight air temperature is forecast below 5 C or in warm, weed choked, deoxygenated water; set at dusk and lift by mid morning.
- One trap per 2 m of shoreline; mark positions.
- Check at first light; never leave traps out in the day.
- Process in a tray: species, sex, stage; release at the trap.
- Disinfect all kit between ponds.
Kit list
- Amphibian funnel traps (NHBS (UK) or make from 2 litre bottles)
- Bamboo canes
- Disinfectant (Virkon)
The day one mistake: Sinking the trap fully. Newts drown; leave an air pocket every time.
| Pond ID | Trap number | Set time | Check time | Species | Sex | Stage | Count | Water temp |
|---|---|---|---|---|---|---|---|---|
Call surveys (frogs and toads)
Listen at fixed points and score calling intensity by species. A cheap way to cover many wetlands in a season.
How to run it
- Wait 1 minute after arrival, then listen for 5 minutes.
- Score each species 0 to 3 (none, individuals countable, overlapping, full chorus).
- Record air temperature, Beaufort wind, sky code, noise index and moon; finish by 01:00.
- Visit early, mid and late season because species peak at different times.
- Record the recording as well; software can check your ears.
The day one mistake: Listening for 30 seconds. Late calling species need the full 5 minutes.
| Site | Date | Time | Air temp | Wind | Rain | Species | Call index (0 to 3) | Recording ID | Noise index (0 to 4) | Sky code |
|---|---|---|---|---|---|---|---|---|---|---|
Environmental DNA sampling
Collect water samples and test for species DNA in a lab. Detects secretive species with one daytime visit.
How to run it
- Order kits and follow the kit protocol exactly; wear fresh gloves per pond.
- Take 20 subsamples around the whole margin into the sterile bag.
- Mix and fill the preservative tubes; label and chill.
- Record pond conditions and the time since any rain.
- Ship within the kit's time limit.
Kit list
- eDNA sampling kit (an accredited eDNA lab)
- Nitrile gloves
- Cool box
The day one mistake: Contaminating the sample with your own kit. New gloves, no reused bags, and never dip the net first.
| Pond ID | Date | Time | Sampler | Kit ID | Subsamples | Water temp | Turbidity | Result | Lab reference |
|---|---|---|---|---|---|---|---|---|---|
Drift fences with pitfalls
A low fence directs migrating amphibians into buckets, counting every animal entering or leaving a pond.
How to run it
- Dig the fence in 10 cm, buckets flush with the ground on both sides.
- Add a sponge and cover to each bucket; check every morning without fail.
- Process: species, sex, stage, direction; release on the far side.
- Record bucket nights as effort.
- Remove or close buckets at the end; never leave them open.
- Disinfect nets, waders, trays and traps between sites (Virkon S at 1 percent for 1 minute) and dry fully; chytrid and ranavirus travel on wet kit.
The day one mistake: Missing a morning check. A hot bucket kills everything in it.
| Array | Bucket | Date | Species | Sex | Stage | Direction (in or out) | Count | Bycatch |
|---|---|---|---|---|---|---|---|---|
Refugia (tin and felt) surveys
Lay sheets of tin or roofing felt that reptiles bask under, then lift them on repeated visits. The standard for snakes and lizards in temperate grassland.
How to run it
- Place refugia on south facing edges, half in sun, in sheltered spots; GPS every one.
- Leave for 2 weeks before the first check.
- Check between 9 and 11 am on mild days at 9 to 18 C; lift slowly from the far side.
- Record species, number, age, and whether on top or under.
- Twenty checks before you record absence.
- Disinfect nets, waders, trays and traps between sites (Virkon S at 1 percent for 1 minute) and dry fully; chytrid and ranavirus travel on wet kit.
The day one mistake: Checking at noon in July. Reptiles have already warmed up and left; go early or on cool bright days.
| Site | Refugia ID | Date | Time | Air temp | Cloud | Species | Number | Age | Position (under or on) |
|---|---|---|---|---|---|---|---|---|---|
Visual encounter transects
Walk slowly along edges and basking sites, recording every reptile seen. Effort is time, so results are comparable between sites.
How to run it
- Walk at 1 km per hour scanning 2 m ahead for basking animals.
- Record species, GPS, substrate and behaviour.
- Note time searched per section.
- Repeat at the same time of day.
- Include night walks for nocturnal geckos in warm climates.
Kit list
- Binoculars close focus
- Handheld GPS
- Reptile field guide (NHBS (UK) or a bookshop (US))
The day one mistake: Walking too fast. Most lizards are seen because they move when you are 2 m away; give them the chance.
| Transect | Date | Start time | End time | Air temp | Species | Count | Age | Behaviour | GPS |
|---|---|---|---|---|---|---|---|---|---|
Drift fences with pitfall and funnel traps
Fences funnel moving reptiles into buckets and funnel traps. The main abundance method in arid and tropical systems.
How to run it
- Build Y arrays with buckets at the centre and ends, funnel traps along each arm.
- Shade every trap and add a moist sponge.
- Check every morning; process and release 20 m away on the far side.
- Record trap nights.
- Close traps when not in use.
- Disinfect nets, waders, trays and traps between sites (Virkon S at 1 percent for 1 minute) and dry fully; chytrid and ranavirus travel on wet kit.
Kit list
- Silt fence
- Funnel traps (NHBS (UK) or Forestry Suppliers (US))
- Buckets 20 L
- Snake hook
- Virkon S disinfectant
The day one mistake: Reaching into a bucket without looking. Tip it toward you and look first, always.
| Array | Trap ID | Date | Species | Count | Age | Sex | Recapture | Bycatch | Trap type |
|---|---|---|---|---|---|---|---|---|---|
Kick sampling for macroinvertebrates
Disturb the river bed upstream of a net for a timed period and sort what you catch. The basis of biotic water quality indices.
How to run it
- Sample all habitats in proportion: riffles, margins, weed, silt.
- Kick for 3 minutes total, moving upstream, net downstream of your feet.
- One minute hand search of stones and vegetation.
- Sort live in a tray or preserve in 70 percent ethanol.
- Identify to family (or species where the index needs it) and record abundance classes.
Kit list
- Kick net 1 mm mesh (Forestry Suppliers (US) or NHBS (UK))
- White sorting tray
- Waders
- Sample pots
The day one mistake: Sampling only the riffle. Half the families live in margins and weed.
| Site | Date | Time | Flow | Habitats sampled | Family | Abundance class | Index score | Preserved (Y/N) | Width (m) | Depth (cm) | Substrate percent (boulder, cobble, pebble, sand, silt) | Conductivity or alkalinity |
|---|---|---|---|---|---|---|---|---|---|---|---|---|
Electrofishing (assisting)
A licensed operator stuns fish with an electric field while assistants net, hold and process them. You will assist, never lead, until trained.
How to run it
- Stop net the reach top and bottom.
- Walk upstream in a line; net every stunned fish quickly into a bucket with aeration.
- Three passes; keep passes separate.
- Measure, weigh, identify and release below the reach after recovery.
- Record settings, time fished and conductivity.
Kit list
- Landing net (a fishing supplier)
- Bait bucket aerator
- Measuring board (Forestry Suppliers (US) or NHBS (UK))
- Waders
The day one mistake: Touching the water without the anode off. Say 'off' and wait for the reply every time.
| Reach | Date | Length (m) | Pass | Species | Length (mm) | Weight (g) | Time fished | Settings | Conductivity |
|---|---|---|---|---|---|---|---|---|---|
Fyke, minnow and crayfish traps
Baited or unbaited traps left overnight catch fish, crayfish and amphibian larvae for presence and relative abundance.
How to run it
- Set with the top above water or an air space (otter guards on fykes).
- Anchor and mark; GPS.
- Check at first light; process and release.
- Record trap nights.
- Disinfect between waters; invasive crayfish must not be moved.
- Disinfect nets, waders, trays and traps between sites (Virkon S at 1 percent for 1 minute) and dry fully; chytrid and ranavirus travel on wet kit.
The day one mistake: Forgetting the otter guard. A drowned otter is a criminal offence and the end of the project.
| Site | Trap ID | Type | Set time | Check time | Species | Count | Size class | Bycatch |
|---|---|---|---|---|---|---|---|---|
Snorkel surveys
Snorkel upstream counting fish by species and size class. Non lethal, fast and good for clear water and spawning behaviour.
How to run it
- Only survey clear water over 30 cm deep; measure visibility with a marked pole.
- Move upstream slowly, lanes agreed between snorkelers.
- Count by species and size class; call to a bank recorder.
- Two passes 30 minutes apart.
- Never survey alone.
The day one mistake: Surveying alone in cold water. Hypothermia and entrapment happen fast.
| Reach | Date | Visibility (m) | Water temp | Pass | Species | Size class | Count | Habitat |
|---|---|---|---|---|---|---|---|---|
Zooplankton and plankton sampling
Tow a fine mesh net through the water column and identify and count what you catch under a microscope.
How to run it
- Record station GPS, depth and Secchi depth.
- Lower the net to depth and haul at 0.5 m per second; note the volume filtered.
- Rinse the cod end into a labelled pot; preserve in 4 percent formalin or ethanol.
- Subsample with a Stempel pipette; count and identify in a counting chamber.
- Scale counts to individuals per litre.
Kit list
- Plankton net 63 micron (Forestry Suppliers (US) or NHBS (UK))
- Zooplankton key
- Compound microscope
- Counting chamber (Carolina Biological (US) or a lab supplier)
The day one mistake: Not recording the volume filtered. A count without volume is not a density.
| Station | Date | Depth | Secchi (m) | Net mesh | Tow length (m) | Volume (L) | Taxon | Count | Per litre |
|---|---|---|---|---|---|---|---|---|---|
Pitfall trapping
Cups sunk flush with the ground catch ground beetles, spiders and ants. The standard for ground active invertebrates.
How to run it
- Sink cups flush with the soil; use a sleeve so you can lift the inner cup.
- Add preservative (propylene glycol) and a rain cover.
- Fit a 10 mm mesh or a raised roof with a narrow gap so shrews, frogs and lizards cannot fall in.
- Empty every 7 to 14 days into labelled pots.
- Sort and identify in the lab; record trap days.
- Remove cups at the end of the study.
The day one mistake: Leaving a lip above the soil. Beetles walk around it and your catch halves.
| Site | Trap ID | Set date | Empty date | Trap days | Taxon | Count | Preservative topped (Y/N) | Vertebrate bycatch |
|---|---|---|---|---|---|---|---|---|
Sweep netting
Sweep a net through vegetation a set number of times and count the catch. Fast and cheap for grassland insects.
How to run it
- Sweep in a figure of eight, net mouth vertical, 20 sweeps at a steady pace.
- Empty into a bag or tray; record only when vegetation is dry.
- Identify to order or family in the field; preserve specimens you cannot name.
- Note vegetation height and flowering.
- Same time of day each visit.
Kit list
- Sweep net (Watkins and Doncaster (UK) or Forestry Suppliers (US))
- Pooter (Watkins and Doncaster (UK) or Forestry Suppliers (US))
- Specimen pots
The day one mistake: Sweeping wet grass. Everything sticks to the net and the sample is useless.
| Site | Sample | Date | Time | Temp | Vegetation height | Taxon | Count | Preserved (Y/N) |
|---|---|---|---|---|---|---|---|---|
Malaise traps
A tent like trap intercepts flying insects and funnels them into a collecting bottle. Huge samples, ideal for DNA metabarcoding.
How to run it
- Site across a flight line, collecting head at the highest and sunniest end.
- Fill the bottle with 80 percent ethanol.
- Change the bottle weekly; label with site and dates.
- Record days deployed.
- Sort or send for metabarcoding.
Kit list
- Malaise trap (NHBS (UK) or Forestry Suppliers (US))
- Ethanol 80 percent
- Collecting bottles
The day one mistake: Facing the head into the shade. Insects fly toward light; orient the head correctly or catch nothing.
| Site | Trap ID | Bottle ID | Set date | Collect date | Days | Ethanol topped | Sample weight | Notes |
|---|---|---|---|---|---|---|---|---|
Light trapping (moths)
A mercury vapour or actinic light attracts moths into a box overnight. Counted and released in the morning.
How to run it
- Set on a sheet in a sheltered spot; power from mains, generator or battery.
- Run dusk to dawn; record min temperature and cloud.
- In the morning, identify and count every moth, then release into cover.
- Photograph anything unknown.
- Same site, same trap, same schedule.
Kit list
- Actinic moth trap (Anglian Lepidopterist Supplies (UK) or Forestry Suppliers (US))
- Egg boxes
- Moth field guide (NHBS (UK) or a bookshop (US))
The day one mistake: Releasing at the trap in daylight. Birds learn the buffet; release into dense cover away from the trap.
| Site | Date | Trap type | Min temp | Cloud | Species | Count | Photo ID |
|---|---|---|---|---|---|---|---|
Pollard walks (butterflies and dragonflies)
Walk a fixed route weekly recording every butterfly within a 5 m box ahead. The method behind national butterfly monitoring schemes.
How to run it
- Divide the route into habitat sections.
- Walk at a steady pace recording butterflies within 2.5 m either side and 5 m ahead.
- Weather rule (UKBMS): at least 13 C with 60 percent sunshine, or at least 17 C in any conditions if dry; wind below Beaufort 5. North American schemes (NABA, Ohio) use their own thresholds.
- Weekly for the whole season; record start and end time, temperature, sun and wind.
- Enter data into the national scheme if one exists.
Kit list
- Butterfly field guide (NHBS (UK) or a bookshop (US))
- Close focus binoculars
- Thermometer
The day one mistake: Chasing a butterfly out of the box. Record it where you first saw it and keep walking.
| Route | Section | Date | Start time | Temp | Sun percent | Wind | Species | Count | End time |
|---|---|---|---|---|---|---|---|---|---|
Pan traps (pollinators)
Coloured bowls of soapy water attract bees and hoverflies. Standardised and cheap for pollinator surveys.
How to run it
- Set bowl triplets at vegetation height, 15 m apart.
- Fill with water and a drop of unscented soap.
- Leave 6 hours in sun; collect into ethanol.
- Record flowering cover around each station.
- Pin or send for identification.
The day one mistake: Setting bowls on the ground in tall grass. Raise them to flower height or they are invisible.
| Site | Station | Colour | Date | Set time | Collect time | Taxon | Count | Flower cover percent |
|---|---|---|---|---|---|---|---|---|
Quadrat sampling
Record species and cover inside a frame. The basic unit of vegetation description.
How to run it
- Choose quadrat size by vegetation: 0.25 m2 for short turf, 1 m2 grassland, 4 m2 heath, 100 m2 woodland canopy.
- Place randomly (random numbers along a tape) or at fixed intervals on a transect.
- List every species; estimate percent cover or use a scale (Domin or Braun Blanquet).
- Record bare ground, litter and vegetation height.
- Photograph each quadrat from above with its number.
Kit list
- Quadrat frame 1 m (NHBS (UK), Forestry Suppliers (US), or make from PVC pipe)
- Measuring tape 30 m
- Plant field guide (NHBS (UK) or a bookshop (US))
- Hand lens
The day one mistake: Estimating cover before listing species. List first, then estimate, or you will miss the small ones.
| Site | Transect | Quadrat | Date | Recorder | Species | Cover percent | Height (cm) | Bare ground percent | Litter percent |
|---|---|---|---|---|---|---|---|---|---|
Line and belt transects
Lay a tape across a gradient (dune, shore, slope) and record species along it. Shows how vegetation changes with environment.
How to run it
- Run the tape from the start of the gradient to beyond its end.
- Record species touching the tape at set intervals (line) or in quadrats along it (belt).
- Record height, slope and soil moisture at each station.
- Mark the ends for repeat visits.
- Draw the profile.
Kit list
- Measuring tape 50 m
- Quadrat frame (NHBS (UK), Forestry Suppliers (US), or make from PVC pipe)
- Clinometer
The day one mistake: Running the transect along the gradient instead of across it. Nothing will change along the tape.
| Site | Transect | Station (m) | Species | Cover or touches | Height (cm) | Slope | Notes |
|---|---|---|---|---|---|---|---|
Relevés and community classification plots
Full species lists with cover in homogenous stands, used to classify vegetation communities.
How to run it
- Pick a homogeneous stand; place the plot away from edges.
- Record every vascular plant and bryophyte with a cover score.
- Record layers separately in woodland: canopy, shrub, field, ground.
- Note aspect, slope, soil and management.
- Match to a classification key later.
The day one mistake: Placing the plot where the flowers are. It must represent the stand, not the prettiest corner.
| Plot ID | Date | Size (m2) | Layer | Species | Cover score | Aspect | Slope | Soil | Management |
|---|---|---|---|---|---|---|---|---|---|
Habitat mapping and walkover surveys
Walk the site mapping habitat types and dominant species with target notes. The first survey on almost every consulting project.
How to run it
- Print aerial imagery at 1:2,500 and pre draw likely boundaries.
- Walk every parcel; classify habitat by the local scheme; record dominant species with a DAFOR scale.
- Write target notes for features (ponds, veteran trees, invasive species).
- GPS boundaries where the imagery is unclear.
- Digitise in GIS the same week.
Kit list
- Waterproof clipboard
- Handheld GPS
- Plant field guide (NHBS (UK) or a bookshop (US))
The day one mistake: Mapping from the path. Walk into each parcel; the far corner is where the rare thing is.
| Parcel | Habitat type | Dominant species | DAFOR | Target note | GPS | Photo ID | Condition |
|---|---|---|---|---|---|---|---|
Point intercept
Lower a pin at fixed points and record every species it touches. Objective cover data that repeats well between observers.
How to run it
- Lay a tape; at each interval lower the pin vertically.
- Record every species touched, top to bottom, and the ground surface hit.
- Cover equals hits divided by points.
- Keep the pin diameter and drop angle fixed.
- Repeat the same tape positions each year.
Kit list
- Point frame or pin (Forestry Suppliers (US) or make from aluminium tube)
- Measuring tape 50 m
- Survey stakes
The day one mistake: Recording only the first hit. Multiple hits per pin are the point of the method.
| Site | Transect | Point | Species hit | Layer | Ground hit | Height (cm) |
|---|---|---|---|---|---|---|
Permanent plots and tree monitoring
Tag and measure every tree in a fixed plot to track growth, mortality and recruitment.
How to run it
- Mark corners with permanent posts; GPS and bearings.
- Tag every stem over the threshold; measure DBH at 1.3 m (UK, Europe, RAINFOR and ForestGEO) or 1.37 m (US Forest Inventory), and record which.
- Map stems by coordinates within the plot.
- Record status codes (alive, dead standing, fallen).
- Remeasure at the same season.
Kit list
- Diameter tape (Forestry Suppliers (US) or NHBS (UK))
- Tree tags and nails (Forestry Suppliers (US))
- Clinometer
The day one mistake: Measuring DBH at different heights. Paint the 1.3 m line on the trunk.
| Plot | Tag | Species | X | Y | DBH (cm) | Height (m) | Status | Date |
|---|---|---|---|---|---|---|---|---|
Intertidal belt transects and quadrats
Work down the shore on the lowest tides recording species in quadrats at fixed heights. The core rocky shore method.
How to run it
- Check tide tables; start 2 hours before low water.
- Run the transect from the strandline to the water's edge; measure height with a cross staff or level.
- Place quadrats at fixed heights; count animals, estimate algae cover.
- Photograph each quadrat.
- Leave before the tide turns.
Kit list
- Quadrat frame 0.5 m (NHBS (UK), Forestry Suppliers (US), or make from PVC pipe)
- Measuring tape 50 m
- Seashore guide
- Non slip reef shoes
The day one mistake: Ignoring the tide. People drown on rocky shores every year; someone on shore knows your plan.
| Shore | Transect | Height (m above chart datum) | Quadrat | Date | Time | Species | Count or cover | Photo ID |
|---|---|---|---|---|---|---|---|---|
Rocky shore timed searches
Search every microhabitat in a zone for a fixed time, recording every species. Builds a species list fast.
How to run it
- Define zones by height.
- Search pools, under rocks (replace them), crevices and weed for 30 minutes.
- Record species and abundance category.
- Photograph unknowns in situ.
- Replace every rock as found.
The day one mistake: Leaving rocks turned. The underside community dies in a day.
| Shore | Zone | Date | Start time | Species | Abundance class | Microhabitat | Photo ID |
|---|---|---|---|---|---|---|---|
Underwater visual census (reef fish)
Divers swim a tape counting fish by species and size within a belt. The reef monitoring standard.
How to run it
- Lay the tape; wait 3 minutes for fish to settle.
- Swim at 5 m per minute counting fish within 2.5 m either side and 5 m above.
- Record species, number and size class on a slate.
- Second diver records benthos or repeats the count.
- Fixed depth and time of day.
The day one mistake: Counting fish that follow you. Record only what is ahead of the leading diver.
| Site | Transect | Depth (m) | Date | Time | Species | Count | Size class (cm) | Visibility (m) |
|---|---|---|---|---|---|---|---|---|
Boat based cetacean and seabird line transects
Observers scan from a vessel along pre planned lines recording every sighting with angle and distance. Distance sampling at sea.
How to run it
- Plan lines with random start; log effort continuously (on, off, sea state).
- Two observers scan 90 degrees each with naked eye, binoculars to confirm.
- Cetaceans: on sighting record time, species, group size, angle (angle board) and distance (reticle binoculars).
- Seabirds (ESAS method): count a 300 m strip on one side in distance bands A to D (0 to 50, 50 to 100, 100 to 200, 200 to 300 m) for birds on the water, and snapshot counts for birds in flight.
- Recorder logs GPS every minute; stop effort above the sea state limit.
Kit list
- Reticle binoculars 7×50 (Steiner or Fujinon, via an optics dealer)
- Angle board (make from a protractor and a board)
- Handheld GPS
The day one mistake: Chasing the animals. Stay on the line; the model assumes you did not move.
| Leg | Date | Time | GPS | Sea state | Effort status | Species | Group size | Angle | Distance (m) | Behaviour | Distance band (birds) | Snapshot (Y/N) |
|---|---|---|---|---|---|---|---|---|---|---|---|---|
Seabird colony counts
Count apparently occupied nests or sites from vantage points or photographs during the incubation window set for each species.
How to run it
- Define count units by species: apparently occupied nests for kittiwakes and gulls, individuals on ledges for guillemots and razorbills, apparently occupied burrows for puffins.
- Count from fixed vantage points on 2 to 3 days inside the standard date and time window for the species.
- Use photographs for dense cliffs and count on screen.
- Record disturbance and weather; do not count in rain or strong wind.
- Use the mean of counts for auks and the maximum for nests.
The day one mistake: Counting outside the species' date and time window. Attendance swings by the hour and the week, and counts from different windows cannot be compared.
| Colony | Plot | Date | Time | Species | Count unit | Count | Disturbance | Weather |
|---|---|---|---|---|---|---|---|---|
Shore counts and strandings surveys
Walk fixed beach sections recording stranded animals, seals hauled out and shore birds. Cheap, repeatable and shareable with citizen scientists.
How to run it
- Walk the same section at the same tide state each month.
- Record every carcass: species, length, decomposition, GPS, photos.
- Count seals from a distance; note age classes.
- Report strandings to the national scheme.
- Never handle carcasses without gloves.
The day one mistake: Not photographing the whole animal with a scale. The scheme cannot verify a species from a head shot.
| Section | Date | Tide | Species | Count | Length (cm) | Condition | GPS | Photo ID | Reported (Y/N) |
|---|---|---|---|---|---|---|---|---|---|
Environmental DNA for fish
Filter water and test for fish DNA in the lab. Detects rare and invasive fish without nets or electricity.
How to run it
- Sample upstream of where you stand; fresh gloves per site.
- Filter 1 to 2 L through the kit's filter until it clogs; record the volume.
- Preserve the filter as the kit instructs; label and chill.
- Take a field blank at every site.
- Record flow, temperature and turbidity.
Kit list
- eDNA filter kit (an accredited eDNA lab)
- Nitrile gloves
- Cool box
The day one mistake: Skipping the field blank. Without it a positive result cannot be defended.
| Site | Date | Replicate | Volume filtered (L) | Filter ID | Blank ID | Water temp | Flow | Result | Lab |
|---|---|---|---|---|---|---|---|---|---|
Fixed route fungal forays
Walk the same route repeatedly recording every fruiting body. Fungi fruit unpredictably, so repetition is the method.
How to run it
- Map the route through every habitat and substrate type (soil, litter, dead wood, dung).
- Record species, substrate, host tree and GPS; photograph cap, gills, stem and base.
- Collect one specimen of unknowns in a labelled paper bag, never plastic.
- Take spore prints the same night.
- Keep going for 3 autumns; single season lists miss most species.
Kit list
- Fungi field guide (NHBS (UK) or a bookshop (US))
- Hand lens
- Paper bags
- Knife
The day one mistake: Recording without the base of the stem. The volva and base are often the identifying feature.
| Route | Date | Species | Substrate | Host | GPS | Photo ID | Specimen (Y/N) | Spore print colour |
|---|---|---|---|---|---|---|---|---|
Grassland fungi (waxcap) surveys
Count waxcaps, clubs, corals and earthtongues to grade grassland conservation value.
How to run it
- Survey unimproved, short grazed or mown swards after autumn rain.
- Walk strips 5 m apart; record species and count fruiting bodies per species.
- Photograph and collect one of each unknown.
- Use the highest species count of the 3 visits for grading.
- Record management and sward height.
Kit list
- Waxcap guide (FSC or NHBS (UK))
- Hand lens
- Handheld GPS
The day one mistake: One visit in October. Fruiting shifts weeks between years; three visits or nothing.
| Field | Date | Sward height | Species | Fruiting bodies | GPS | Photo ID |
|---|---|---|---|---|---|---|
Lichen and bryophyte quadrats on trees and rock
Record lichen and moss cover on trunks or rock faces in small quadrats. Used for air quality indices and epiphyte monitoring.
How to run it
- Select trees of similar species and girth; record aspect and bark pH class.
- Place the ladder quadrat at 1 to 1.5 m on each aspect.
- Record presence of each species in each 10 cm square; estimate cover.
- Photograph each quadrat.
- Collect tiny fragments only when needed for microscopy.
Kit list
- Ladder quadrat (make from acetate, or British Lichen Society)
- Hand lens 10x and 20x
- Lichen guide (FSC or NHBS (UK); a bookshop (US))
The day one mistake: Sampling only the sunny side. Aspect drives the community; record all four.
| Site | Tree | Species (tree) | Girth | Aspect | Square | Lichen or bryophyte species | Cover percent | Photo ID |
|---|---|---|---|---|---|---|---|---|
Bryophyte relevés
Full moss and liverwort lists with cover in small plots by substrate. Slow, specialist work that mostly happens at home under the microscope.
How to run it
- Sample each substrate separately: soil, rock, bark, dead wood, flush.
- Record cover per species; collect small packets of unknowns.
- Label packets with plot, substrate and date immediately.
- Identify with a microscope and keys.
- Record moisture and shade.
Kit list
- Bryophyte guide (FSC or NHBS (UK); a bookshop (US))
- Paper packets
- Compound microscope
The day one mistake: Collecting whole cushions. A thumbnail sized piece identifies as well and leaves the colony alive.
| Plot | Substrate | Date | Species | Cover percent | Fertile (Y/N) | Packet ID | Moisture | Shade |
|---|---|---|---|---|---|---|---|---|
Land based cetacean watches
Scan a fixed sea area from a headland with binoculars and record every cetacean sighting with bearing, distance and behaviour. Cheap, repeatable, and the basis of most citizen science cetacean schemes.
How to run it
- Choose a headland with height and a wide view; mark the sector limits on a photo.
- Record effort every 15 minutes: sea state, swell, visibility, glare, observers.
- Scan slowly with the naked eye, then binoculars; on a sighting record time, species, number, calves, bearing (compass) and distance (reticle or estimated).
- Note behaviour (travelling, feeding, milling, bow riding) and direction.
- Stop effort above sea state 3 or when visibility drops below 1 km.
Kit list
- Binoculars 8×42
- Sighting compass (Suunto or Silva, via an outdoor shop)
- Reticle binoculars 7×50 (Steiner or Fujinon, via an optics dealer)
- Tally counter
The day one mistake: Recording sightings without recording effort. Ten dolphins in a two hour watch and ten dolphins in a ten hour watch are different answers.
| Site | Date | Watch start | Watch end | Sea state | Visibility | Time | Species | Number | Calves | Bearing | Distance (m) | Behaviour | Direction |
|---|---|---|---|---|---|---|---|---|---|---|---|---|---|
Seal haul out counts
Count seals hauled out on a known site at low water, by species and age class, without disturbing them. Used for population trends and pup production.
How to run it
- Time the count to low water; seals haul out on the falling tide.
- Count from a fixed point at 200 m or more with a telescope; count twice and record both.
- Record species, age class (pup, juvenile, adult), and any tagged or marked animals.
- Note disturbance events (boats, dogs, walkers) and the seals' response.
- Repeat in the pupping and moult seasons for the species; grey and harbour seals differ by months.
The day one mistake: Getting close enough to flush them. A stampede into the water can crush pups and empties the site for hours; if heads come up, you are too close.
| Site | Date | Low water time | Count time | Species | Pups | Juveniles | Adults | Total | Marked animals | Disturbance | Weather |
|---|---|---|---|---|---|---|---|---|---|---|---|
Photo identification (mark recapture)
Photograph dorsal fins, flukes or scars and match individuals across encounters. Gives abundance by mark recapture, site fidelity and social structure.
How to run it
- Approach groups slowly from the side and behind, never through them; obey the local approach distance.
- Photograph every animal in the group, both sides of the fin, at right angles; take more frames than you think you need.
- Record encounter start and end, GPS, group size, calves and behaviour.
- Grade every photo for quality before matching; only good grades enter the analysis.
- Match to the catalogue by fin notches and scars; two people confirm every match.
The day one mistake: Photographing only the animals that come to the boat. Missing the shy ones biases abundance every time.
| Encounter ID | Date | Start time | End time | GPS | Species | Group size | Calves | Behaviour | Photos taken | Individuals identified |
|---|---|---|---|---|---|---|---|---|---|---|
Passive acoustic monitoring (hydrophones and click detectors)
Moored detectors log echolocation clicks or full audio around the clock, giving presence and activity through weather and darkness that visual surveys miss.
How to run it
- Choose stations that answer the question (harbours, tidal races, wind farm sites); one detector per station.
- Moor with a weight, riser and surface or acoustic release; log GPS, depth and deployment time.
- Service and download on retrieval; check battery and memory before redeployment.
- Run the manufacturer's click train classifier, then verify a sample by hand.
- Report detection positive minutes or hours per day as the standard unit.
Kit list
- Click detector (FPOD or CPOD) (Chelonia Ltd)
- Hydrophone recorder (Ocean Instruments)
- Mooring rope and weights
The day one mistake: Reporting raw click counts. Use detection positive minutes so stations and months can be compared.
| Station | Detector ID | Deploy date | Retrieve date | Depth (m) | Days logged | Species | Detection positive minutes per day | Battery on retrieval |
|---|---|---|---|---|---|---|---|---|
Waterbird core counts (wetland counts)
Count every waterbird on a defined wetland or estuary sector once a month through the non breeding season. The method behind national wetland bird schemes.
How to run it
- Fix the sector boundaries on a map and never change them.
- Count on the scheme's priority date; on estuaries count at high tide when birds are concentrated.
- Scan systematically with a telescope; count large flocks in blocks of 10, 50 or 100.
- Record every species, including gulls if the scheme asks, and note disturbance and ice cover.
- Submit to the national scheme the same week.
The day one mistake: Counting a flock twice as it moves between sectors. Agree the sector edges with neighbouring counters and note the time each flock was counted.
| Site | Sector | Date | Start time | End time | Tide | Species | Count | Count method (exact or estimate) | Disturbance | Ice cover percent |
|---|---|---|---|---|---|---|---|---|---|---|
Vantage point watches (raptors and flight lines)
Watch a fixed arc from a high point and map every flight of target species with height and duration. The standard for wind farm and infrastructure impact assessment.
How to run it
- Choose vantage points that together cover the whole site within 2 km; mark the arc on a map.
- Watch for up to 3 h per session, scanning continuously; record effort in 15 minute blocks.
- On a flight: species, number, start time, duration in 15 second intervals, height band, and the route drawn on the map.
- Record weather every 15 minutes; stop in poor visibility.
- Spread the 36 h across the season and across the day.
The day one mistake: Forgetting the flight height. Collision risk models need the seconds spent in the rotor height band, not just the sighting.
| VP | Date | Watch start | Watch end | Weather | Species | Number | Flight start | Duration (s) | Height band | Flight ID on map | Behaviour |
|---|---|---|---|---|---|---|---|---|---|---|---|
Hibernation site counts
Count and identify torpid bats in caves, mines, tunnels and cellars in winter. Licensed work; you will assist a licence holder.
How to run it
- Enter only with the licence holder; keep the team small and quiet.
- Search every crevice systematically with a torch and mirror; do not touch or breathe on bats.
- Identify to species where possible without handling; record 'bat species' if unsure.
- Log temperature and humidity at each section.
- Leave within the hour; one visit per month at most.
- North America: follow the USFWS white nose syndrome decontamination protocol for every item that enters a roost or touches a bat.
The day one mistake: Waking bats with heat and light. Each arousal burns a week of fat reserves; keep lights low and visits short.
| Site | Date | Section | Temperature | Humidity | Species | Count | Torpid (Y/N) | Notes |
|---|---|---|---|---|---|---|---|---|
Dormouse nest tubes and nest boxes
Nest tubes and boxes on branches attract hazel dormice to build nests. Standard presence survey and long term monitoring.
How to run it
- Fix tubes under horizontal branches at 1 to 2 m, entrance toward the trunk, 20 m apart.
- Check monthly; open tubes gently and look for the woven nest of shredded honeysuckle or grass.
- Nest boxes are checked by licence holders only; record animals, sex, weight and torpor.
- Score effort with the scheme's index; a full season of 50 tubes is needed before absence is claimed.
- Remove tubes in winter.
Kit list
- Dormouse nest tubes (NHBS (UK) or Forestry Suppliers (US))
- Nest boxes (NHBS (UK) or Forestry Suppliers (US))
- Handheld GPS
The day one mistake: Confusing a wood mouse or bird nest with a dormouse nest. Dormouse nests are woven, with no cup and often green leaves; photograph every nest.
| Site | Tube number | Date | Nest (Y/N) | Nest type | Dormouse present | Sex | Weight (g) | Torpid | Photo ID |
|---|---|---|---|---|---|---|---|---|---|
Water vole and riparian mammal sign surveys
Search banks for burrows, latrines, feeding stations and prints of water voles, and for otter spraints and beaver sign. The standard riparian mammal method.
How to run it
- Walk the bank slowly in waders where safe, checking the waterline and 2 m up the bank.
- Record latrines, burrows with grazed lawns, feeding stations of cut stems at 45 degrees, and footprints.
- GPS every sign; count latrines per 100 m as the abundance index.
- Otter: record spraints on prominent rocks and under bridges; beaver: cut stems, dams and lodges.
- Two visits at least 2 weeks apart before recording absence.
Kit list
- Riparian mammal sign guide (NHBS (UK) or the Mammal Society)
- Waders
- Handheld GPS
The day one mistake: Surveying after a flood. Sign is washed away and you will record a false absence; wait 2 weeks.
| Watercourse | Section | Bank | Date | Sign type | Species | Count | GPS | Age | Photo ID |
|---|---|---|---|---|---|---|---|---|---|
Hair snares and scat DNA sampling
Collect hair on barbed wire corrals or scat along transects and identify individuals by DNA for capture recapture. Standard for bears, wolves, lynx and cats.
How to run it
- Build barbed wire corrals at 50 cm height around a scent lure; one per grid cell.
- Check every 10 to 14 days; collect each hair clump into a separate envelope with new gloves and tweezers; flame the wire.
- Walk scat transects the same session; sample the outside of fresh scat into ethanol or silica.
- Record GPS, date, session and sample ID; keep samples dry and cool.
- Genotype at the lab; run spatial capture recapture.
The day one mistake: Mixing hair from two clumps in one envelope. One clump, one envelope, or the lab gets a mixed genotype and bins it.
| Grid cell | Corral ID | Session | Date | Sample ID | Sample type | Barb number | GPS | Quality | Notes |
|---|---|---|---|---|---|---|---|---|---|
Drone and aerial surveys
Fly pre planned strips with an RGB or thermal camera and count animals on the imagery. Fast for open country herds, colonies and haul outs.
How to run it
- Plan the flight in the mission app with strip spacing that matches the camera footprint; check airspace and wildlife disturbance rules.
- Fly at the altitude the target species tolerates (test and watch for reactions); keep the sun behind the camera.
- Count on the imagery with a grid overlay, two counters independently.
- Record altitude, time, camera and weather for every flight.
- Repeat flights to estimate detection.
Kit list
- Drone for wildlife
- Thermal drone camera (DJI or a drone dealer)
- Spare batteries
The day one mistake: Flying over a colony at 30 m. Birds and seals flush, the count is ruined and the permit is at risk; find the tolerated altitude first.
| Site | Flight ID | Date | Time | Altitude (m) | Camera | Strip | Species | Count | Counter | Weather |
|---|---|---|---|---|---|---|---|---|---|---|
Sea turtle nesting beach surveys
Walk the beach at dawn counting fresh tracks and nests by species, and patrol at night to tag females and protect nests.
How to run it
- Walk the full beach at first light; record every crawl as a nest or false crawl by the track pattern.
- Identify species by track width and gait; mark and GPS each nest; camouflage the site.
- Night patrols: approach a nesting female from behind only once she is laying; tag and measure.
- Record hatching and excavate nests 3 days after emergence to count shells and unhatched eggs.
- Report to the regional network.
Kit list
- Handheld GPS
- Red light headlamp
- Callipers 1 m
- Turtle flipper tags (National Band and Tag (US))
The day one mistake: Using white light on the beach. Females abort nesting and hatchlings head inland; red light only, and only when needed.
| Beach | Section | Date | Time | Species | Track type (nest or false crawl) | GPS | Nest ID | Tag number | Carapace length (cm) | Eggs |
|---|---|---|---|---|---|---|---|---|---|---|
Seine netting
Drag a weighted net through shallow water to enclose fish over a known area. Good for juveniles in margins, lakes and estuaries.
How to run it
- Measure the haul area; keep the lead line on the bottom throughout.
- Walk the net in a semicircle back to the bank and close it quickly.
- Process in aerated buckets: species, length, count; release.
- Record area swept and haul number.
- Rinse and dry the net between waters.
Kit list
- Seine net 10 m (Forestry Suppliers (US) or a fishing net maker)
- Buckets 10 L
- Bait bucket aerator
- Measuring board (Forestry Suppliers (US) or NHBS (UK))
The day one mistake: Lifting the lead line early. The fish leave under the net and the haul is meaningless.
| Site | Haul | Date | Area (m2) | Species | Count | Length range (mm) | Water temp | Habitat |
|---|---|---|---|---|---|---|---|---|
Salmonid redd counts
Count and map the gravel nests (redds) of spawning salmon and trout to index spawning stock.
How to run it
- Walk upstream in clear water; polarised glasses and low sun angle.
- Record each redd: GPS, size, species if known, and flag it to avoid recounting.
- Note superimposed redds and test digs separately.
- Repeat every 7 to 10 days; the sum of new redds is the season total.
- Avoid wading through redds.
The day one mistake: Counting the same redd twice on the next visit. Flag or GPS every redd on the day you find it.
| River | Reach | Date | Visibility | Redd ID | GPS | Species | Size (m) | New or previously counted | Notes |
|---|---|---|---|---|---|---|---|---|---|
Aquatic macrophyte surveys
Record submerged, floating and emergent plants in a water body by wading, grapnel and bathyscope. Used for water quality and habitat classification.
How to run it
- Survey in June to September when plants are fully grown.
- Walk the bank and wade where safe; throw a grapnel every 10 m and record what comes up.
- Use a bathyscope to see the bed in deeper water.
- Record species with cover scores and the percent of channel shaded.
- Bag unknowns in water for identification.
Kit list
- Grapnel (NHBS (UK) or a boat chandler)
- Bathyscope (NHBS (UK) or Forestry Suppliers (US))
- Waders
- Aquatic plant guide (FSC or NHBS (UK); a bookshop (US))
The day one mistake: Recording only what you can see from the bank. Half the species are submerged; throw the grapnel.
| Water body | Section | Date | Species | Growth form | Cover score | Depth (m) | Substrate | Shade percent |
|---|---|---|---|---|---|---|---|---|
Rare plant population counts
Census a rare plant population by counting individuals, flowering stems or occupied grid cells on a fixed date each year.
How to run it
- Map the colony boundary with GPS and mark permanent corners.
- Count every individual or flowering stem; for large colonies count in fixed quadrats and scale up.
- Record life stage (seedling, vegetative, flowering) and threats (grazing, trampling, shading).
- Photograph from fixed points.
- Same week each year.
Kit list
- Handheld GPS
- Quadrat frame (NHBS (UK), Forestry Suppliers (US), or make from PVC pipe)
- Tally counter
- Survey pegs
The day one mistake: Counting flowers instead of plants without saying which. Fix the count unit in year one and never change it.
| Site | Colony | Date | Count unit | Count | Flowering | Vegetative | Seedlings | Area (m2) | Threats | Photo ID |
|---|---|---|---|---|---|---|---|---|---|---|
Soil and litter extraction (Tullgren funnels and earthworm surveys)
Collect soil or litter samples and drive the animals out with heat and light into alcohol, or dig and hand sort pits for earthworms. The way into the least surveyed group of all.
How to run it
- Take cores or litter quadrats of fixed size; record depth and moisture.
- Place samples in Tullgren funnels under a lamp for 3 to 7 days over 70 percent ethanol.
- For earthworms, dig a 20 cm pit and hand sort, then pour mustard solution to bring up deep burrowers.
- Identify to order or family; count per sample.
- Standardise sample size so counts are per square metre.
Kit list
- Tullgren funnel kit (Carolina Biological (US) or make from a bucket, sieve and lamp)
- Soil corer
- Mustard powder
- Sample pots
The day one mistake: Drying samples too fast. Turn the lamp up slowly over days or the animals die in the soil instead of dropping.
| Site | Sample | Date | Type (core, litter, pit) | Size | Moisture | Taxon | Count | Per m2 |
|---|---|---|---|---|---|---|---|---|
Benthic grab and core sampling
Lower a grab or corer to the seabed to sample sediment infauna, sieve it and identify the animals. The core method for soft sediment monitoring.
How to run it
- Position the vessel on station; record GPS and depth for every grab.
- Accept a grab only if it is full and undisturbed; record the volume.
- Sieve gently on deck; fix the residue in buffered formalin or ethanol.
- Take a sediment subsample for particle size and organic content.
- Sort and identify in the lab; count per grab area.
Kit list
- Van Veen grab (KC Denmark or Forestry Suppliers (US))
- Sieve 1 mm
- Sample jars
The day one mistake: Keeping a half full grab. It means the jaws hit a stone and the sample is biased; drop it and repeat.
| Station | Replicate | Date | GPS | Depth (m) | Grab volume (L) | Sediment | Taxon | Count | Per m2 |
|---|---|---|---|---|---|---|---|---|---|
Coral reef line intercept and photo quadrats
Record what lies under a tape or in photo quadrats along a reef transect to measure coral cover, bleaching and algae. Paired with fish counts on the same tape.
How to run it
- Lay the tape along the depth contour; record depth and GPS at both ends.
- Line intercept: record the benthic category under every point or the length of each patch under the tape.
- Photo quadrats: photograph a 1 m frame every metre with the camera held square.
- Note bleaching, disease and recent mortality by colony.
- Analyse photos with point count software; same transects every year.
Kit list
- Transect tape 50 m
- Underwater camera
- Photo quadrat frame (make from PVC pipe)
- Dive slate
The day one mistake: Recording 'coral' without the growth form or genus. Cover alone hides the shift from branching to massive corals that the reef is telling you about.
| Site | Transect | Depth (m) | Date | Point (m) | Category | Genus or growth form | Bleached (Y/N) | Photo ID |
|---|---|---|---|---|---|---|---|---|
Preliminary roost assessment and tree inspection
Look for droppings, staining, feeding remains and roost features by day, and grade the structure for bat suitability. The first step of every bat job and the basis for deciding how many emergence surveys follow.
How to run it
- Inspect the outside: gaps under tiles, soffits, lead flashing, lifted bark, woodpecker holes, rot holes; photograph every feature.
- Inside: torch lofts and cellars for droppings, urine staining, moth wings and live bats; crumble droppings to tell bat from mouse.
- Trees: ground level assessment with binoculars, then climb or use a pole camera and endoscope for potential roost features.
- Grade suitability (negligible, low, moderate, high) using the BCT guidelines and set the number of emergence surveys from the grade.
- Never block or disturb a feature; record and leave.
The day one mistake: Grading a tree from the ground as negligible. Half the roost features are invisible from below; climb or pole camera before you write it off.
| Structure ID | Date | Feature | Location on structure | Droppings | Staining | Live bats | Suitability grade | Surveys required | Photo ID |
|---|---|---|---|---|---|---|---|---|---|
Badger bait marking
Feed peanuts mixed with coloured plastic pellets at each sett, then map which colours appear in which latrines to draw territory boundaries.
How to run it
- Assign a unique pellet colour to each main sett; mix pellets with peanuts and syrup.
- Bait daily for 10 to 14 days near the sett entrances.
- Search all latrines within 500 m of every sett for 2 to 3 days; record the colours found.
- Draw territory boundaries between latrines holding different colours.
- Do this before vegetation grows, February to April.
The day one mistake: Using the same colour for two setts within 1 km. The map becomes unreadable and the fortnight is wasted.
| Sett ID | Pellet colour | Bait day | Latrine ID | GPS | Colours found | Count | Date |
|---|---|---|---|---|---|---|---|
Artificial cover objects for terrestrial salamanders
Untreated wooden boards laid on the forest floor draw terrestrial salamanders that no other method finds. The core North American method for woodland amphibians.
How to run it
- Lay untreated boards (30 x 30 cm to 60 x 60 cm) flat on cleared soil in a grid; GPS each board.
- Leave 4 weeks before the first check.
- Lift boards in cool damp conditions; record species, count, and life stage; replace the board exactly.
- Handle animals with wet hands or not at all; never on dry or hot days.
- Same boards, same interval, every year.
The day one mistake: Checking on a dry afternoon. Salamanders are underground and the board is empty; wait for rain.
| Site | Board ID | Date | Air temp | Soil moisture | Species | Count | Stage | Under board (Y/N) |
|---|---|---|---|---|---|---|---|---|
Freshwater turtle hoop net trapping
Baited hoop nets set in shallow water catch freshwater turtles for marking and population estimates. The standard North American turtle method.
How to run it
- Set nets in 0.5 to 1 m of water with the top of the hoop above the surface so turtles can breathe.
- Bait with sardines in a perforated can; stake the net so it cannot roll.
- Check every 24 hours; process species, sex, carapace length, notch marks; release at the net.
- Record trap nights.
- Disinfect nets between water bodies.
The day one mistake: Setting the hoop fully submerged. Turtles drown by morning.
| Water body | Net ID | Set date | Check date | Species | Sex | Carapace length (mm) | Mark | Recapture | Bycatch |
|---|---|---|---|---|---|---|---|---|---|
Multi mesh gill netting (lakes)
Standardised multi mesh gill nets set overnight across depth strata give a repeatable picture of lake fish communities. Lethal for most fish, so used only where the standard demands it.
How to run it
- Plan net numbers per depth stratum from the lake area and maximum depth using the CEN table.
- Set nets at dusk at random positions in each stratum; record GPS and depth.
- Lift at dawn; identify, count and measure every fish by mesh panel.
- Record net nights per stratum.
- Dry and disinfect nets between lakes.
Kit list
- Nordic multi mesh gill net
- Fish measuring board (Forestry Suppliers (US) or NHBS (UK))
- Floats and weights
The day one mistake: Setting all nets in the shallows. Without the deep strata the lake community is misread.
| Lake | Net ID | Stratum | Depth (m) | Set time | Lift time | Mesh panel | Species | Count | Length (mm) |
|---|---|---|---|---|---|---|---|---|---|
Pond invertebrate netting (timed hand net)
A timed hand net sample across all pond habitats, sorted live, gives the family list behind pond quality scores such as PSYM.
How to run it
- Map the mesohabitats (open water, emergent, submerged, margins) and divide the 3 minutes among them by area.
- Net in short sweeps, emptying into a tray between habitats.
- Sort live in white trays for 1 hour, or preserve in 70 percent alcohol.
- Identify to family; record presence or abundance class.
- Disinfect and dry the net before the next pond.
The day one mistake: Netting only the open water. Most families live in the marginal vegetation.
| Pond | Date | Mesohabitats sampled | Time per habitat | Family | Abundance class | Preserved (Y/N) |
|---|---|---|---|---|---|---|
Bumblebee transects and flower insect timed counts
Walk a fixed route counting bumblebees by species and caste, or watch a flower patch for ten minutes counting every insect visitor. The two methods behind the UK Pollinator Monitoring Scheme.
How to run it
- BeeWalk: walk at a steady pace recording bumblebees within 2 m either side and 4 m ahead, by species and caste (queen, worker, male).
- Weather: above 13 C, dry, light wind, between 11:00 and 17:00.
- FIT count: choose a target flower, mark a 50 x 50 cm patch, count every insect that lands in 10 minutes by group.
- Record the flower species and its cover.
- Monthly for BeeWalk; FIT counts as often as you like.
Kit list
- Bumblebee guide
- Stopwatch
- Quadrat frame 50 cm (NHBS (UK), Forestry Suppliers (US), or make from PVC pipe)
The day one mistake: Counting honeybees as bumblebees. Learn the three common bumblebees first and record unknowns as unknown.
| Route or patch | Section | Date | Time | Temp | Sun | Species or group | Caste | Count | Flower |
|---|---|---|---|---|---|---|---|---|---|
Benthic diatom sampling
Brush the biofilm off submerged stones, preserve it and identify the diatoms under a microscope. The standard for river nutrient and acid status (TDI, EU Water Framework Directive).
How to run it
- Pick 5 cobbles from the well lit, flowing part of the reach, not from shaded margins or silt.
- Scrub the upper surface with a toothbrush into a tray of river water; pour into a 50 ml bottle.
- Preserve with Lugol or ethanol; label site, date and substrate.
- Prepare slides by acid digestion in the lab; count 300 valves per sample.
- Calculate the index; record which substrate was used because the index differs.
The day one mistake: Scrubbing silt covered stones. The community on silt is a different one and the index is wrong; choose clean, flowing sites.
| Site | Date | Substrate (cobble or plant) | Number of stones | Flow | Shade | Preservative | Sample ID | Lab ID |
|---|---|---|---|---|---|---|---|---|
Phytoplankton and chlorophyll sampling
Sample the water column for phytoplankton counts and chlorophyll a to track algal blooms and lake trophic state.
How to run it
- Lower a weighted tube through the mixed layer (or to twice the Secchi depth) and collect the integrated sample.
- Subsample 250 ml into a dark bottle for counts and preserve with Lugol; keep 1 L cold for chlorophyll.
- Filter the chlorophyll sample through a glass fibre filter within 8 hours; freeze the filter.
- Record Secchi depth, temperature profile and any surface scum or colour.
- Count cells in a sedimentation chamber; report cells per ml and chlorophyll in micrograms per litre.
The day one mistake: Sampling only the surface film. A scum on top and a clear column below give a bloom count ten times too high.
| Station | Date | Time | Secchi (m) | Sample depth (m) | Water temp | Scum (Y/N) | Chlorophyll sample ID | Count sample ID | Cells per ml |
|---|---|---|---|---|---|---|---|---|---|
Seaweed and kelp surveys
Record seaweed species and cover on the shore, and kelp density and canopy along belts below the tide, to track habitat condition and non native species.
How to run it
- Shore: run the transect from the lichen zone to low water; at each height record every seaweed species and percent cover in a 0.5 m quadrat.
- Note zonation (channel wrack, spiral wrack, bladder wrack, serrated wrack, kelp) and photograph each quadrat.
- Kelp: swim a 25 m tape at fixed depth; count stipes per 2 m belt and estimate canopy cover; measure 10 stipe lengths.
- Record non natives (wireweed, Undaria) separately with GPS.
- Collect a fragment of any unknown into a bag of seawater; press or photograph it the same day.
Kit list
- Quadrat frame 0.5 m (NHBS (UK), Forestry Suppliers (US), or make from PVC pipe)
- Seaweed guide
- Underwater camera
- Transect tape 50 m
The day one mistake: Surveying on a neap tide. The kelp zone stays under water and half the shore is never seen; use the lowest spring tides.
| Shore or site | Transect | Height or depth (m) | Quadrat or belt | Date | Species | Cover percent or stipe count | Canopy percent | Non native (Y/N) | Photo ID |
|---|---|---|---|---|---|---|---|---|---|
Wind and solar farm carcass searches (birds and bats)
Systematic searches under turbines or solar arrays for dead birds and bats, corrected for the carcasses searchers miss and the carcasses scavengers remove. The standard for estimating fatality at energy sites (SNH and BCT guidance in the UK, USFWS Land Based Wind Energy Guidelines in the US).
How to run it
- Mark a search plot around each turbine to 1 rotor length for bats and 1.5 to 2 rotor lengths for birds, and map the area you can actually search.
- Walk parallel transects 5 to 10 m apart at a steady 2 km per hour, scanning 3 to 5 m either side, at the same interval every week.
- Bag, label and photograph every carcass or feather spot with GPS, distance and bearing to the tower, species, age, condition and estimated days since death.
- Run a searcher efficiency trial each month by having someone else place 10 to 20 marked carcasses the searcher does not know about, and record how many are found.
- Run a carcass persistence trial each season by placing 10 to 20 carcasses and checking them on days 1, 2, 3, 7, 14 and 28 until they are gone.
Kit list
- Handheld GPS
- Nitrile gloves
- Zip seal bags
- Flagging tape
- Fatality estimator (GenEst) (free from USGS; SNH guidance from NatureScot (UK))
The day one mistake: Reporting raw carcass counts as the fatality rate. Searchers find perhaps half of what is there and scavengers remove most of the rest within a week, so an uncorrected count can be 5 to 10 times too low; run the trials and use an estimator.
| Turbine ID | Date | Search start and end time | Searcher | Plot area searched (ha) | Transect spacing (m) | Visibility class | Species | Age and sex | Distance and bearing to tower | Condition and days since death | Photo ID | Trial carcass (Y/N) |
|---|---|---|---|---|---|---|---|---|---|---|---|---|
Breeding wader surveys (Brown and Shepherd)
Walk the whole site in daylight so that no ground is more than 100 m away, mapping every wader and its behaviour, then estimate breeding pairs from the three visits. The Brown and Shepherd method is the standard for lapwing, curlew, snipe, redshank and golden plover on open ground.
How to run it
- Prepare a map at 1:10,000, plan a route with legs no more than 200 m apart, and walk it between 08:30 and 18:00 avoiding rain and wind above Beaufort 4.
- Make visit 1 between mid April and mid May and visit 2 between mid May and the end of June, at least 7 days apart, adding a third visit in June only where curlew or chicks need confirming.
- Mark every wader on the map with a species code and a behaviour code: alarm calling, display, distraction display, incubating, chicks seen, or just present.
- Walk steadily and do not stop to search for nests; if you flush an incubating bird move on at once so it can return.
- Count pairs per species using the standard rule set: for lapwing use the highest visit count of displaying or alarming adults, for curlew and snipe use the highest count from visits 1 and 2, and treat birds with chicks as confirmed.
The day one mistake: Surveying at dawn like a songbird count. Waders are least visible at dawn and the method relies on birds standing and alarming in the middle of the day; keep to the 08:30 to 18:00 window or your counts will be low and inconsistent.
| Site | Visit number | Date | Start and end time | Observer | Wind and cloud | Species | Number | Behaviour code | Map reference | Habitat | Stock present (Y/N) | Area covered (ha) |
|---|---|---|---|---|---|---|---|---|---|---|---|---|
Nest box monitoring (tits, flycatchers, owls, kestrels)
Check numbered nest boxes on a weekly schedule to record first egg date, clutch size, hatching and fledging under the BTO Nest Record Scheme or NestWatch (Cornell) rules. The easiest way to get breeding success data for hole nesters and the source of most long term studies on climate and timing.
How to run it
- Erect boxes by February, numbered and mapped, 2 to 4 m up, entrance away from prevailing weather and direct sun, small boxes 20 to 30 m apart.
- Start weekly checks in late March; approach quietly, tap the box, open the lid for a few seconds, count contents and close.
- Record stage as nest building, lining, eggs (count), young (count and age) or empty, and back calculate first egg date assuming one egg per day.
- When chicks are close to fledging (day 12 onwards in tits) do not open the box; watch from a distance or check after they have gone.
- Clean out old nests after the season ends and enter every record online so it reaches the national scheme.
The day one mistake: Opening a box with large chicks inside. Tit chicks from about day 12 will explode out of the box and cannot be put back; note the hatch date and stop opening the box a week before the expected fledge date.
| Box number | Species | Visit date | Days since last check | Stage | Eggs | Chicks | Chick age (days) | Adult on nest (Y/N) | Outcome code | Box height and aspect | Habitat |
|---|---|---|---|---|---|---|---|---|---|---|---|
Heronry and colonial waterbird counts
Count apparently occupied nests in heronries, egret colonies, cormorant colonies and other tree or reed nesting waterbirds from outside the colony. The BTO Heronries Census has run since 1928 and the Colonial Waterbird Survey in the US follows the same logic.
How to run it
- Locate the colony from records or by following birds carrying sticks in March, and find a vantage point outside the trees where most nests are visible.
- Count before leaves close the canopy: late March to mid April for grey heron in the UK, later for species that nest in reeds or leaf cover.
- Count apparently occupied nests, meaning nests that are well built with an adult or young on or beside them, and score the rest as unoccupied.
- Repeat the count on a second visit at the peak of incubation and use the highest count of occupied nests as the colony figure.
- Keep to the edge, keep visits under 90 minutes and leave at once if adults start leaving nests, then submit the count to the national scheme.
The day one mistake: Counting every nest structure. Old nests persist for years and a heronry with 30 nests may hold 12 pairs; only count nests that are occupied or freshly built with whitewash under them.
| Colony ID | Date | Visit number | Start and end time | Observer | Vantage point | Species | Apparently occupied nests | Unoccupied nests | Nest tree species and height | Young visible (Y/N) | Disturbance noted |
|---|---|---|---|---|---|---|---|---|---|---|---|
Visible migration counts (fixed point)
Stand at a fixed point on a headland, ridge or valley edge and count every bird flying through with its direction, in hourly blocks. The Trektellen network in Europe and hawkwatch sites in the US (HMANA protocol) use exactly this method.
How to run it
- Pick a point with a wide view along the expected flight line, note its coordinates, and use the same spot every time.
- Arrive 15 minutes before sunrise, log start time, cloud, wind direction and strength, and visibility.
- Count every bird that passes in one direction, in the hourly block it passes, and record direction of travel; birds that land and stay are logged separately as grounded.
- Log counting effort to the minute, including breaks, because the count is expressed as birds per hour.
- Submit hourly totals to Trektellen or HawkCount the same day and check that the species totals match your notebook.
The day one mistake: Counting the same flock that circles back. Only log birds moving through in the main direction of passage and note any large flock that reappears, or your finch totals will double.
| Site | Date | Hour block | Minutes watched | Observer | Wind direction and force | Cloud and visibility | Species | Number | Direction | Height class | Grounded (Y/N) |
|---|---|---|---|---|---|---|---|---|---|---|---|
Low tide feeding distribution and high tide roost counts (WeBS Low Tide Counts)
Count waders and wildfowl on the intertidal flats around low water so their feeding distribution can be mapped, and count the roosts at high water so the total population is known. The WeBS Low Tide Count scheme in the UK follows this method; in the US the same design is used in shorebird site assessments.
How to run it
- Divide the estuary into sectors on a map using creeks, groynes and marks that you can see in the field, and assign each sector a code.
- Count each sector once a month from November to February, starting 2 hours before low water and finishing 2 hours after, on a rising or falling tide as the scheme specifies.
- Record every wader and wildfowl in the sector by species with a count and a behaviour code (feeding, roosting, flying through).
- On a separate date count the high tide roosts within 2 hours of high water from a distance that does not flush the birds.
- Note the tide height, weather and any disturbance, and submit counts to the scheme organiser after each visit.
The day one mistake: Counting at low water on a spring tide when the flats extend for miles and then again on a neap tide when they do not. Count on similar tide heights each month or your distribution maps will move with the tide instead of the birds.
| Sector code | Date | Low water time and height | Count start and end time | Observer | Species | Number | Behaviour | Mud, sand or saltmarsh | Wind and visibility | Disturbance source | Tide state at count |
|---|---|---|---|---|---|---|---|---|---|---|---|
Colour ring and tag resighting
Read the colour rings, flags and wing tags of marked birds and report them to the ringing scheme so survival, movements and site fidelity can be estimated. The cheapest way to contribute to a national scheme; every accurate resighting is a data point.
How to run it
- Learn the ring positions and colour codes for the species you will see; the European colour ring birding site and the USGS Bird Banding Lab list every scheme.
- Set up a scope at a roost or feeding flock, scan legs systematically and read each combination twice before writing it down.
- Record the full combination in the standard format (left leg above and below the joint, then right leg), the date, place, time and what the bird was doing.
- Photograph the bird whenever you can; a photo settles a doubtful read.
- Submit sightings to the scheme coordinator listed on the cr birding site, or to the BTO Ringing Scheme (ring.ac) for the UK and the Bird Banding Laboratory (reportband.gov) for the US, and keep the reply, which tells you where the bird was ringed.
The day one mistake: Guessing a ring you could not fully read. A wrong resighting creates a movement that never happened and can survive in the dataset for years; record a partial read as partial and move on.
| Date | Time | Watch duration (minutes) | Site and GPS | Observer | Species | Ring combination | Ring position | Metal ring read (Y/N) | Behaviour | Flock size | Photo (Y/N) | Reported to scheme (Y/N) |
|---|---|---|---|---|---|---|---|---|---|---|---|---|
Avian influenza dead bird surveillance and swabbing
Walk fixed sections during avian influenza outbreaks, report dead wild birds to the national helpline and, where you are trained and permitted, take oropharyngeal and cloacal swabs for testing. Wild bird surveillance is how new strains are detected.
How to run it
- Report before you touch: in the UK call the Defra helpline (03459 33 55 77) or use the online form for 1 or more dead birds of prey, 3 or more dead gulls or wild waterfowl (swans, geese, ducks), or 5 or more dead wild birds of any species; in the US report to the state wildlife agency or USDA Wildlife Services.
- Wear disposable gloves, an FFP2 or N95 mask and eye protection, and keep dogs and other people away from carcasses.
- If swabbing under a programme, take one oropharyngeal and one cloacal swab, place each in viral transport medium, label with the bird ID, and keep cold.
- Double bag any carcass you are asked to collect, disinfect boots and equipment with an approved disinfectant before leaving the site, and do not visit poultry or other bird sites the same day.
- Log species, location, count and condition for every carcass even when not collected, and keep the helpline reference number.
Kit list
- Nitrile gloves
- FFP2 or N95 masks
- Safety glasses
- Viral transport medium swabs (issued by the surveillance lab (APHA Weybridge in the UK, USGS National Wildlife Health Center in the US))
- Virkon S disinfectant
The day one mistake: Picking up a dead swan bare handed to see what killed it. You risk infection and you have moved a carcass that surveillance staff needed in place; report it, photograph it, and leave it.
| Section | Section length (km) | Date | Start and end time | Observer | Species | Number dead | Number sick | Condition | GPS | Helpline reference | Swabbed (Y/N) | Sample IDs | PPE used | Disinfection done (Y/N) |
|---|---|---|---|---|---|---|---|---|---|---|---|---|---|---|
Bat radio tracking to roosts (VHF)
Attach a 0.3 to 0.5 g VHF transmitter to a bat caught under licence, then find its day roosts and foraging areas with a receiver and Yagi antenna. The only method that finds tree roosts and commuting routes reliably.
How to run it
- Under the licence, glue the tag between the shoulder blades of a bat above the weight threshold (tag no more than 5 per cent of body mass) and release it at the capture point.
- Search for the signal each morning from high ground or roads, then home in by walking towards the strongest signal with the gain turned down until you find the roost tree or building.
- At night station 2 or 3 teams at known points, take simultaneous bearings on a synchronised time signal every 5 to 15 minutes and triangulate the fix later.
- Record signal strength, bearing, time and your own GPS for every fix, and note when the signal is lost.
- Confirm each roost with an emergence count on a following evening and stop tracking when the tag drops off or falls silent.
Kit list
- VHF receiver and Yagi antenna (Lotek, ATS, Wildlife Materials or Biotrack)
- Radio tags (Lotek, Holohil or ATS)
- Sighting compass (Suunto or Silva, via an outdoor shop)
- Handheld GPS
- Headlamp with red light
- Skin adhesive for tags (Perma Type or Torbot Skin Bond via Lotek or NHBS (UK))
The day one mistake: Turning the gain up to hear the signal and then walking in circles. Signal bounces off buildings and hillsides at high gain; reduce gain until the signal is barely audible and the direction becomes clear.
| Bat ID and tag frequency | Date | Time of fix | Team | Team GPS | Bearing | Signal strength | Gain setting | Fix type (triangulation or homing) | Roost found (Y/N) | Roost GPS and structure | Weather |
|---|---|---|---|---|---|---|---|---|---|---|---|
Infrared and thermal camera emergence surveys (BCT 2023)
Record emergence with infrared or thermal cameras so that every bat leaving a roost is captured and can be counted on screen, as required by the BCT Bat Surveys for Professional Ecologists Good Practice Guidelines 4th edition (2023). Cameras replace or supplement human counters for complex or large roosts.
How to run it
- Set the camera at least 5 m from the emergence point with the whole feature and some sky in frame, and add an infrared illuminator if using a near infrared camera.
- Start recording 15 minutes before sunset and stop 90 minutes after, or 2 hours before sunrise to 15 minutes after for re entry, on nights above 10 C without heavy rain.
- Run a bat detector recording next to the camera with a synchronised clock so calls can be matched to bats on screen.
- Review the whole recording, not just the first hour, and log every emergence and return with a time stamp and exit point.
- Store footage with the site, date and camera ID, and keep it for the report because the reviewer will ask to see it.
Kit list
- Thermal imaging camera
- Infrared camcorder
- Infrared illuminator
- Tripod
- Full spectrum bat detector (Wildlife Acoustics)
- Full spectrum bat detector (Wildlife Acoustics or Titley Scientific)
The day one mistake: Pointing a thermal camera at a warm brick wall at dusk. Bats vanish against a background warmer than they are; frame the exit against sky or cool foliage or you will count nothing.
| Roost ID | Date | Camera ID and type | Camera position and distance (m) | Sunset time | Recording start and end | Temperature and wind | Exit point | Time out | Time in | Species from detector | Running total | Reviewer |
|---|---|---|---|---|---|---|---|---|---|---|---|---|
Bat box monitoring
Check numbered bat boxes on a monthly schedule for bats, droppings and other occupants. Boxes tell you which species use a site and, over years, whether the population is stable.
How to run it
- Mount boxes at 3 to 5 m in groups of 3 on the same tree facing south, southeast and southwest, clear of branches beneath, and number and map them.
- Check monthly between April and October, in the middle of the day when bats are torpid, with a licensed bat worker doing any box opening.
- Look up into the box with a torch first; if bats are present, count and identify without handling unless the licence allows it.
- Record droppings, birds, wasps or dormice, and clean out bird nests after the season if the box is for bats.
- Log occupancy per box per visit and report any new species to the local bat group and the national recorder.
The day one mistake: Checking boxes on a cold morning. Torpid bats in a box cannot fly and a cold check can leave them exposed all day; check in the warm part of the day and close the box within a minute.
| Box number | Box type | Tree and aspect | Date | Time | Checker and licence number | Bats present (count) | Species | Droppings (Y/N) | Other occupants | Temperature | Box condition |
|---|---|---|---|---|---|---|---|---|---|---|---|
Autumn swarming surveys
Survey caves, mines, tunnels and cellars in late summer and autumn when bats gather at the entrance to mate before hibernation. Swarming sites can draw bats from 60 km away and are protected as underground hibernacula in the UK.
How to run it
- Identify candidate sites from hibernation records and old mine plans, and get permission and a safety check on the entrance.
- Set up 10 to 20 m from the entrance from sunset with a full spectrum detector recording continuously and an observer with a red light.
- Count passes in and out at the entrance in 10 minute blocks, and note chasing, social calls and any landings on the rock.
- Stay until at least 2 am because Myotis swarming activity often peaks after midnight.
- If trapping is part of a licensed study, use a harp trap at the entrance, process bats within 30 minutes and release them at the trap.
Kit list
- Full spectrum bat detector (Wildlife Acoustics)
- Headlamp with red light
- Tally counter
- Harp trap (Austbat or NHBS (UK); Bat Conservation and Management (US))
- Thermal imaging camera
- Full spectrum bat detector (Wildlife Acoustics or Titley Scientific)
The day one mistake: Going home at midnight. Many Myotis swarm hardest between midnight and 3 am, and a survey that ends early records a quiet site that is actually busy.
| Site | Date | Sunset | Start and end time | Temperature and wind | 10 minute block | Passes in | Passes out | Species from calls | Social calls (Y/N) | Chasing (Y/N) | Trap open time and catch |
|---|---|---|---|---|---|---|---|---|---|---|---|
Driven bat transects (NBMP car survey, iBats)
Drive a fixed route at low speed with a bat detector held out of the window recording continuously, so that bat calls can be identified and mapped afterwards. The NBMP Car Survey in the UK and iBats internationally cover far more ground per night than walking.
How to run it
- Plan a route of about 40 km on quiet roads that avoids main roads and towns, and record it on GPS.
- Start 45 minutes after sunset on a dry night above 10 C, with the detector microphone held out of the passenger window pointing up at 45 degrees.
- Drive at a steady 15 mph (24 km per hour) with hazard lights on and record continuously with a GPS track log running.
- Repeat the same route on a second night in July, ideally within 2 weeks.
- Upload recordings and the GPS track to the scheme, then check automated identifications against the sonograms.
Kit list
- Full spectrum bat detector (Wildlife Acoustics)
- Handheld GPS
- Vehicle magnetic beacon
- Window mount for microphone
- Full spectrum bat detector (Wildlife Acoustics or Titley Scientific)
The day one mistake: Driving at normal speed. Above 15 mph most calls are too brief to identify and the pass rate cannot be compared with any other survey; keep to the protocol speed and accept that the route takes 1.5 hours.
| Route ID | Date | Sunset | Start and end time | Distance driven (km) | Average speed | Temperature and wind | Detector and gain | Species | Passes | GPS time stamp | Habitat along section |
|---|---|---|---|---|---|---|---|---|---|---|---|
Dropping collection for DNA species identification
Collect fresh bat droppings from roosts and send them to a lab that amplifies mitochondrial DNA to identify the species. This tells you which species uses a roost without catching or disturbing a single bat.
How to run it
- Search the roost, loft floor or wall below the entrance by day for droppings that are dark, crumbly and fresh looking, and photograph them in place.
- Pick up 5 to 10 droppings with clean tweezers or a fresh gloved hand into a labelled dry tube, one tube per pile.
- Keep tubes dry and cool, avoid touching the droppings with your skin or breathing on them, and post to the lab within a week or freeze them.
- Fill in the lab form with the site, date, structure and where in the roost each sample was taken.
- Record the lab result against the roost and treat a failed sample (no DNA) as no result rather than no bats.
Kit list
- Sample tubes
- Fine tweezers
- Nitrile gloves
- Silica gel sachets
- DNA analysis service (Warwick University Ecology Lab (UK), NatureMetrics (UK) or a university genetics lab (US))
The day one mistake: Mixing droppings from several piles into one tube. A loft may hold two species and the lab returns one name, so keep every pile separate and note where it came from.
| Site | Roost structure | Date | Collector | Sample tube ID | Location in roost | Number of droppings | Freshness | Photo ID | Date sent to lab | Lab result | Result date |
|---|---|---|---|---|---|---|---|---|---|---|---|
Camera trap tunnels and Mostela boxes
A wooden box with a plastic tunnel inside and a camera trap facing the tunnel, so that stoats, weasels and small mammals are filmed as they investigate. The Mostela design from the Dutch Small Mustelid Foundation is now the standard for small mustelid occupancy.
How to run it
- Build or buy a box about 40 cm long with an 8 cm tunnel and a camera fixed at the far end, focused on the tunnel at 30 to 40 cm.
- Place boxes along linear features (hedge bases, ditches, walls, stone piles) 100 to 200 m apart, entrance low and level with the ground, and hide with vegetation.
- Set the camera to 10 to 20 second videos with a short delay, and check that the lens is clean and the infrared is not flaring on the tunnel.
- Leave for 14 to 28 days, check weekly for battery, card and damp, and swap cards without moving the box.
- Score every video for species, time and behaviour, and treat the first detection date as the key output for occupancy.
Kit list
- Camera trap
- Camera trap accessories
- Mostela box (make from plywood and 8 cm drainpipe; plans from the Vincent Wildlife Trust (UK))
- SD cards 32GB
- Lithium AA batteries
The day one mistake: Setting the camera on still photographs. A weasel crosses the tunnel in under a second and the camera fires after it has gone; use video with a fast trigger and check the first week of footage before trusting the setup.
| Box ID | Site and GPS | Feature type | Deploy date | Retrieve date | Trap nights | Camera ID | Check date | Species | Number of events | First detection date | Behaviour | Weather notes |
|---|---|---|---|---|---|---|---|---|---|---|---|---|
Squirrel drey counts and feeding sign transects
Count squirrel dreys along winter transects and score cone and nut feeding remains to estimate relative density and, from the cone and nut damage, which species is present. Cheap and repeatable; the drey index tracks red and grey squirrel numbers between years.
How to run it
- Lay out 1 km transects through woodland and walk them between November and March when the canopy is bare, scanning 25 m each side for dreys.
- Record every drey with GPS, tree species, height and whether it looks used (fresh leaves, intact) or old, and compute dreys per hectare (1 km by 50 m equals 5 ha).
- Every 200 m search a 50 m strip or a 5 by 5 m quadrat for stripped cones, split hazelnuts and bark strips, and count them.
- Examine cones and nuts: reds leave neat spirals and nuts split in two, greys chew more raggedly, but confirm species with a hair tube or camera.
- Repeat the same transects each winter and report the drey index and feeding sign counts together.
Kit list
- Binoculars 8×42
- Handheld GPS
- Measuring tape 50 m
- Tally counter
- Hair tube (make from 30 cm of 65 mm drainpipe with sticky tape pads, or NHBS (UK))
The day one mistake: Counting dreys in summer. Leaves hide most of them and the count drops by half, so the index only works in the leaf off months on the same transects every year.
| Transect ID | Date | Observer | Length (m) | Strip width (m) | Drey number | GPS | Tree species and height | Drey condition | Cones stripped | Nuts split | Species evidence | Area (ha) |
|---|---|---|---|---|---|---|---|---|---|---|---|---|
Pine marten scat transects and den box checks
Walk forest tracks for pine marten scats, which are deposited on paths as territorial marks, and check den boxes for use. Scat DNA confirms the species and identifies individuals; den boxes show breeding.
How to run it
- Lay out 1 to 2 km transects along forest tracks and rides, which martens use for scent marking, and walk them monthly.
- Record every scat with GPS, freshness, size and contents, photograph it, then remove it so it is not counted next month.
- Bag fresh scats in tubes for DNA confirmation (fox and marten scats overlap in size) and keep them cool.
- Check den boxes from a ladder 2 to 4 times a year, in late winter for occupancy and in early summer for kits, using an endoscope so the box is not opened.
- Report scats per km and den box occupancy to the Vincent Wildlife Trust or the Mammal Society in the UK, or the state agency in the US.
The day one mistake: Identifying every twisted scat as marten. Fox scats look the same and DNA shows up to a third of field identified marten scats are fox; collect samples and get the species confirmed before mapping.
| Transect ID | Date | Observer | Length (km) | Scat number | GPS | Freshness | Length (cm) | Contents | DNA sample ID | Scat removed (Y/N) | Den box number | Occupied (Y/N) | Kits seen |
|---|---|---|---|---|---|---|---|---|---|---|---|---|---|
Harvest mouse nest searches
Search tall tussocky grass, reed and bramble for the woven grass nests of harvest mice, which are visible after the vegetation dies back. The Mammal Society National Harvest Mouse Survey uses timed searches to map distribution.
How to run it
- Pick a search area of tall grass, reed, rush or bramble edge and walk it slowly parting the stems at 30 to 100 cm height where nests are woven.
- Search for 30 to 60 minutes per 100 m, or for a fixed time, with two people working the same strip from opposite sides.
- Record every nest with GPS, height above ground, plant species it is woven into, diameter and whether it is a breeding nest (over 6 cm, lined) or a smaller resting nest.
- Leave nests in place and do not open them; harvest mice may still be using them in mild winters.
- Record zero searches too, with the time spent, and submit all results to the national survey.
The day one mistake: Searching in summer when the grass is green. Nests are invisible until the vegetation dies back in October, and searches before then record absence where there are mice.
| Site and GPS | Date | Surveyors | Search time (minutes) | Length searched (m) | Habitat | Nest number | Nest GPS | Height (cm) | Plant species | Diameter (cm) | Breeding or resting | Management notes |
|---|---|---|---|---|---|---|---|---|---|---|---|---|
Hedgehog torch and thermal transects
Walk a fixed route after dark with a spotlight or thermal camera and count every hedgehog seen, giving an encounter rate per km. With distance to each animal the counts can be turned into density by distance sampling.
How to run it
- Design a route of 1 to 3 km along paths, lawns, field edges and hedges, and record it on GPS.
- Start 1 hour after sunset on nights above 8 C without heavy rain, walking at 2 km per hour sweeping a spotlight or thermal camera slowly 20 m each side.
- For each hedgehog record time, GPS, perpendicular distance, habitat and behaviour; do not pick it up unless marking under a study.
- Repeat each route 3 to 5 nights in the season, same start time.
- Report hedgehogs per km and submit sightings to the Big Hedgehog Map (PTES and BHPS).
The day one mistake: Using a weak head torch and only looking at the path. Hedgehogs sit still in short grass 15 m away and are missed unless the beam sweeps slowly; use a bright spotlight or thermal and walk slowly.
| Transect ID | Date | Sunset | Start and end time | Distance (km) | Temperature and rain | Observer | Hedgehog number | Time | GPS | Perpendicular distance (m) | Habitat | Behaviour |
|---|---|---|---|---|---|---|---|---|---|---|---|---|
Invasive rodent tracking tunnels, chew cards and wax tags (island eradication standard)
Ink tracking tunnels, chew cards and wax tags detect rats and mice at very low density, which is what island eradication projects and seabird island biosecurity need. Protocols follow the New Zealand Department of Conservation and the RSPB and Island Conservation eradication standards.
How to run it
- Lay a grid of devices at 50 m spacing for rats and 25 m for mice, numbered, mapped and flagged, covering the whole island or the area under check.
- Bait tracking tunnels with peanut butter on a fresh ink card, set chew cards (corflute with peanut butter in the flutes) and wax tags at ground level, and leave tracking tunnels 1 night and chew cards and wax tags 7 nights.
- Collect cards and tags, and identify prints and bite marks with a reference key: rat incisor marks are 2 mm wide and paired, mouse marks are under 1 mm.
- In a biosecurity check every quarter run the whole grid and report any sign the same day; during an eradication check every night and mark every detection.
- Store used cards for review and keep a detection map so that a single rat can be targeted.
Kit list
- Ink tracking tunnel (NHBS (UK) or Forestry Suppliers (US))
- Chew cards and wax tags (Pest Control Research (NZ), or make from corflute and paraffin wax)
- Peanut butter
- Flagging tape
- Handheld GPS
- Ink tracking tunnels and cards (Gotcha Traps or Connovation (NZ), or make from corflute)
The day one mistake: Reading a smudged print as no rat. A single faint set of prints on one card is an incursion on an eradicated island; escalate every uncertain sign, photograph it, and re set the device with fresh bait.
| Device ID | Grid reference | Device type | Date set | Date checked | Nights out | Bait | Sign (species) | Print or bite width (mm) | Confidence | Photo ID | Reported (Y/N) | Weather |
|---|---|---|---|---|---|---|---|---|---|---|---|---|
Live pitfall trapping for shrews
Bury open topped containers flush with the ground so shrews fall in and are held alive with food and bedding. The only cheap method that catches shrews reliably, but shrews starve within hours so the check interval is the whole method.
How to run it
- Dig in 10 to 20 buckets or 2 litre tubs at 5 m spacing along a line, rim flush with the soil, with drainage holes and a rain cover 5 cm above.
- Put in dry bedding and a generous supply of food (blowfly pupae or mealworms, plus a little wet dog food) in every trap every time it is set.
- Open in the evening and check every 2 hours by day and every 3 to 4 hours at night, without exception, in the cool part of the year (not above 25 C).
- Identify, weigh and release each shrew at the trap within 2 minutes, and refresh food and bedding.
- Close traps by day if you cannot check them and remove all containers at the end of the session.
Kit list
- Plastic buckets 5 litre
- Mealworms
- Spring balance (Pesola, via Forestry Suppliers (US) or NHBS (UK))
- Headlamp
- Trowel
- Pesola spring scale (Pesola)
The day one mistake: Leaving the traps overnight to check at dawn. A shrew must eat every 2 to 3 hours and every trap you find in the morning will hold a dead one; if you cannot check through the night, close the traps at dusk.
| Line ID | Trap number | Date set | Check time | Interval since last check (hours) | Trap nights | Species | Sex | Weight (g) | Released (Y/N) | Food and bedding refreshed (Y/N) | Temperature | Rain |
|---|---|---|---|---|---|---|---|---|---|---|---|---|
Mink rafts
A floating raft with a clay pad under a tunnel records the footprints of mink passing along the bank, and the same raft carries a live trap once mink are confirmed. The GWCT mink raft is the basis of every UK mink control project and of the North American Mink control programmes.
How to run it
- Build or buy a raft with a 10 cm tunnel over a basket of clay and oasis foam, and tether it to a bank under cover every 1 km of watercourse.
- Wet the clay so it takes a print, then check every 14 days in monitoring mode, smoothing the pad after each check.
- Identify prints with a key: mink show 5 toes in a star shape about 3 cm across, water vole and rat are smaller, otter much larger.
- When mink prints appear, replace the clay basket with a live cage trap inside the tunnel and check the trap at least once every 24 hours, ideally at dawn.
- Dispatch trapped mink humanely under the law, release all non target animals at once, and return the raft to monitoring mode.
Kit list
- Mink raft (GWCT (UK) design; make from polystyrene, marine ply and drainpipe)
- Live cage trap
- Clay for tracking pad
- Animal tracks field guide (NHBS (UK) or a bookshop (US))
- Waterproof gloves
The day one mistake: Leaving a trap set through a weekend. A water vole or a polecat in an unchecked cage dies, and the project loses its landowner; if you cannot check daily, take the trap out and leave the clay in.
| Raft ID | Watercourse and GPS | Date | Days since last check | Mode (monitor or trap) | Prints (species) | Print width (cm) | Photo ID | Trap catch | Non target released | Mink dispatched | Water level | Clay condition |
|---|---|---|---|---|---|---|---|---|---|---|---|---|
Marine mammal observer and PAM mitigation watches (JNCC protocol)
Trained marine mammal observers and passive acoustic monitoring operators watch a mitigation zone around seismic, piling or explosive work and delay operations if a marine mammal is inside it. The JNCC guidelines for minimising the risk of injury to marine mammals set the UK protocol; NMFS incidental take authorisations set the US one.
How to run it
- Before the source starts, watch the full 500 m mitigation zone for 30 minutes (60 minutes in water over 200 m) from the highest safe platform, with a second observer or a PAM system when visibility is poor.
- Record every sighting with time, bearing, distance by reticle binoculars, species, number, behaviour and heading, and whether it was inside the zone.
- If an animal is inside the zone, tell the operator to delay the start until 20 minutes have passed since the animal was last seen leaving.
- Ensure a soft start (gradual ramp up) of at least 20 minutes and log the start, stop and any breaks in the source.
- Complete the JNCC marine mammal recording forms (or the NMFS report) with effort, environmental conditions and every mitigation action, and submit them within the required period.
Kit list
- Reticle binoculars 7×50 (Steiner or Fujinon, via an optics dealer)
- PAM hydrophone system (Seiche Ltd or Vanishing Point (PAMGuard software is free))
- Handheld GPS
- Sighting compass (Suunto or Silva, via an outdoor shop)
- Waterproof notebook
The day one mistake: Starting the pre watch late so the source is not delayed. If the 30 minutes are not complete and logged before the soft start, the mitigation is invalid and the whole operation can be stopped by the regulator; the watch starts when you say it does, not when the crew is ready.
| Vessel and operation | Date | Watch start and end time | Observer or PAM operator | Platform height (m) | Sea state and swell | Visibility (km) | Source active (Y/N) | Sighting time | Species | Number | Distance (m) and bearing | Inside zone (Y/N) | Mitigation action |
|---|---|---|---|---|---|---|---|---|---|---|---|---|---|
Seabird productivity plots and chick provisioning watches
Mark nests on cliff plots and follow them to fledging to measure chicks fledged per pair, and watch nests to record how often adults bring food and what they bring. Productivity is the earliest warning of a food shortage at sea and the JNCC Seabird Monitoring Programme method is used on both sides of the Atlantic.
How to run it
- Choose plots visible from a safe vantage point, photograph them, and mark 20 to 50 nests per species on the photo with numbers before eggs hatch.
- Visit every 3 to 5 days from late May, recording each nest as egg, small chick, large chick, empty or failed, and note the date of first sighting of a chick.
- Continue until chicks fledge (kittiwake at about 40 days, guillemot jumps at 20 days) and score the plot as chicks fledged per active nest.
- For provisioning, watch 5 to 10 nests for 4 to 6 hours or dawn to dusk from a hide, logging every feed with time, nest, prey type and size relative to bill length.
- Repeat provisioning watches 3 to 5 times through chick rearing and report both productivity and feeds per chick per hour to the SMP or the state coordinator.
The day one mistake: Setting up the plot after chicks have hatched. Nests that failed at the egg stage are missed and productivity comes out too high; mark nests during incubation and count failures as zero.
| Colony and plot ID | Species | Nest number | Visit date | Days since last visit | Nest contents | Chick age class | Outcome | Watch date | Watch start and end time | Feeds per nest | Prey type | Prey size (bill lengths) | Sea state |
|---|---|---|---|---|---|---|---|---|---|---|---|---|---|
Burrow nesting seabird playback surveys (shearwaters and storm petrels)
Play the species' call at burrow entrances by day and count the burrows that reply, then convert to apparently occupied burrows using a calibration of the response rate. The JNCC method for Manx shearwater and storm petrel is the only way to census birds that are underground by day and at sea by night; puffin burrows are scored from signs, not playback.
How to run it
- Map the colony and lay out random quadrats or transect strips, then count every burrow entrance within them, marking each with a numbered cane.
- Between late May and early July, play the call at each burrow entrance for 10 seconds with a speaker at the entrance, listen 10 seconds, and repeat once.
- Record a response, no response or unknown, and note burrows that are collapsed or obviously unused.
- Calibrate the response rate on at least 100 burrows by playing to each on 3 or more days in the same season, because a bird responds on only some visits (about 50 to 60 per cent for Manx shearwater).
- Divide the number of responding burrows by the response rate to give apparently occupied burrows, multiply by burrow density and colony area, and submit to the Seabird Monitoring Programme.
Kit list
- Bluetooth speaker
- Quadrat frame 1 m (NHBS (UK), Forestry Suppliers (US), or make from PVC pipe)
- Bamboo canes
- Handheld GPS
- Measuring tape 50 m
The day one mistake: Skipping the calibration and reporting responding burrows as pairs. Half the birds do not answer on any one day, so the raw count underestimates the colony by half or more; the calibration is not optional.
| Colony and quadrat ID | Date | Time | Observer | Quadrat area (m2) | Burrow number | Species played | Response (Y/N/unknown) | Burrow condition | Calibration burrow (Y/N) | Visit number | Wind and rain | Biosecurity check done (Y/N) |
|---|---|---|---|---|---|---|---|---|---|---|---|---|
Beached bird surveys with oiling scores
Walk fixed beach sections and record every dead seabird with its species, age and whether it is oiled, giving corpses per km and an oil rate. The RSPB Beached Bird Survey (since 1971), the North Sea international survey and COASST in the US use this to track chronic oil pollution and mass mortality events.
How to run it
- Register a fixed beach section of 2 to 5 km and walk the full length along the strandline once a month, or at least in the February count, at or near low water.
- For every corpse record species, age (juvenile or adult), condition, and whether it is oiled, scoring the fraction of the body oiled (none, under 25 per cent, 25 to 50, 50 to 75, over 75 per cent).
- Photograph the corpse with a scale, measure wing chord if the species is uncertain, and use COASST style foot and wing keys for partial remains.
- Mark each corpse (cut a wing tip or spray paint) so it is not recounted next month, and remove it above the strandline if the scheme asks.
- Wear gloves, wash hands, report any large mortality to the scheme and to the avian influenza helpline, and submit the count as corpses per km with the oiling rate.
The day one mistake: Walking the section at high water when the strandline is under water and half the corpses are floating. Survey at low water along the whole strandline, or the count reflects the tide rather than the birds.
| Section ID | Date | Start and end time | Low water time | Length walked (km) | Observer | Corpse number | Species | Age | Oiled (Y/N) | Oiling score | Condition | Marked (Y/N) | Photo ID | Wind and recent storms |
|---|---|---|---|---|---|---|---|---|---|---|---|---|---|---|
VHF radio tracking and triangulation
Fit an animal with a VHF transmitter and locate it by taking compass bearings to the strongest signal from two or more known points. Gives home range, habitat use and survival at a fraction of the cost of GPS collars.
How to run it
- Fit collars at under 3 percent of body mass under the project licence and let the animal settle for 7 days before the first fix counts.
- Choose fixed tracking stations with clear sky lines and record their GPS positions to the metre.
- At each station rotate the antenna slowly, find the null or peak, read the compass bearing and note the time and signal strength.
- Take 3 bearings from different stations within 10 minutes so the animal has not moved; angles of 30 to 150 degrees between bearings give the smallest error polygon.
- Enter fixes into LOAS or similar software the same day and check every error polygon over 1 ha before it enters the analysis.
Kit list
- VHF receiver and Yagi antenna (Lotek, ATS, Wildlife Materials or Biotrack)
- VHF transmitter collars (Lotek, ATS or Biotrack)
- Sighting compass (Suunto or Silva, via an outdoor shop)
- Handheld GPS
- Headlamp
The day one mistake: Taking the three bearings 30 minutes apart. The animal walks 300 m between them, the lines never cross cleanly and every fix is thrown out. Use radios so all observers take bearings on the same minute.
| Animal ID | Frequency | Date | Time of bearing | Station ID | Station easting and northing | Bearing (degrees) | Signal strength | Number of bearings | Error polygon (ha) | Habitat at fix | Observer |
|---|---|---|---|---|---|---|---|---|---|---|---|
Roadkill surveys
Record every dead animal on a fixed stretch of road to map collision hotspots and track relative abundance of species such as hedgehogs, badgers, otters and deer. The Mammal Society and Project Splatter run national schemes.
How to run it
- Choose a fixed route and drive or walk it in the same direction at the same time of day, with a passenger recording so the driver never records.
- Log every carcass with GPS, species, age class if obvious and a photograph; record unidentifiable remains as unknown mammal rather than guessing.
- Note the road side, verge type, adjacent habitat and any fence or wall within 10 m of the carcass.
- Record zero surveys in full; a route with no carcasses is a data point, not a wasted trip.
- Upload to the national scheme (Project Splatter in the UK, state roadkill portals such as CROS in California) and keep your own copy with route length as the denominator.
Kit list
- Handheld GPS
- High visibility vest
- Nitrile gloves
- Waterproof notebook
- Animal tracks and signs field guide (NHBS (UK) or a bookshop (US))
The day one mistake: Surveying at midday. Crows, foxes and traffic strip small carcasses within hours, so afternoon counts miss most hedgehogs and amphibians. Start at first light and be consistent.
| Route ID | Route length (km) | Date | Start time | Vehicle or foot | Species | Number | Age class | GPS easting and northing | Road side | Verge and adjacent habitat | Weather |
|---|---|---|---|---|---|---|---|---|---|---|---|
Thermal imaging transects for deer, hares and nocturnal mammals
Walk or drive fixed lines at night with a thermal camera and record every warm body with its distance and bearing. Detects deer and hares in cover that spotlighting misses and does not disturb the animals.
How to run it
- Plan straight transects that cross the habitat and mark GPS start and end points in daylight.
- Begin 1 h after sunset on clear nights below 10 C when the contrast between animals and ground is greatest.
- Scan a slow arc ahead and to both sides every 20 to 30 m, identify each animal with binoculars or a zoom in the thermal image, and record species and group size.
- Measure distance with a laser rangefinder and bearing with a compass at first detection, never after the animal moves.
- Repeat each transect 2 to 3 times over a fortnight and analyse in Distance software with a minimum of 60 to 80 detections per species.
Kit list
- Thermal imaging camera
- Laser rangefinder
- Sighting compass (Suunto or Silva, via an outdoor shop)
- Handheld GPS
- Headlamp with red light
The day one mistake: Counting the same herd twice after it runs ahead of you along the line. Record group position and heading and drop any group that reappears within 200 m in the direction of travel.
| Transect ID | Transect length (km) | Date | Start and end time | Air temperature (C) | Cloud and wind | Species | Group size | Distance (m) | Bearing (degrees) | Habitat | Observer |
|---|---|---|---|---|---|---|---|---|---|---|---|
Scent stations and track plates
A smoothed disc of sand or a sooted metal plate with a scent lure in the middle records the footprints of carnivores that visit overnight. The USFWS scent station index for foxes, coyotes and bobcats is the standard design.
How to run it
- Rake a 1 m circle of sieved sand or fine soil to a smooth surface, or lay a 40 by 80 cm aluminium track plate coated in soot or chalk and carbon inside a corrugated plastic tunnel.
- Place a fatty acid scent tablet or a few drops of lure on a stake in the centre and record GPS, habitat and date.
- Check every morning within 2 h of sunrise, photograph every track with a scale bar, then re smooth or replace the plate.
- Identify tracks with a field guide and record unclear prints as unknown; do not force a species onto a smudge.
- Run 3 to 5 nights, record station nights as the effort denominator, and rest the site for at least 4 weeks before repeating.
Kit list
- Fine play sand
- Aluminium sheet for track plates
- Contact paper
- Fatty acid scent tablets (USDA Pocatello Supply Depot (US) or NHBS (UK))
- Animal tracks and signs field guide (NHBS (UK) or a bookshop (US))
The day one mistake: Using so much lure that animals roll on the station and destroy every print. One tablet or 3 drops of lure per station is enough; more gives you a mess instead of tracks.
| Station ID | Station night | Date | GPS easting and northing | Substrate (sand or plate) | Lure type | Species | Number of track sets | Photo ID | Rain overnight (Y/N) | Habitat | Station nights total |
|---|---|---|---|---|---|---|---|---|---|---|---|
Deer browsing and impact assessment
Score browsing on seedlings, coppice regrowth and shrubs to measure the effect of deer on woodland structure. Follows the Forestry Commission Woodland Herbivore Impact Assessment and the AVID method (Assessing Vegetation Impacts from Deer, Cornell and New York DEC) used in North America.
How to run it
- Lay plots on a systematic grid and mark the centre with a stake and GPS so the plot can be relocated next year.
- In each plot record the height and browse status of every tree seedling and sapling under 2 m, counting the proportion of leading shoots browsed.
- Score ground flora and shrub layer on the 0 to 3 impact scale (none, light, moderate, heavy) using the indicator species and browse line height in the standard form.
- Note fraying, bark stripping, deer paths and dung groups so the impact can be attributed to deer rather than livestock or rabbits.
- Survey in February to April before bud burst, repeat annually on the same plots, and compare against fenced exclosure plots where they exist.
Kit list
- Measuring tape 30 m
- Handheld GPS
- Marking stakes
- Clipboard with survey form
- Diameter tape (Forestry Suppliers (US) or NHBS (UK))
The day one mistake: Scoring only the most obvious eaten patch beside the ride. Deer impact is patchy, so a fixed grid with plots in the dull interior of the stand is the only way to get a number you can compare next year.
| Stand ID | Plot ID | Date | GPS easting and northing | Plot area (m2) | Seedling species | Height class | Leading shoot browsed (Y/N) | Ground flora impact score 0 to 3 | Browse line height (cm) | Dung groups in plot | Other herbivore sign |
|---|---|---|---|---|---|---|---|---|---|---|---|
Behavioural sampling (focal follows, scan sampling, activity budgets, ethograms)
Watch animals in a structured way and record what they do using a written ethogram, so activity budgets and social interactions can be compared between sites or seasons. The Altmann 1974 sampling methods are still the standard.
How to run it
- Write an ethogram before day one: a list of mutually exclusive behaviours, each with a one sentence definition, and test it with a second observer until you agree on 90 percent of records.
- Choose the sampling rule: focal animal sampling for one individual, or scan sampling where you record what every visible animal is doing at a fixed instant.
- Set a timer and record at the beep, never in between; for focal follows note the start and end time and any minutes the animal was out of sight.
- Stay far enough away that the animal does not change behaviour because of you, and abandon a follow if it does.
- Balance observation time across morning, midday and evening and across individuals so the budget is not built on the tamest animal at the easiest hour.
The day one mistake: Writing down what the animal is doing when you look up rather than at the beep. Recording the interesting moments and skipping the resting ones inflates active behaviours by half. The timer decides when you record.
| Date | Site | Observer | Sampling rule (focal or scan) | Focal animal or group ID | Start time | End time | Minutes out of sight | Interval | Behaviour code | Nearest neighbour | Weather |
|---|---|---|---|---|---|---|---|---|---|---|---|
Snow tracking transects
Walk a fixed route after fresh snow and record every track crossing to give an index of lynx, marten, hare, fox and wolf abundance. The Finnish wildlife triangle scheme and the Minnesota carnivore track survey are the standard designs.
How to run it
- Wait 24 to 72 h after the snow stops so that animals have moved but tracks are still crisp; abandon the survey if it thaws or snows again.
- Walk the fixed line and record every set of tracks that crosses it, identifying species from print shape, gait and stride, and photographing anything uncertain with a ruler.
- Follow a track for 20 to 50 m off the line when needed to confirm species or the number of animals, then return to the same point.
- Record snow depth, snow age in hours and whether the surface is powder or crust, because these change detection more than animal numbers do.
- Divide crossings by transect length and by days since snowfall to make counts comparable between visits.
Kit list
- Snowshoes
- Handheld GPS
- Folding ruler
- Animal tracks and signs field guide (NHBS (UK) or a bookshop (US))
- Insulated gloves
The day one mistake: Surveying the morning after a heavy overnight fall. Nothing has moved yet, you record zero and conclude the species is absent. One clear night of animal movement is the minimum before the survey counts.
| Transect ID | Transect length (km) | Date | Hours since snowfall | Snow depth (cm) | Snow surface | Temperature (C) | Species | Number of crossings | Number of animals | GPS of crossing | Photo ID |
|---|---|---|---|---|---|---|---|---|---|---|---|
Wildlife crossing and underpass monitoring
Record which species use underpasses, green bridges, culverts and fence gaps and how often, to test whether mitigation on a road or railway works. Combines camera traps at each entrance with a raked track bed inside the tunnel.
How to run it
- Map every structure and fence end along the road and record dimensions, openness ratio and whether water or a dry ledge runs through.
- Mount a camera trap at each entrance at 40 to 60 cm height angled along the tunnel, set to 3 shot bursts with no delay, and secure it in a lockbox.
- Rake a 1 m wide bed of sand or marble dust across the full width inside the tunnel and check it every 2 to 4 weeks with the cameras.
- Score each visit as a complete crossing, a turn back or a pass by the entrance, because refusals are the key result for design.
- Place control cameras away from the structure to compare use with local abundance, and report crossings per camera night.
The day one mistake: Pointing the camera straight into the tunnel mouth. Backlight blows out every image and the trigger fires on every passing car. Angle the camera 30 to 45 degrees along the wall inside the entrance.
| Structure ID | Structure type and size | Camera ID | Deploy and check dates | Camera nights | Species | Number | Direction | Outcome (cross, turn back, pass by) | Track bed detections | Time of detection | Notes |
|---|---|---|---|---|---|---|---|---|---|---|---|
Chytrid and ranavirus swabbing
Rub a sterile swab over the skin of each amphibian and send the swabs to a lab for qPCR detection of Batrachochytrium dendrobatidis, B. salamandrivorans or ranavirus. The only reliable way to know whether a disease is present at a site.
How to run it
- Order sterile rayon tipped swabs and screw cap tubes from the lab you will use and agree the storage method (dry, or in 70 percent ethanol) before you go.
- Catch each animal with a new pair of nitrile gloves or a new plastic bag, and never let two animals share a container.
- Swab 5 strokes on each side of the belly, each inner thigh and each hind foot for chytrid (30 strokes total); for ranavirus take an oral or cloacal swab, or a toe clip only under a licence.
- Snap the swab tip into its labelled tube, keep tubes cool, and freeze them at the end of the day.
- Disinfect boots, nets and containers with 1 percent Virkon or 70 percent ethanol between every site, and send swabs with a chain of custody sheet.
Kit list
- Sterile rayon swabs (MW100 medical wire swabs via the testing lab, or NHBS (UK))
- Nitrile gloves
- Screw cap microtubes
- Cool box with ice packs
- Virkon S disinfectant
The day one mistake: Reusing gloves between two frogs. One positive animal contaminates the next swab and the site is recorded as an outbreak that never happened. A new pair of gloves per animal is the whole point of the method.
| Site | Water body ID | Date | Species | Animal number | Life stage | SVL (mm) | Swab tube ID | Swab type (skin or cloacal) | Storage method | Water temperature (C) | Handler |
|---|---|---|---|---|---|---|---|---|---|---|---|
Toad patrols and road crossing surveys
Volunteers walk a road crossing point on migration nights, count and carry toads, frogs and newts across, and record the dead. Froglife Toads on Roads registers crossings in the UK and the data show which sites need tunnels or road closures.
How to run it
- Register the crossing with Froglife (UK) or the local amphibian group and agree who is patrol coordinator and how the road authority is told.
- Patrol only on evenings above 5 C with rain or high humidity, wearing high visibility vests and a head torch, and start at dusk.
- Walk the road edge and verge in pairs, one on each side, picking up animals with wet hands or a bucket and carrying them in the direction they were heading.
- Count live animals by species and sex or pair, count the dead separately, and record the time and the weather.
- Release animals on the pond side at least 5 m beyond the road and never in the pond itself, and never drive a car along the crossing while patrolling.
Kit list
- High visibility vest
- Headlamp
- Bucket with lid
- Warning signs (Froglife or the local council for toad crossing road signs)
- Thermometer
The day one mistake: Carrying toads to the nearest verge rather than the direction they were travelling. Half of them turn round and cross again. Look at which way the animal faces and take it to the pond side or the terrestrial side accordingly.
| Crossing ID | Date | Start and end time | Air temperature (C) | Rain and wind | Patrol length (m) | Species | Sex or pair | Live carried | Dead | Direction of travel | Number of patrollers |
|---|---|---|---|---|---|---|---|---|---|---|---|
Mitigation capture and translocation with exclusion fencing
On development sites, amphibians and reptiles are fenced out, trapped and moved to a prepared receptor site before construction. The Natural England great crested newt and reptile mitigation guidelines set the effort and the fence specification.
How to run it
- Install a 500 mm high polythene or Herpetosure fence buried 100 mm and sloped to the site, with a 1 m strip mown at the base, and inspect it daily for gaps.
- Sink pitfall buckets every 10 m along the inside of the fence and lay felt or tin refugia at 5 to 10 m intervals with a minimum of 100 per ha for reptiles.
- Check every trap and refugium daily within 4 h of dawn, with cover boards checked before the pitfalls, and never leave buckets open in heat or frost.
- Record each animal by species, sex and life stage, move it the same day to the receptor site, and release it under cover in the evening or in shade.
- Continue until 5 clear days with no animals after the minimum 30 trapping days (60 for medium or large populations), then destructive search the site by hand before the fence comes down.
Kit list
- Amphibian exclusion fencing (Herpetosure or NHBS (UK); ERTEC or ACO (US))
- Pitfall buckets
- Roofing felt
- Nitrile gloves
- Handheld GPS
The day one mistake: Missing the daily check on a hot bank holiday. Newts and lizards die in dry buckets within a day and the licence is revoked. Two people are named on every day of the rota and the buckets have a damp sponge in each.
| Site | Fence section | Trap or refugium ID | Date | Check time | Trap days to date | Species | Sex | Life stage | Number | Receptor release point | Night minimum temperature (C) |
|---|---|---|---|---|---|---|---|---|---|---|---|
Terrestrial and stream visual encounter surveys
Search a fixed area or stream length for a fixed time, turning rocks, logs and leaf litter and replacing them, to record salamanders, frogs and newts on land. The USGS ARMI protocols and the Heyer et al. 1994 standard methods set the time constrained search rules.
How to run it
- Mark the plot or reach with GPS and flag the corners so the same area is searched every visit.
- Search for a fixed time, turning every cover object you can lift safely and replacing it exactly, and rake leaf litter with your fingers in 1 m squares within the plot.
- Handle animals only with wet or gloved hands, hold them for under 2 minutes for identification and measurement, and release them under the same object.
- In streams, work upstream so silt does not cloud the water ahead of you, and check the underside of rocks in riffles as well as the bank edge.
- Record search time, number of searchers and cover objects turned, and disinfect boots and gloves between sites.
Kit list
- Nitrile gloves
- Headlamp
- Hand rake
- Handheld GPS
- Reptiles and amphibians field guide (NHBS (UK) or a bookshop (US))
The day one mistake: Leaving a log rolled over. The moist underside dries, the salamander below has lost its home and the next visit finds nothing. Roll it back exactly and put the animal beside it, not under it, so it is not crushed.
| Site | Plot or reach ID | Date | Start time | Search time (person minutes) | Number of searchers | Cover objects turned | Species | Number | Life stage | Air and substrate temperature (C) | Rain in last 24 h (Y/N) |
|---|---|---|---|---|---|---|---|---|---|---|---|
Larval dip netting and tadpole counts
Sweep a dip net through pond margins and count and identify the tadpoles and larvae caught to confirm breeding and compare larval abundance between ponds. It is the standard larval confirmation method in the NARRS scheme in the UK and in the USGS ARMI protocols in the US.
How to run it
- Walk the pond margin and space the sweeps evenly so every habitat type (open water, emergent plants, submerged weed) gets a share.
- Sweep the net 1 m through the water and vegetation, then tip it into a white tray of pond water and count each species and stage.
- Identify larvae with a hand lens using tail fin shape, eye position and gill form, and photograph anything uncertain rather than keeping it.
- Return all larvae to the pond within 10 minutes and never transfer water, larvae or weed between ponds.
- Record the number of sweeps as the effort denominator and repeat 2 to 3 times through the season to catch late developers.
The day one mistake: Netting only at the easy access point on the one open bank. Tadpoles cluster in warm shallow weed and larvae hide under the far margin, so a single bank gives a count that changes with the wind, not the pond.
| Pond ID | Date | Time | Number of sweeps | Shoreline length (m) | Water temperature (C) | Species | Gosner or larval stage | Number | Sweep habitat | Water clarity | Surveyor |
|---|---|---|---|---|---|---|---|---|---|---|---|
Automated frog call recorders
Leave an AudioMoth or Song Meter beside the water to record frog and toad choruses through the night, then score calling activity from the files. Extends the NAAMP call index across many sites without night visits.
How to run it
- Set the recorder to a duty cycle such as 1 minute in 10 from 1 h before sunset to 1 h after sunrise, with a sample rate of 32 kHz, and test it at home for one night.
- Fix the unit inside a waterproof case on a stake or tree 1 to 2 m from the water edge and 1 m above ground, microphone pointing at the pond.
- Log GPS, deployment time, card ID and a reference photo, and add a temperature logger beside it because calling depends on temperature.
- Retrieve after 2 to 6 weeks, back up the cards, and score each 1 minute file with the NAAMP index 0 to 3 (none, individuals countable, overlapping, full chorus).
- Verify every species by listening to at least 3 files and checking a spectrogram before it enters the site list.
Kit list
- AudioMoth or Song Meter Mini recorder (Open Acoustic Devices via LabMaker or GroupGets; Wildlife Acoustics)
- Waterproof case for AudioMoth
- Temperature logger
- SD cards 64GB
- Lithium AA batteries
The day one mistake: Recording continuously at 48 kHz for six weeks. The card fills in a week and the batteries die in ten days, so the peak of the chorus is missed. A 1 minute in 10 duty cycle and 32 kHz captures every species and lasts the season.
| Site | Recorder ID | Card ID | Deploy date and time | Retrieve date and time | Duty cycle | Sample rate | File date and time | Species | Call index 0 to 3 | Air temperature (C) | Verified (Y/N) |
|---|---|---|---|---|---|---|---|---|---|---|---|
Crocodilian spotlight eyeshine counts
Drive a boat along a fixed stretch at night and count the red eyeshine of crocodiles, alligators and caimans, estimating size class for each. Standard for the Florida alligator, Australian saltwater crocodile and IUCN Crocodile Specialist Group monitoring.
How to run it
- Run the transect in daylight first to map hazards, and record water level and tide state because counts fall when the water is high.
- Start 1 h after sunset with one spotter on the bow holding a 100,000 candlepower spotlight or a strong headlamp at eye level, and the driver keeping a steady 8 to 10 km per h.
- Sweep the beam slowly across the water and both banks, and when eyes are seen approach to within 10 to 20 m to estimate total length from the snout to eye distance.
- Record every animal with GPS, size class (hatchling, juvenile, subadult, adult) and eyes only if it submerged before sizing.
- Stop if wind exceeds 15 km per h or it rains, and calculate animals per km of transect for each repeat.
The day one mistake: Shining the light from the driver's seat behind the spotter. The reflection only shows when the beam and your eye are on the same line, so the spotter holds the light beside their head and nobody else uses a torch.
| Transect ID | Transect length (km) | Date | Start and end time | Water level and tide | Wind and cloud | Air and water temperature (C) | Species | Size class | Eyes only (Y/N) | GPS easting and northing | Habitat |
|---|---|---|---|---|---|---|---|---|---|---|---|
Sea turtle in water surveys
Count sea turtles at sea from a boat or by snorkelling on reef flats and seagrass, and capture them by hand for tagging and measurement where permitted. Gives abundance and size structure of the foraging population that beach counts miss.
How to run it
- Plan transects in water under 15 m deep over seagrass or reef, and survey only in Beaufort 2 or less with the sun high for visibility.
- Run the boat at 8 to 10 km per h with one observer each side scanning 90 degrees and record each turtle with distance, angle, species, size class and behaviour at first sighting.
- For snorkel transects, swim a fixed line at a steady pace with a GPS in a dry bag on a float and count turtles within 5 m each side.
- Hand capture, where licensed, is done by a trained swimmer approaching from behind and above, gripping the front of the carapace and bringing the turtle up in under 2 minutes.
- On the boat, measure curved carapace length, check for existing tags, fit inconel flipper tags and a PIT tag, and release within 20 minutes at the capture point.
Kit list
- Mask, snorkel and fins
- Waterproof GPS
- Reticle binoculars (Steiner or Fujinon, via an optics dealer)
- Inconel flipper tags and PIT tags (National Band and Tag Company (US) for flipper tags; Biomark for PIT tags)
- Flexible measuring tape
The day one mistake: Chasing a turtle that has seen the boat. It dives, surfaces 200 m away and is counted again, and the capture attempt exhausts the animal. Record at first sighting and abandon any capture that goes past 2 minutes.
| Transect ID | Transect length (km) | Date | Start and end time | Sea state | Visibility (m) | Species | Size class | Distance and angle | Behaviour | Tag numbers | CCL (cm) |
|---|---|---|---|---|---|---|---|---|---|---|---|
Basking turtle counts
Count freshwater turtles hauled out on logs and banks from a distance with binoculars or a scope to index abundance and detect invasive sliders. A cheap alternative to trapping for painted, map and pond turtles.
How to run it
- Map the basking logs and banks on the first visit and choose vantage points at least 30 m away so turtles do not drop off as you arrive.
- Survey between 10 am and 2 pm on sunny days with light wind and air temperature of 18 to 28 C, when basking peaks.
- Approach each point quietly, wait 2 minutes, then scan for 10 to 20 minutes and count every turtle by species and size class using a scope for identification.
- Photograph groups so the counts can be checked and to record invasive species such as red eared sliders for the local recorder.
- Repeat 3 to 5 times through the season and use the maximum count per point as the index, with survey time and shoreline length as effort.
Kit list
- Spotting scope and tripod
- Binoculars 8×42
- Camera with zoom lens
- Thermometer
- Reptiles field guide (NHBS (UK) or a bookshop (US))
The day one mistake: Walking straight to the water edge. Turtles slide off at 50 m and the count is of ripples. Stop at the vantage point behind cover and let them settle before you count.
| Site | Point ID | Date | Time | Air temperature (C) | Water temperature (C) | Cloud and wind | Survey time (min) | Species | Size class | Number | Basking substrate |
|---|---|---|---|---|---|---|---|---|---|---|---|
Lizard noosing, hand capture and mark recapture
Catch lizards with a noose of fishing line on a pole or by hand, mark them with paint or toe codes, and recapture to estimate population size. The standard for wall lizards, sand lizards, anoles and skinks.
How to run it
- Tie a slip noose of 4 to 6 kg fishing line to the tip of a 1.5 to 3 m telescopic pole and practise on a pen cap until you can drop it over in one motion.
- Survey in the first 2 to 3 h of basking on sunny mornings, approaching slowly from the front and lowering the noose over the head, then lifting gently so the lizard hangs by the neck for a second only.
- Hold the lizard by the body, never the tail, record SVL, mass, sex and any tail loss, and mark it with a small dot of non toxic paint or a numbered scheme.
- Release at the exact capture point within 5 minutes and note the GPS so recaptures give movement as well as numbers.
- Run 3 to 5 sessions a few days apart and analyse with a closed population model, recording captures per person hour as the effort.
Kit list
- Telescopic pole
- Fishing line 6 kg
- Digital calipers
- Pesola spring scale (Pesola)
- Non toxic paint marker
The day one mistake: Grabbing the tail when the noose slips. The tail autotomises, the lizard loses fat stores and its survival for the year, and your recapture data is of a damaged animal. Hand goes over the shoulders or nowhere.
| Site | Plot or transect ID | Date | Session number | Person hours | Air temperature (C) | Species | Mark ID | New or recapture | SVL (mm) | Mass (g) | Sex and tail condition |
|---|---|---|---|---|---|---|---|---|---|---|---|
Tortoise burrow surveys with burrow camera
Find gopher or desert tortoise burrows on transects, measure them, and push a burrow camera in to see whether a tortoise is home. The USFWS gopher tortoise line transect distance sampling protocol is the standard for population estimates.
How to run it
- Walk parallel transects 10 to 20 m apart, or distance sampling lines, and record every burrow with GPS and its perpendicular distance from the line.
- Measure burrow width at 50 cm inside the entrance with calipers, because width predicts the carapace length of the occupant.
- Classify each burrow as active, inactive or abandoned from tracks, plastron slides and debris, then scope it with a burrow camera to confirm occupancy.
- Feed the camera slowly along the floor of the burrow to the end or until the tortoise is seen, and never dig, smoke or flood a burrow.
- Use only camera confirmed occupancy for the estimate and enter the perpendicular distances in Distance software with at least 60 to 80 occupied burrows.
Kit list
- Burrow camera (Environmental Management Services burrow scope (US), or a plumbing inspection camera with a 15 m cable)
- Digital calipers
- Handheld GPS
- Measuring tape 30 m
- Burrow identification guide
The day one mistake: Pushing the camera in fast and blind. It snags, the tortoise retreats, and the burrow collapses at the bend. Two people, one feeding cable and one watching the screen, and stop at the first sign of resistance.
| Site | Transect ID | Transect length (m) | Date | Burrow ID | GPS easting and northing | Perpendicular distance (m) | Burrow width (cm) | Activity class | Camera result | Tortoise size estimate | Commensal species seen |
|---|---|---|---|---|---|---|---|---|---|---|---|
Baited remote underwater video, BRUV
Drop a weighted frame with a camera and a bait bag to the seabed for an hour and count the fish that visit. MaxN, the maximum number of each species in one frame, gives a relative abundance that does not double count.
How to run it
- Build or buy a frame with a GoPro in a dive housing set to 1080p wide, a 1 to 1.5 m bait arm and 1 kg of crushed pilchard or mackerel in a mesh bag.
- Deploy from a boat at 250 to 500 m spacing so bait plumes do not overlap, with a rope and surface float, and log GPS, depth, time and visibility.
- Leave each rig for a 60 minute soak; national schemes use 60 minutes and less than that cannot be compared.
- Retrieve, download and label footage by site and date, and score every species with MaxN and time of first arrival in a spreadsheet or the GlobalArchive platform.
- Record visibility from the footage and the seabed type, because both change MaxN more than fish abundance does.
The day one mistake: Scoring total fish counted rather than MaxN. The same wrasse swims through 30 times and the site becomes a hotspot. Count only the most seen at once in one frame per species.
| Site | Rig ID | Date | Deploy and retrieve time | Soak time (min) | Depth (m) | Visibility (m) | Habitat | Bait type | Species | MaxN | Time of first arrival |
|---|---|---|---|---|---|---|---|---|---|---|---|
PIT tagging and antenna detection
Inject a glass passive integrated transponder into an animal and detect it when it passes an antenna in the stream or at a pond entrance. Works for fish, amphibians, reptiles and small mammals and gives survival, movement and growth with no recapture.
How to run it
- Anaesthetise fish in buffered MS 222 or clove oil under licence, or hold amphibians and reptiles with a wet gloved hand, and inject the tag with a sterile needle into the body cavity or under the skin.
- Scan each animal with a handheld reader before release to record the tag number, and hold fish in a recovery bucket until upright and swimming.
- Build antenna loops across the channel from 12 gauge wire in flexible conduit, tune them to the reader, and test read range with a tag on a stick at every point in the channel.
- Run the reader on a deep cycle battery with a solar panel, download detections weekly, and log any period the antenna was down.
- Analyse detections with the tagging records so every fish has a tag date, size and release point, and report tag loss from any recaptures.
Kit list
- PIT tags and injector (Biomark or Oregon RFID)
- Handheld PIT reader (Biomark or Oregon RFID)
- Antenna reader board (Biomark IS1001 or Oregon RFID)
- Deep cycle battery
- Solar panel 100 W
The day one mistake: Tagging fish under the minimum size. A 12 mm tag in a 50 mm fish kills it or is shed within a week, and the survival estimate is really a tag loss estimate. Follow the tag to body mass rule and use 8 mm tags for small animals.
| Site | Date | Species | Tag number | Tag size (mm) | Fork length (mm) | Mass (g) | Release point | Antenna ID | Detection date and time | Antenna uptime (h) | Water temperature (C) |
|---|---|---|---|---|---|---|---|---|---|---|---|
Acoustic telemetry for fish
Surgically implant an acoustic transmitter and moor receivers that log every fish passing within a few hundred metres. The method behind salmon migration, shark movement and barrier passage studies, and the Ocean Tracking Network shares detections across projects.
How to run it
- Choose transmitter size under 2 percent of body mass and a ping interval of 60 to 180 s so battery life covers the study.
- Anaesthetise the fish, make a 1 to 2 cm incision in the belly wall, insert the transmitter, close with 2 sutures and return the fish to recovery water; the whole procedure should take under 3 minutes.
- Moor receivers on a weighted line 1 to 2 m off the bottom with an acoustic release or a surface float, and range test with a test tag at 100, 200, 400 and 800 m on deployment day.
- Download receivers every 3 to 6 months, replace batteries, and record the exact times of any gaps.
- Filter false detections (single hits within a 24 h window), then build movement histories per fish and register the array with the OTN or the European Tracking Network.
Kit list
- Acoustic transmitters (Innovasea (Vemco) or Lotek)
- Acoustic receivers (Innovasea (Vemco) or Lotek)
- Surgical kit (veterinary supplier; implant surgery is done or supervised by a licensed vet)
- Fish anaesthetic MS 222 (a veterinary supplier, on prescription)
- Deep cycle battery
The day one mistake: Skipping the range test. The receivers are 800 m apart in a noisy estuary where the real range is 200 m, and the fish pass through the gaps undetected. Test on the day and again in a storm and lay the array for the worst case.
| Fish ID | Transmitter ID | Species | Fork length (mm) | Tagging date | Release point | Receiver ID | Receiver position | Detection date and time | Range at deployment (m) | Receiver uptime (days) | Water temperature (C) |
|---|---|---|---|---|---|---|---|---|---|---|---|
Smolt traps, rotary screw traps and fish counters
A rotating cone in the current catches migrating salmon and trout smolts in a live box so they can be counted, measured and marked before release, while resistivity or video counters count returning adults at a weir. Standard in Environment Agency, Marine Scotland and USFWS salmon monitoring.
How to run it
- Site the trap in the main current at a depth that keeps the cone turning, anchored to both banks or a bridge, and fit a debris boom upstream.
- Check the live box at dawn and dusk without fail, netting fish into a bucket of river water, counting each species and measuring 30 fish per day.
- Mark a batch of 50 to 100 smolts each week with a fin clip or dye and release them 500 m upstream; the proportion recaptured is the trap efficiency for that week.
- Record trap hours, cone revolutions and river level every check, and stop the cone during spates so fish are not injured in the box.
- Divide the daily catch by efficiency to estimate the total run, and reconcile with the adult counter data for the same cohort.
Kit list
- Rotary screw trap (EG Solutions (US) or a bespoke fabricator; hire through a fisheries consultancy in the UK)
- Fish measuring board (Forestry Suppliers (US) or NHBS (UK))
- Bait bucket aerator
- Fine mesh landing net (a fishing supplier)
- Water level logger
The day one mistake: Leaving the live box overnight in a rising river. Debris fills the box, oxygen falls, and 200 smolts are dead by morning. Check at dawn and dusk and lift the cone the moment the level rises.
| Trap ID | Date | Check time | Trap hours since last check | River level (m) | Water temperature (C) | Species | Number | Fork length (mm) | Marked released | Marked recaptured | Cone stopped (Y/N) |
|---|---|---|---|---|---|---|---|---|---|---|---|
Larval fish light traps and ichthyoplankton tows
Light traps attract fish larvae and juveniles at night while plankton nets towed behind a boat sample eggs and larvae in the water column. Together they show where and when fish spawn and how many larvae survive.
How to run it
- Assemble a light trap from a clear box with funnel entries and a waterproof LED, or buy a quatrefoil trap, and moor it 1 m below the surface on a weighted line.
- Set traps 1 h after sunset on dark nights and retrieve at dawn, rinsing the catch into a labelled jar of 70 percent ethanol or 5 percent buffered formalin.
- For tows, fit a bongo or 500 micron plankton net with a flowmeter in the mouth, tow at 1 to 2 knots for 5 to 10 minutes, and record the flowmeter reading to convert to volume.
- Rinse the cod end into a jar, label inside and out with site, date and gear, and keep it out of the sun.
- Sort under a microscope, identify larvae with a regional key, and report numbers per trap night or per 100 m3 of water.
Kit list
- Plankton net 500 micron (Forestry Suppliers (US) or NHBS (UK))
- Flowmeter (General Oceanics or KC Denmark)
- Waterproof LED dive light
- Sample jars
- Zooplankton identification key
The day one mistake: Setting the traps on a full moon. Moonlight swamps the trap light and the catch drops by 90 percent, so the season looks empty. Set on the new moon and the nights either side, and record moon phase every time.
| Station | Date | Gear (trap or tow) | Set time | Retrieve time | Soak or tow duration (min) | Flowmeter reading | Volume filtered (m3) | Moon phase | Water temperature (C) | Species | Number |
|---|---|---|---|---|---|---|---|---|---|---|---|
Lamprey ammocoete surveys
Electrofish or scoop the fine sediment margins of a river to catch lamprey larvae, which live buried for 3 to 7 years and are the only reliable stage to survey. The Environment Agency and JNCC ammocoete method sets the quadrat and effort rules.
How to run it
- Walk the reach and mark every patch of soft silt or sand with organic matter in slack water, which is the only habitat ammocoetes use.
- Place a 0.5 m2 quadrat on the silt and electrofish it in slow pulses with a lamprey setting (low frequency, 3 to 5 Hz) for 3 minutes while a second person nets larvae as they emerge.
- Where electrofishing is not licensed, take 5 to 10 scoops of sediment with a bucket into a sieve and wash gently in a tray.
- Measure every larva to the millimetre and separate brook and river lamprey from sea lamprey by pigment pattern on the tail and oral hood.
- Return larvae to the same silt bed and report density per m2 by habitat type, with sediment depth and water temperature.
Kit list
- Backpack electrofisher (Smith Root or Electracatch; hire in the UK from an Environment Agency approved contractor)
- Quadrat frame 50 cm (NHBS (UK), Forestry Suppliers (US), or make from PVC pipe)
- Fine mesh landing net (a fishing supplier)
- Sieve 1 mm
- Waders
The day one mistake: Fishing the gravel riffle where you expect fish. Ammocoetes live only in soft silt, so a riffle survey scores zero and the river is wrongly reported as empty. Look for silt with decaying leaves in the slack edges.
| Reach ID | Date | Quadrat ID | Habitat (silt, sand, gravel) | Sediment depth (cm) | Water temperature (C) | Fishing time (s) | Species | Number | Length (mm) | Density per m2 | Conductivity (uS) |
|---|---|---|---|---|---|---|---|---|---|---|---|
Trawl and beam trawl surveys
A net towed along the seabed by a research vessel catches bottom fish and shellfish at fixed stations so that stock size and age structure can be tracked year on year. The ICES International Bottom Trawl Survey and the NOAA groundfish surveys are the reference designs.
How to run it
- Use the standard gear for the region (GOV trawl for the North Sea IBTS, 2 m or 4 m beam trawl for flatfish and shrimp) and never change mesh or rigging between years.
- Tow for exactly 15 minutes (beam) or 30 minutes (otter trawl) at the standard speed with a start and end position, and record warp length and wing spread.
- Sort the whole catch by species on deck, weigh each species, and measure the length of all fish or a random subsample of 100 per species.
- Take otoliths and scales from a stratified length sample for ageing, and record maturity stage and sex.
- Log depth, bottom temperature and salinity with a CTD at each station and report catch per hour or per swept area.
Kit list
- Beam trawl 2 m (a commercial net maker; the Cefas or NOAA survey specification)
- Fish measuring board (Forestry Suppliers (US) or NHBS (UK))
- Deck scale 30 kg
- Otolith envelopes
- Marine field guide
The day one mistake: Changing the tow speed because the catch is poor. Swept area is the denominator, so a faster tow makes the fish look denser than last year. The standard speed and duration are the survey, not a guideline.
| Station | Date | Shoot and haul time | Tow duration (min) | Speed (knots) | Start and end position | Depth (m) | Bottom temperature (C) | Species | Total weight (kg) | Length (cm) | Otolith sample ID |
|---|---|---|---|---|---|---|---|---|---|---|---|
Hydroacoustic echo sounder surveys
A scientific echo sounder sends pulses down through the water and the returned echoes give the number and size of fish in the column across the whole lake or shelf in one night. The standard for pelagic species such as vendace, coregonids, sprat and herring, and set by ICES and the EU Water Framework Directive guidance.
How to run it
- Calibrate the transducer with a tungsten carbide sphere at the start of every survey and record the calibration gain.
- Run transects at night when fish leave the bottom and disperse, at 5 to 10 knots, with the transducer pole mounted 0.5 to 1 m below the surface.
- Plan parallel or zigzag lines at a spacing that gives a coverage degree of at least 6 (total line length divided by the square root of the area).
- Ground truth the echoes with a trawl, gill net or camera on the same night so echo sizes can be turned into species and lengths.
- Process in Echoview or Sonar5, remove surface and bottom dead zones, and report fish density per hectare or biomass per square kilometre with the coverage degree.
Kit list
- Scientific echo sounder (Kongsberg Simrad EK80 or Biosonics DT X)
- Calibration sphere (Kongsberg Simrad or Biosonics)
- Transducer pole mount (make from aluminium tube or a boat builder)
- GPS with NMEA output
- Deep cycle battery
The day one mistake: Surveying in the afternoon when the fish are in a tight layer on the bottom inside the dead zone. The lake looks empty and the biomass is a fraction of the truth. Run at night, and repeat the same night pattern every year.
| Survey ID | Date | Transect ID | Start and end time | Line length (km) | Coverage degree | Calibration gain | Transducer depth (m) | Bottom depth (m) | Fish density per ha | Ground truth species | Water temperature profile (C) |
|---|---|---|---|---|---|---|---|---|---|---|---|
Freshwater mussel searches (bathyscope, excavation, settlement plates)
Look for native mussels on the bed with a bathyscope, then excavate small quadrats to find buried juveniles, and set settlement plates where zebra or quagga mussels are suspected. Follows the Environment Agency and USFWS freshwater mussel survey guidance.
How to run it
- Get a survey licence first where pearl mussels or listed unionids might occur, and confirm river levels are low and visibility is at least 1 m.
- Walk upstream through each 100 m reach for a fixed 15 minutes, viewing the bed through the bathyscope in a zigzag and counting every live mussel and empty shell separately.
- Place a 0.25 sq m quadrat at 5 to 10 points on the reach, dig the top 10 cm of bed into a sieve by hand and count juveniles under 30 mm.
- Return every animal to its exact spot, siphon end up, pressed gently into the sediment, and record shell length of a subsample with callipers.
- Hang settlement plates from a fixed post at 1 m depth for 4 to 8 weeks in summer and check them for zebra mussel spat under a hand lens before you Check Clean Dry all kit.
Kit list
- Bathyscope (NHBS (UK) or Forestry Suppliers (US))
- Quadrat 50 cm (NHBS (UK), Forestry Suppliers (US), or make from PVC pipe)
- Sieve 2 mm
- Vernier callipers
- Chest waders
The day one mistake: Digging mussels out of the bed and laying them on the bank to measure. Adults left out of the water for more than a few minutes in summer sun die. Measure each one in a tray of river water and replace it within 2 minutes.
| Reach ID | Date | Search time (min) | Reach length (m) | Water depth (cm) | Visibility (m) | Substrate | Species | Live count | Dead shell count | Juvenile count per quadrat | Shell lengths (mm) |
|---|---|---|---|---|---|---|---|---|---|---|---|
Crayfish hand search, night torching and refuge traps
Find crayfish by lifting stones by hand, by torching the shallows at night when they are active, and by leaving artificial refuge traps overnight. Used for the white clawed crayfish protocol of the Environment Agency and for signal crayfish spread mapping.
How to run it
- Check the biosecurity plan first: survey any native site before any invasive site on the same day, and disinfect and dry all kit between waters.
- In daylight work upstream lifting every stone larger than your hand for a fixed time, placing each stone back as it was and holding the net downstream of your hands.
- After dark walk the same reach with a strong torch and count every crayfish seen on the bed for a timed 30 minutes.
- Set 10 refuge traps of bundled plastic tubes on the bed, each fitted with an otter guard, anchored and marked, and lift them after 24 h into a white tray.
- Identify each animal to species, record sex and carapace length, and return natives at the capture point; invasive species must not be returned to the water and must be killed humanely on site by freezing or destruction of the head, as your licence requires.
Kit list
- Headlamp
- Hand net
- White sorting tray
- Vernier callipers
- Artificial refuge trap (make from 10 lengths of 15 cm plastic pipe cable tied to a base plate, or NHBS (UK))
The day one mistake: Putting a captured signal crayfish back because it was not the target. Returning an invasive species is illegal in the UK and spreads plague. Read the rule for your area before the first trap goes in and take a bucket and a lid.
| Site | Date | Method (hand, torch, trap) | Search time (min) or trap nights | Bank length (m) | Water temperature (C) | Species | Number | Sex | Carapace length (mm) | Berried (Y/N) | Plague signs (Y/N) |
|---|---|---|---|---|---|---|---|---|---|---|---|
Dragonfly exuviae searches and larval sampling
Collect the cast larval skins left on emergent stems and sample larvae with a pond net to prove breeding rather than just visiting adults. Exuviae are the British Dragonfly Society standard for confirming a breeding site.
How to run it
- Mark a 20 m stretch of emergent vegetation and search it for a fixed 20 minutes on each visit, checking stems, trunks and bridge piers to 2 m above water.
- Lift each exuvia by the stem with tweezers, drop it into a labelled pot and note the height above water and the plant it was on.
- In April to June sweep a pond net for 1 minute through 10 stations of submerged and emergent vegetation and tip into a white tray.
- Identify larvae in the tray with a hand lens, record instar as final or earlier, return them within 10 minutes, and Check Clean Dry the net and tray before the next pond.
- Identify exuviae at home under a microscope with a key, and keep them in dry pots as vouchers for county recorders.
The day one mistake: Searching exuviae only on sunny afternoons. Most emergence happens overnight and skins fall in wind within a day or two, so the first search after a dry still night is the one that counts. Go early and go often.
| Site | Date | Time | Search length (m) | Search time (min) | Species | Exuviae count | Larvae count | Instar | Height above water (cm) | Substrate plant | Water level |
|---|---|---|---|---|---|---|---|---|---|---|---|
Surber and Hess quantitative sampling
Sample a fixed area of stream bed with a Surber (0.09 sq m) or Hess (0.086 sq m) frame so invertebrate counts convert to density per square metre. Used where the kick sample is not enough and you need numbers, following EPA rapid bioassessment and EA guidance.
How to run it
- Work upstream so you never sample bed you have walked over, choosing 5 random points across one riffle at 10 to 30 cm depth.
- Set the frame on the bed with the net mouth facing downstream and press the skirt down to seal it.
- Scrub every stone inside the frame into the net, then stir the gravel to 5 cm for 60 seconds by hand.
- Wash the net contents into a jar, label inside and out, preserve in 70 percent ethanol, and Check Clean Dry waders, net and frame before the next site.
- Sort the whole sample in the lab, identify to family or species, and divide counts by the frame area for density per square metre.
Kit list
- Surber sampler (Wildco via Forestry Suppliers (US) or NHBS (UK))
- Sample jars 500 ml
- Ethanol 70 percent
- Chest waders
- Stopwatch
The day one mistake: Sampling a nice looking riffle and calling it the site. Five samples from one chosen spot cannot represent a reach. Randomise the points across the whole riffle with a table or a thrown quadrat.
| Site | Date | Sample number | Frame area (sq m) | Depth (cm) | Velocity (m per s) | Substrate size class | Disturbance time (s) | Taxon | Count | Density per sq m | Preservative |
|---|---|---|---|---|---|---|---|---|---|---|---|
eDNA metabarcoding for invertebrate communities
Filter water and sequence the trace DNA to list the invertebrate taxa present in a river or pond without sorting a sample. Best used alongside a kick sample as the reference lists are still incomplete for many groups.
How to run it
- Book a lab that runs COI metabarcoding first and get their sampling kit, as the filters and preservative must match their pipeline.
- Wear fresh nitrile gloves at every site, Check Clean Dry boots and waders before entering, and open a bottle of distilled water at the site to make a field blank.
- Collect 3 replicates of 1 to 2 litres at points 10 m apart, upstream of where you stand, and filter each on site with the syringe kit until it clogs.
- Record the volume filtered, add the preservative buffer, seal each filter in its tube and keep it cold and dark.
- Send samples within 24 h or freeze them, and when results come back keep the raw read counts and the negative control results with the species list.
Kit list
- eDNA filter kit (an accredited eDNA lab)
- Nitrile gloves
- Sterile 1 litre bottles
- Cool box with ice packs
- Distilled water
The day one mistake: Sampling the downstream site first and walking upstream. DNA from boots and kit carries between sites and the upstream sample then shows species that live 2 km away. Always work from the cleanest or most upstream site down.
| Site | Date | Replicate | Volume filtered (ml) | Filter ID | Field blank ID | Water temperature (C) | Flow state | Turbidity | Lab batch | Taxa detected | Reads per taxon |
|---|---|---|---|---|---|---|---|---|---|---|---|
Invasive non native species checks with Check Clean Dry
Look for the main freshwater invaders (killer shrimp, zebra mussel, signal crayfish, floating pennywort, New Zealand pygmyweed) at every site and follow the Check Clean Dry biosecurity routine so you never move them. A habit that sits beneath every other freshwater method.
How to run it
- Before the season print the GB Non Native Species Secretariat or your state ID sheets for the 10 target species and keep them in the kit bag.
- On arrival spend 10 minutes checking the margin and any hard surfaces for shells, weed rafts and shrimp in a white tray.
- On leaving check every net, wader and rope for mud, weed and animals, and pick them off into a bag for disposal in general waste.
- Clean kit with water at the site or a 1 percent Virkon Aquatic dip (10 g per litre) for 15 minutes, then dry it completely for 48 h before the next water, and keep a second set of kit for known infested sites.
- Report every new sighting with a photograph to the national alert scheme within 24 h, and never return a suspected invader to the water.
The day one mistake: Rinsing waders in the next river to clean them. That is how killer shrimp moved between reservoirs. Clean at the car with your own water and let the kit dry fully, or use a dedicated set for each catchment.
| Site | Date | Arrival check time (min) | Departure check time (min) | Species looked for | Species found | Count or cover | Photo ID | Kit cleaned (Y/N) | Dry time before next site (h) | Reported to (scheme) |
|---|---|---|---|---|---|---|---|---|---|---|
Beating trays for canopy invertebrates
Hold a white tray under a branch and strike the branch so the insects fall onto the cloth, then collect them with a pooter. The standard way to sample beetles, bugs and caterpillars from foliage.
How to run it
- Choose 10 trees of the target species along a path and tag them so the same trees are sampled each month.
- Hold the tray 30 cm under a branch at head height and give 5 sharp taps with a stick within 3 seconds, then stop.
- Suck small insects into the pooter and drop larger ones into a pot with a paintbrush before they fly, working fast in the first 30 seconds.
- Record the tree, branch height and species then repeat on 3 more branches on different sides of the tree.
- Identify in the field where you can and preserve the rest in 70 percent alcohol with a pencil label inside the tube.
Kit list
- Beating tray (Watkins and Doncaster (UK) or Forestry Suppliers (US), or make from a white sheet on two crossed canes)
- Pooter (Watkins and Doncaster (UK) or Forestry Suppliers (US))
- Specimen tubes
- Fine paintbrush
- Hand lens 10x
The day one mistake: Beating wet foliage after rain. Everything sticks to the leaves and the count is a fraction of the true number. Wait until the canopy is dry and beat in still weather.
| Site | Tree ID | Tree species | Date | Time | Branch height (m) | Taps per branch | Branches per tree | Taxon | Count | Life stage | Wind |
|---|---|---|---|---|---|---|---|---|---|---|---|
Timed searches for snails and slugs with litter sieving
Search under logs, stones and at grass bases for a fixed time, then sieve leaf litter to find the small snails that hand searching misses. The Conchological Society method for site lists.
How to run it
- Go after rain or at night when slugs are out, and search a defined patch for exactly 30 minutes turning logs and stones and putting each back.
- Pick every snail and slug into a pot with damp tissue, counting live and empty shells separately.
- Fill a 1 litre bag with leaf litter and the top 1 cm of soil from 3 spots, especially under hedges and by walls.
- At home dry the litter for 2 days then sieve it through 5 mm and 2 mm meshes and pick the fine fraction under a lamp with a lens.
- Identify with a key, photograph slugs alive on a white card before they go home, and release at the site of capture.
The day one mistake: Searching in a dry spell. Snails seal up and slugs go 20 cm underground, so the site looks empty. Time the visit for the first damp morning after a wet night and search again.
| Site | Date | Time | Weather (wet or dry) | Search time (min) | Litter volume (litres) | Microhabitat | Species | Live count | Shell count | Substrate pH | Photo ID |
|---|---|---|---|---|---|---|---|---|---|---|---|
Butterfly egg, larval and web searches
Search the larval foodplant for eggs, caterpillars or silk webs, which proves breeding and can be counted when the adults are hard to see. Butterfly Conservation uses this for brown hairstreak eggs, marsh fritillary webs and pearl bordered fritillary larvae.
How to run it
- Read the species guidance for the stage and month; brown hairstreak eggs are counted on blackthorn in winter, marsh fritillary webs in late August and September.
- Mark a search plot or a fixed length of hedge and search for a timed 30 minutes or check 100 plants, whichever the protocol says.
- Check the underside of leaves and the stem forks at the height the guidance names and count each egg, larva or web once.
- Note the plant species, its height, sun or shade, and mark larger finds with a discreet tag so they can be followed.
- Never remove eggs or larvae; photograph and log the location for the county recorder.
Kit list
- Hand lens 10x
- Handheld GPS
- Flagging tape
- Butterfly field guide (NHBS (UK) or a bookshop (US))
- Waterproof notebook
The day one mistake: Counting brown hairstreak eggs on old thick blackthorn. Females lay on 1 to 3 year old growth at the fork of a twig, so time spent on old wood is wasted. Search young sunny growth at waist height.
| Site | Date | Species | Stage | Search time (min) or plants checked | Foodplant | Plant height (cm) | Aspect and shade | Count | Web size (cm) | Weather | Photo ID |
|---|---|---|---|---|---|---|---|---|---|---|---|
Orthoptera surveys with bat detector and sweep net
Walk a transect with a bat detector to hear the songs of grasshoppers and bush crickets that are too high for most ears, and sweep the vegetation to confirm identity. The Orthoptera Recording Scheme method.
How to run it
- Survey on a dry afternoon over 18 C, between 13:00 and 17:00 for grasshoppers and into dusk for bush crickets.
- Walk the transect slowly with the detector set to 25 kHz for grasshoppers and 40 kHz for bush crickets, stopping when you hear a song.
- Count singing males within 5 m of the line and identify the song with a reference recording.
- At 5 stops make 20 sweeps of the net through the sward and tip the catch into a pot to confirm species and sex.
- Record nymphs separately and release everything at the stop.
Kit list
- Bat detector (Wildlife Acoustics or Titley Scientific; NHBS (UK))
- Sweep net (Watkins and Doncaster (UK) or Forestry Suppliers (US))
- Specimen pots
- Thermometer
- Hand lens 10x
The day one mistake: Surveying in the morning. Most grasshoppers do not sing until the ground has warmed after midday, so a morning transect records a tenth of what is there. Come back after lunch in sun.
| Site | Transect ID | Date | Start time | Transect length (m) | Walk time (min) | Temperature (C) | Cloud and wind | Detector frequency (kHz) | Species | Singing males | Sweeps per stop | Net catch count | Nymphs |
|---|---|---|---|---|---|---|---|---|---|---|---|---|---|
Saproxylic beetle surveys (flight interception and vane traps on veteran trees)
Hang flight interception or window traps on trees with deadwood features to catch the beetles that breed in decaying wood. The standard for scoring veteran tree sites by the Saproxylic Quality Index.
How to run it
- Pick 10 to 20 trees with hollows, rot holes, sap runs or dead limbs and photograph each feature with a tree tag number.
- Hang the trap 2 to 4 m up next to the deadwood feature with a rope over a branch so it can be lowered.
- Fill the collecting bottle with 50 percent propylene glycol and a drop of detergent and empty it every 14 days.
- Strain the catch into 70 percent ethanol, label with tree ID and dates, and count the trap days.
- Sort to family in the lab, send difficult beetles to a specialist, and calculate the index from the published species list.
Kit list
- Flight interception trap (Watkins and Doncaster (UK) or Forestry Suppliers (US), or make from clear acrylic and a funnel)
- Propylene glycol
- Sample jars 500 ml
- Throw line
- Tree tags (Forestry Suppliers (US))
The day one mistake: Hanging traps in the open on a pole. Saproxylic beetles fly to the tree feature, not the field, so a trap 5 m from the hollow catches flies. Hang it touching the trunk beside the feature.
| Tree ID | Tree species | Girth (cm) | Deadwood feature | Trap height (m) | Set date | Empty date | Trap days | Taxon | Count | Sample ID | Observer |
|---|---|---|---|---|---|---|---|---|---|---|---|
Stag beetle dusk transects
Walk a fixed route at dusk and count flying and walking stag beetles, following the PTES Great Stag Hunt method. One of the few beetle surveys the public can run.
How to run it
- Choose a route through gardens, parks or wood edge with old stumps and walk it on warm still evenings above 15 C.
- Start 15 minutes before sunset and walk the 500 m at a slow steady pace for 30 minutes, once a week for 6 weeks.
- Count every beetle, note sex, whether flying or walking, and any found dead on the pavement.
- Log the exact spot on GPS for each sighting and the nearest stump or deadwood.
- Report every record to the PTES or your local recording scheme and repeat the route on the same weekday each year.
The day one mistake: Walking at sunset then giving up. Peak flight is 30 to 60 minutes after sunset once the air is still, so a survey that ends at sunset misses the main pulse. Stay until it is fully dark.
| Route ID | Date | Start time | End time | Length (m) | Temperature (C) | Wind | Sex | Flying or walking | Alive or dead | GPS | Deadwood nearby |
|---|---|---|---|---|---|---|---|---|---|---|---|
Ant surveys (baiting cards, nest counts)
Lay baits of tuna and honey on cards to draw foraging ants, and count nest mounds in a plot to estimate colony density. Bait cards follow the standard ant sampling methods of Agosti et al. and the plot count follows the UK wood ant survey guidance.
How to run it
- Set out 20 index cards at 10 m spacing along a line, each with a teaspoon of tuna and a drop of honey, between 10:00 and 16:00 on a warm dry day.
- After 60 minutes photograph each card, count the ants by species and collect 5 workers per species into alcohol.
- Mark out a 10 by 10 m plot and search it for nests by turning stones and looking for mounds and soil craters.
- Measure each wood ant mound height and diameter and mark it with GPS so it can be re found.
- Identify with a key under a microscope and send difficult specimens to a recorder.
The day one mistake: Checking bait cards after 5 hours. Ants recruit in tens of minutes and the dominant species then excludes the rest, so a late check shows one species per card. Check at 60 minutes exactly.
| Site | Date | Time | Temperature (C) | Card number | Bait type | Species | Count at 60 min | Plot area (sq m) | Nest count | Mound height (cm) | GPS |
|---|---|---|---|---|---|---|---|---|---|---|---|
Spider and grassland suction sampling (G vac)
Use a converted garden vacuum to suck spiders, bugs and beetles out of short vegetation over a known area. Gives density per square metre and catches the small ground layer species a sweep net misses.
How to run it
- Fit a fine mesh bag inside the nozzle of a leaf blower vacuum and mark the nozzle area, usually 0.1 sq m.
- Sample only when the sward is dry, placing the nozzle firmly onto the ground for 10 seconds at 10 spots 1 m apart.
- Tip the bag into a large tray, pick the catch into alcohol with a pooter and note the sward height.
- Repeat for 10 samples per site along a random line and record the total area as 1 sq m per sample.
- Sort in the lab to family and count, then send spiders to a recorder for species.
Kit list
- Garden leaf vacuum
- Fine mesh net bag
- Pooter (Watkins and Doncaster (UK) or Forestry Suppliers (US))
- White sorting tray
- Ear defenders
The day one mistake: Sampling after dew. Wet vegetation clogs the bag and the animals stay glued to the sward, so morning counts are far lower than afternoon counts at the same site. Wait until the grass is dry to the touch.
| Site | Date | Time | Sample number | Nozzle area (sq m) | Placements | Seconds per placement | Sward height (cm) | Vegetation dry (Y/N) | Taxon | Count | Density per sq m |
|---|---|---|---|---|---|---|---|---|---|---|---|
Glow worm transects
Walk a route after dark and count the glowing females, following the UK Glow worm Survey method. Cheap, pleasant and the only way to count a species you cannot see by day.
How to run it
- Choose a route along a bank, verge or old grassland and walk it once in daylight to learn the ground.
- Start 1 h after sunset on a warm still night and walk slowly without a torch, using red light only to write.
- Count every glowing female within 5 m each side and mark the position on GPS, noting the vegetation height.
- Count glowing larvae separately, which glow more weakly and move.
- Repeat weekly for at least 5 nights to find the peak, and report the peak count as the transect result.
The day one mistake: Walking with a white headlamp on. Females stop glowing when lit and the count collapses. Walk dark, let your eyes adjust for 10 minutes, and use red light only to write.
| Route ID | Date | Start time | End time | Length (m) | Temperature (C) | Cloud and moon | Females glowing | Larvae glowing | GPS | Vegetation height (cm) | Peak visit (Y/N) |
|---|---|---|---|---|---|---|---|---|---|---|---|
Tick drag sampling
Drag a white cloth over vegetation so questing ticks attach, then count them per 100 sq m. The CDC and UK Health Security Agency method for tick density and disease risk mapping.
How to run it
- Sew a 1 by 1 m white flannel cloth to a pole with a rope and treat clothing with permethrin the day before.
- Drag the cloth at walking pace for 10 m, stop, and check both sides in good light.
- Pick ticks off with fine forceps into a tube of ethanol and record stage as larva, nymph or adult.
- Repeat for 10 drags along a random route through the habitat and record temperature and humidity.
- Check your own clothing fully at the end and report density as ticks per 100 sq m.
Kit list
The day one mistake: Dragging through wet grass early in the morning. Ticks do not quest on wet vegetation and the cloth picks up nothing. Sample when the sward is dry and humidity is between 50 and 85 percent.
| Site | Date | Time | Drag number | Drag length (m) | Cloth area (sq m) | Habitat | Temperature (C) | Humidity (percent) | Larvae | Nymphs | Adults |
|---|---|---|---|---|---|---|---|---|---|---|---|
Mosquito trapping and larval dipping
Run a baited light or BG trap overnight for adult mosquitoes and dip standing water with a ladle for larvae. Used by public health teams and for invasive Aedes surveillance.
How to run it
- Hang the trap at 1.5 m in shade near vegetation with the CO2 or lure fitted and switch it on 1 h before dusk.
- Collect the catch bag at dawn, kill in a freezer and count by species and sex under a lens.
- At every standing water body take 20 dips with a 350 ml dipper along the edge, tilting slowly to avoid a shadow, and Check Clean Dry the dipper between water bodies.
- Count larvae and pupae per dip, pipette a sample into alcohol for ID and note the water type.
- Set larval traps of black cups with water for invasive Aedes and check for eggs on the paper strip after 7 days.
Kit list
- Mosquito trap (BG Sentinel by Biogents or CDC light trap via Clarke or John W. Hock (US); NHBS (UK))
- Larval dipper (BioQuip style dipper via Forestry Suppliers (US), or make from a 350 ml cup on a 1 m pole)
- Pipettes
- Specimen tubes
- Cool box with ice packs
The day one mistake: Dipping straight into the water and creating a shadow. Larvae dive at the first movement and the dip is empty. Approach from the sun side, hold still for 30 seconds, then dip in one slow movement.
| Site | Date | Trap type | Trap night | Adults by species | Sex | Water body | Dip number | Larvae per dip | Pupae per dip | Water temperature (C) | Shade |
|---|---|---|---|---|---|---|---|---|---|---|---|
Dung beetle baited pitfalls
Sink a pot in the ground with fresh dung suspended above it to catch the beetles that fly to it. The Dung beetle UK Mapping Project and tropical rapid assessment method.
How to run it
- Ask the farmer for fresh cattle or sheep dung from animals not treated with ivermectin in the last 4 weeks.
- Sink a 1 litre pot flush with the ground and add 5 cm of water with a drop of detergent.
- Wrap 200 g of dung in muslin and hang it 5 cm above the pot on a wire; place a rain cover on stakes.
- Set 10 traps at 50 m spacing and collect after 48 h, straining beetles into alcohol.
- Record the livestock present, sward height and soil type, and identify beetles with a key or send to the mapping project.
The day one mistake: Using dung from wormed cattle. Ivermectin residues repel or kill the beetles and the trap catches nothing for weeks. Ask about treatment dates before collecting the bait.
| Site | Date | Trap number | Bait type | Trap hours | Livestock present | Wormer used (Y/N) | Sward height (cm) | Soil type | Taxon | Count | Weather |
|---|---|---|---|---|---|---|---|---|---|---|---|
Invasive plant mapping
Walk a site and map every stand of Japanese knotweed, Himalayan balsam, giant hogweed or the local invaders with GPS and a size class. The base map for any control programme.
How to run it
- Learn the 5 to 10 target species from the GB Non Native Species Secretariat or state sheets and survey in June to September when they are tall.
- Walk the whole site in parallel lines 20 m apart, or every bank of a river in 100 m sections.
- At each stand record the GPS point or polygon, the longest dimension, the density class (scattered, patchy, dense) and the growth stage.
- Photograph each stand with a scale object and check 20 m downstream and downwind for outliers.
- Clean boots and tools of seed and rhizome before leaving, and repeat after control to score change.
Kit list
- Handheld GPS
- Tape measure 30 m
- Rugged digital camera
- Boot brush
- Wildflower field guide (NHBS (UK) or a bookshop (US))
The day one mistake: Mapping only the big stands. The small outliers 20 m away are what spread the plant, and they are the cheapest to remove. Walk the full site systematically, not just the obvious patches.
| Site | Section length (m) | Date | Search time (min) | Species | GPS or polygon ID | Stand length (m) | Density class | Growth stage | Photo ID | Control history | Observer | Nearest watercourse (m) |
|---|---|---|---|---|---|---|---|---|---|---|---|---|
Hedgerow surveys (structure and species)
Record the woody species, height, width, gaps and base condition of a hedge in 30 m sections, following the UK Hedgerow Survey Handbook and the PTES Great British Hedgerow Survey.
How to run it
- Map every hedge on the site and give each a number, then choose the central 30 m of each or divide long hedges into 30 m sections.
- In each section list every woody species and count them, noting the dominant one and any trees over 4 m.
- Measure height and width at the middle of the section, and estimate gaps as a percent of length.
- Score the base: margin width, bank or ditch, bare soil, nettles and the number of woodland ground flora species.
- Record management (trimmed, laid, coppiced, unmanaged) and classify each hedge to the Handbook condition categories.
Kit list
- Tape measure 30 m
- Clinometer
- Ranging poles (Forestry Suppliers (US) or NHBS (UK))
- Tree field guide (NHBS (UK) or a bookshop (US))
- Clipboard
The day one mistake: Counting species along the whole hedge. The Handbook uses 30 m sections so results compare between hedges and years; a 200 m walk with a species list cannot be repeated. Mark section ends with GPS.
| Hedge ID | Section | Date | Length (m) | Height (m) | Width (m) | Gaps (percent) | Woody species | Species count | Trees over 4 m | Margin width (m) | Management |
|---|---|---|---|---|---|---|---|---|---|---|---|
Veteran tree and tree health surveys
Record girth, form and the deadwood features of each old tree for the Ancient Tree Inventory, and check for signs of ash dieback, Dutch elm disease, Phytophthora and bleeding cankers. One survey feeds both conservation and safety.
How to run it
- Walk the site and tag or GPS every tree with a girth over 3 m at 1.5 m, or the species threshold in the Woodland Trust guidance.
- Measure girth at 1.5 m with a tape, or below the swelling if the trunk is fluted, and record species and form (maiden, pollard, coppice).
- Tick the veteran features present: hollowing, rot holes, dead limbs, sap runs, fungal brackets, epiphytes, bark loss.
- Look for disease signs by species: diamond lesions and crown dieback in ash, bleeding cankers on horse chestnut, wilting in elm, and photograph any find.
- Submit each tree to the Ancient Tree Inventory or your state champion tree register and repeat the health check each summer.
Kit list
- Diameter tape (Forestry Suppliers (US) or NHBS (UK))
- Binoculars 8×42
- Handheld GPS
- Rugged digital camera
- Tree tags (Forestry Suppliers (US))
The day one mistake: Measuring girth at whatever height is easy. A girth taken at 1 m on one tree and 1.5 m on the next cannot be compared. Use 1.5 m every time and note the exception when a burr forces you lower.
| Tree ID | Species | GPS | Date | Girth (cm) | Height of girth (m) | Form | Veteran features | Fungi seen | Disease signs | Photo ID | Threat or target nearby |
|---|---|---|---|---|---|---|---|---|---|---|---|
Phenology monitoring
Record the dates of first leaf, first flower, fruit and leaf fall on the same marked plants each year to track climate response. Nature's Calendar run by the Woodland Trust in the UK and the USA National Phenology Network use this protocol.
How to run it
- Choose 5 to 10 plants of each species that you can reach every week and tag them with a number.
- Visit weekly from February and score each phenophase as present or absent using the network definitions (bud burst, first leaf, first flower, open flowers, ripe fruit, leaf colour, leaf fall).
- Estimate the intensity as a percent class of buds open or leaves fallen.
- Photograph each plant on every visit from the same spot so dates can be checked.
- Enter the data into the network website the same week and keep the same plants for as many years as you can.
Kit list
- Tree tags (Forestry Suppliers (US))
- Rugged digital camera
- Waterproof notebook
- Hand lens 10x
The day one mistake: Recording only the first flower date. One date per year is a weak signal with no error bar. Score presence and intensity of every phase on every visit so the start, peak and end can all be estimated.
| Plant ID | Species | Date | Phenophase | Present (Y/N) | Intensity class | Temperature (C) | Photo ID | Observer | Days since last visit | Site | Notes |
|---|---|---|---|---|---|---|---|---|---|---|---|
Saltmarsh zonation transects
Run a line from the low marsh up to the terrestrial edge and record species cover and height in quadrats, so the zonation and any squeeze against sea walls can be tracked. The Environment Agency saltmarsh monitoring and NOAA marsh vegetation protocol.
How to run it
- Check tide tables and start 2 h before low water on a spring tide, with an escape route agreed.
- Set a transect from the pioneer zone to the sea wall or upper limit with a fixed start post and a bearing.
- Place a 1 by 1 m quadrat every 10 m or at every visible change of community and record percent cover of every species and bare mud.
- Measure the elevation of each quadrat with a level or GPS with RTK where you have it, and note creek and pan edges.
- Mark quadrat corners with pegs, photograph from the landward side and repeat annually in the same month.
Kit list
- Quadrat 1 m (NHBS (UK), Forestry Suppliers (US), or make from PVC pipe)
- Tape measure 50 m
- Ranging poles (Forestry Suppliers (US) or NHBS (UK))
- Handheld GPS
- Chest waders
The day one mistake: Starting a transect at the sea wall and walking out as the tide turns. Creeks fill behind you and mud is soft on the pioneer zone. Start at the outer end on a falling tide and work back to land.
| Transect ID | Quadrat distance (m) | Date | Elevation (m) | Zone | Species | Percent cover | Vegetation height (cm) | Bare mud (percent) | Creek edge distance (m) | Photo ID | Tide |
|---|---|---|---|---|---|---|---|---|---|---|---|
Dune vegetation transects
Walk a line from the beach across the dune ridges and slacks recording species cover and the ground profile, to track succession, bare sand and scrub invasion. The Sand Dune Survey of Great Britain method.
How to run it
- Set a transect perpendicular to the shore from the strandline to the back of the fixed dune and mark the start with a post and GPS.
- Level the ground profile every 5 m with a clinometer or level and staff to draw a cross section.
- Place a 2 by 2 m quadrat every 10 m and record percent cover of every species, bare sand, litter and moss.
- Classify each quadrat to a dune zone (embryo, mobile, semi fixed, fixed, slack, scrub) and note rabbit grazing and trampling.
- Photograph each quadrat and the transect line and repeat in the same month each year.
Kit list
- Quadrat 2 by 2 m (make from four 2 m canes and string, or NHBS (UK))
- Tape measure 50 m
- Clinometer
- Ranging poles (Forestry Suppliers (US) or NHBS (UK))
- Wildflower field guide (NHBS (UK) or a bookshop (US))
The day one mistake: Placing quadrats where the vegetation is interesting. That biases every cover value upward and hides bare sand loss, which is the thing the survey exists to measure. Keep the fixed 10 m spacing whatever the ground looks like.
| Transect ID | Distance (m) | Date | Dune zone | Slope (degrees) | Species | Percent cover | Bare sand (percent) | Moss and lichen (percent) | Grazing signs | Trampling | Photo ID |
|---|---|---|---|---|---|---|---|---|---|---|---|
Seed rain traps and seed bank germination
Catch falling seed in funnel traps to measure seed rain, and germinate soil cores in a greenhouse to count the viable seed bank. Together they show whether a site can restore itself.
How to run it
- Set 10 to 20 funnel traps of known area on posts 30 cm above ground in a grid and note the area of each.
- Empty traps monthly into labelled bags, dry, sieve and count seeds by species under a lens.
- Take 10 soil cores of 5 cm diameter to 10 cm depth per site, keeping the litter and the 0 to 5 cm and 5 to 10 cm layers separate.
- Spread each core 1 cm thick over sterile compost in trays in a greenhouse, water daily and keep control trays of compost alone.
- Identify and remove every seedling as it becomes recognisable for 6 months, stir the soil at 3 months, and report seeds per square metre.
Kit list
- Seed trap funnels (make from a plastic funnel, mesh bag and a post, or Forestry Suppliers (US))
- Soil corer
- Seed trays
- Sterile seed compost
- Hand lens 10x
The day one mistake: Not running control trays. Greenhouse compost and airborne seed produce seedlings that then get counted as the seed bank. Always run 3 trays of compost alone beside the samples and subtract what germinates in them.
| Site | Trap or core ID | Date | Trap area (sq m) | Days exposed | Core depth (cm) | Core volume (cc) | Species | Seed count | Seedlings germinated | Control seedlings | Seeds per sq m |
|---|---|---|---|---|---|---|---|---|---|---|---|
Tree regeneration plots
Count seedlings and saplings by height class in small plots to measure whether a wood is regenerating and whether deer browsing is stopping it. Follows the Forestry Commission and USFS Forest Inventory regeneration subplot method.
How to run it
- Lay a grid at 50 m spacing across the wood and mark each plot centre with a peg and GPS.
- At each point count every woody plant under 1.3 m tall within a 2 m radius, by species and height class (under 20 cm, 20 to 50 cm, 50 to 130 cm).
- Count saplings over 1.3 m tall and under 7 cm diameter within a 4 m radius.
- Score browsing on the leading shoot of the nearest 10 saplings as browsed or not, and note deer dung and bark stripping.
- Record canopy cover, ground flora dominance and light, and repeat annually in July or August.
Kit list
- Tape measure 30 m
- Handheld GPS
- Marker pegs
- Tree field guide (NHBS (UK) or a bookshop (US))
- Densiometer (Forestry Suppliers (US) or NHBS (UK))
The day one mistake: Counting only the healthy saplings and skipping the browsed stumps. The browsed ones are the evidence. Count every stem and score browsing separately so the deer effect is visible.
| Plot ID | GPS | Date | Radius (m) | Species | Height class | Count | Browsed (percent) | Deer sign | Canopy cover (percent) | Ground flora dominant | Observer |
|---|---|---|---|---|---|---|---|---|---|---|---|
Biomass clip plots
Cut all the vegetation inside a small quadrat, dry it and weigh it to give standing crop in grams per square metre. The direct measure of productivity behind grazing and restoration studies.
How to run it
- Place 10 to 20 quadrats of 0.25 sq m at random points and photograph each before clipping.
- Clip everything rooted inside the frame to 1 cm above the soil with shears, sorting into live, dead and litter, or by functional group if needed.
- Bag each fraction in paper with a label inside, and record fresh weight if you can.
- Dry at 60 C for 48 h or until constant weight and weigh to 0.1 g.
- Multiply by 4 for grams per square metre and note grazing exclusion, cutting date and rainfall.
Kit list
- Quadrat 50 cm (NHBS (UK), Forestry Suppliers (US), or make from PVC pipe)
- Garden shears
- Paper bags
- Digital scale 0.1 g
- Drying oven
The day one mistake: Weighing fresh. Water content varies from 40 to 80 percent between mornings and afternoons, so fresh weights are not comparable. Dry to constant weight every time.
| Site | Plot ID | Date | Plot area (sq m) | Live dry mass (g) | Dead dry mass (g) | Litter dry mass (g) | Dry mass per sq m | Sward height (cm) | Grazing | Drying temperature (C) | Drying hours |
|---|---|---|---|---|---|---|---|---|---|---|---|
Deadwood fungi fixed log surveys
Tag a set of fallen logs and record every fungal fruit body on them each year, with the log decay stage, so species turnover can be followed through decomposition. Follows the fixed log monitoring used in Swedish deadwood fungi studies and by UK fungus groups.
How to run it
- Choose 20 to 50 logs over 10 cm diameter and 1 m long, tag each with a numbered disc and GPS, and record species, length, diameter and decay class 1 to 5.
- Search the whole log surface including the underside and bark crevices for 10 minutes with a lens and torch.
- Record every fruit body by species with an abundance class, and photograph anything you cannot name.
- Take a small voucher of unknown brackets and crusts only, in paper, noting the log number.
- Repeat in September, October and April each year, and note when a log moves to the next decay class.
Kit list
- Hand lens 10x
- Headlamp
- Tree tags (Forestry Suppliers (US))
- Diameter tape (Forestry Suppliers (US) or NHBS (UK))
- Mushroom field guide (NHBS (UK) or a bookshop (US))
The day one mistake: Rolling the log to see underneath. That kills the fauna and changes the moisture of the whole community. Lie on the ground with a torch and mirror and leave the log where it is.
| Log ID | Tree species | Length (m) | Diameter (cm) | Decay class | Date | Search time (min) | Fungus species | Abundance class | Photo ID | Voucher (Y/N) | Moisture |
|---|---|---|---|---|---|---|---|---|---|---|---|
Seagrass transects and quadrats
Lay a tape across a seagrass bed and score percent cover, shoot density and canopy height in quadrats, following Seagrass Watch and the SeagrassNet protocol. Intertidal beds can be walked at low water and subtidal ones snorkelled.
How to run it
- Set 3 parallel 50 m transects 25 m apart from the shallow edge and mark the start posts with GPS.
- At 0, 5, 10 and every 5 m to 50 m place a 0.25 sq m quadrat on the right of the tape and estimate percent cover of seagrass, algae and epiphytes using the Seagrass Watch photo guide.
- Count shoots in a 0.01 sq m corner of the quadrat, measure the 5 longest leaves and note the species.
- Photograph every quadrat from directly above with the label visible.
- Record sediment type, grazing marks, wasting disease lesions and water depth, and repeat in the same month each year.
Kit list
- Quadrat 50 cm (NHBS (UK), Forestry Suppliers (US), or make from PVC pipe)
- Tape measure 50 m
- Underwater camera
- Dive slate
- Marine field guide
The day one mistake: Walking through the bed to place quadrats. Every step crushes rhizomes and the transect degrades year by year. Walk only along the tape line on the left side and place quadrats to the right.
| Site | Transect ID | Quadrat distance (m) | Date | Depth (m) | Species | Percent cover | Shoot count per 0.01 sq m | Canopy height (cm) | Epiphyte cover (percent) | Sediment | Photo ID |
|---|---|---|---|---|---|---|---|---|---|---|---|
Mangrove plots and transects
Run transects across the mangrove and measure every tree in fixed plots for species, diameter and height, with seedling counts in subplots. The Mangrove Action Project and CIFOR blue carbon protocol.
How to run it
- Check tides and set transects at low water from the seaward fringe to the landward limit with GPS at each plot corner.
- Mark 10 by 10 m plots every 25 m and tag every tree with a diameter over 2.5 cm at 1.3 m, or above the highest prop root for Rhizophora.
- Measure diameter and height and record species and condition (live, dead, cut).
- Count seedlings and saplings under 2.5 cm in a 2 by 2 m subplot in each corner.
- Take a 30 cm soil core for carbon where the study needs it, record crab burrow density and salinity, and repeat annually.
Kit list
- Diameter tape (Forestry Suppliers (US) or NHBS (UK))
- Tape measure 50 m
- Clinometer
- Tree tags (Forestry Suppliers (US))
- Refractometer
The day one mistake: Measuring Rhizophora diameter at 1.3 m where the prop roots are. The reading is meaningless and cannot be repeated. Measure 30 cm above the highest prop root and write the height used.
| Transect ID | Plot ID | Date | Tree ID | Species | Diameter (cm) | Height of diameter (m) | Height (m) | Condition | Seedlings per subplot | Salinity (ppt) | Crab burrows per sq m |
|---|---|---|---|---|---|---|---|---|---|---|---|
Drop down video, towed camera and ROV seabed surveys
Lower a camera to the seabed on a frame or tow it slowly to record habitat and epifauna where divers cannot go. The JNCC and NOAA method for mapping reefs, biogenic habitats and impacts on the shelf.
How to run it
- Plan stations on a grid or along a gradient in the GIS and check the weather window for under 1 m swell.
- Fit lasers 10 cm apart or a scale bar in the field of view and log GPS, depth and time on every drop.
- Lower the camera until the bed is in view, hold for 1 to 3 minutes or drift slowly, and record 3 stills.
- For tows keep the camera 0.5 to 1 m off the bed at 0.5 knots and note the start and end positions.
- Analyse video to EUNIS or CMECS habitat class with SACFOR abundance for conspicuous species, and archive the raw footage with the metadata.
Kit list
- Drop down camera system (Seatronics, SubC Imaging, or make from a GoPro on a weighted frame with lights)
- Action camera
- Dive lights
- Handheld GPS
- Portable depth sounder
The day one mistake: Towing too fast. Above 1 knot the video is a blur and no species can be named. Hold the boat at 0.5 knots and let the camera hang, even if the survey takes twice as long.
| Station ID | Date | Time | Start GPS | End GPS | Depth (m) | Video minutes | Tow length (m) | Habitat class | Species | SACFOR | Visibility |
|---|---|---|---|---|---|---|---|---|---|---|---|
Intertidal sediment cores for infauna
Push a core tube into mud or sand at low water and sieve the sediment to count the worms, bivalves and crustaceans that feed shorebirds and fish. The Environment Agency and NOAA benthic infauna method.
How to run it
- Set stations down the shore from the strandline to low water on a spring tide and mark with GPS.
- At each station take 5 cores of 10 cm diameter to 15 cm depth 1 m apart and bag the sediment.
- Sieve each core through a 0.5 mm mesh at the shore with seawater and put the residue into a pot of 10 percent buffered formalin or 70 percent ethanol.
- Take a sixth core for particle size and organic content.
- Sort under a microscope in the lab, count and identify to family or species, and report per 0.1 sq m.
Kit list
- Core tube (make from a 10 cm plastic drain pipe with a cap, or NHBS (UK) or Forestry Suppliers (US))
- Sieve 0.5 mm
- Sample jars 500 ml
- Ethanol 70 percent
- Microscope
The day one mistake: Sieving without keeping the water in the residue. Small polychaetes are lost through a dry sieve. Sieve gently under water in a tray and wash the residue into the pot with a squeeze bottle.
| Shore | Station | Date | Core ID | Core area (sq m) | Depth (cm) | Shore height | Sediment type | Taxon | Count | Density per 0.1 sq m | Preservative |
|---|---|---|---|---|---|---|---|---|---|---|---|
Strandline surveys
Walk the tide line and record the shells, egg cases, seaweeds, litter and dead animals cast up, following the Marine Conservation Society Beachwatch and the Shark Trust Great Eggcase Hunt methods. Cheap, year round and open to volunteers.
How to run it
- Mark a 100 m section of beach with GPS at each end and survey on a falling tide after the top of the tide.
- Walk the strandline slowly for 30 minutes listing every type of natural item and count egg cases, shells and stranded animals.
- For litter follow the Beachwatch categories and count items per 100 m.
- Photograph every egg case and unknown item on a scale card and soak egg cases before identifying.
- Report strandings of turtles, cetaceans and seals to the strandings network and log the rest with the recording scheme.
The day one mistake: Surveying a beach that was cleaned that morning. Many beaches are raked at dawn in summer and the strandline is gone. Ask the council when cleaning happens and survey before it.
| Beach | Section | Date | Tide state | Section length (m) | Search time (min) | Item category | Species | Count | Litter items per 100 m | Photo ID | Storm in last 7 days (Y/N) |
|---|---|---|---|---|---|---|---|---|---|---|---|
Reef invertebrate belt transects (Reef Check)
Swim a 5 m wide belt along a fixed 100 m line and count the indicator invertebrates and impacts, then use a line intercept for substrate. The Reef Check protocol used worldwide for reef health.
How to run it
- Complete Reef Check training and lay the 100 m transect along a depth contour at 2 to 6 m, marking the start with GPS.
- Swim the 4 segments of 20 m (0 to 20, 25 to 45, 50 to 70, 75 to 95 m) counting the indicator species within 2.5 m each side: urchins, sea cucumbers, crown of thorns, giant clams, lobsters, banded shrimp.
- Search under ledges with a torch and count anemones and their shrimps once per segment.
- Record impacts per segment: bleaching, disease, trash, anchor damage, fishing nets.
- Repeat at the 6 to 12 m depth and enter data on the Reef Check forms the same day.
The day one mistake: Counting outside the belt. A lobster seen 4 m off the line is not on the transect. Hold a 2.5 m length of line in one hand and use it to test every doubtful animal.
| Site | Depth (m) | Date | Segment | Belt area (sq m) | Species | Count | Impact category | Impact score | Visibility (m) | Water temperature (C) | Diver |
|---|---|---|---|---|---|---|---|---|---|---|---|
Seasearch style subtidal dive surveys (SACFOR)
Dive a site and describe every habitat met with its depth, substrate and conspicuous species scored on the SACFOR scale. The Seasearch method run by the Marine Conservation Society and adopted by JNCC for MPA condition reporting.
How to run it
- Complete the Seasearch Observer or Surveyor course and plan the dive with buddy, depth limit and GPS of the entry point.
- Descend and note the depth, substrate, slope and visibility at the start, then follow a slow route across the habitats.
- For each habitat record its depth range, substrate and up to 10 conspicuous species with a SACFOR class (Superabundant, Abundant, Common, Frequent, Occasional, Rare).
- Photograph each habitat and every species you cannot name for later ID.
- Fill in the Seasearch form the same day with sketch, depth profile and impacts seen, and send it to the coordinator.
The day one mistake: Listing species without a habitat. A record of 30 species with one depth is not a Seasearch form. Describe each habitat as its own record with its depth band and give the species to it.
| Site | Date | Entry GPS | Dive time (min) | Habitat number | Depth range (m) | Substrate | Species | SACFOR | Visibility (m) | Water temperature (C) | Impacts |
|---|---|---|---|---|---|---|---|---|---|---|---|
Habitat condition assessment
Walk a W across each habitat parcel and score indicator species, sward structure, bare ground, scrub and negative indicators at 20 stops against a target. The Common Standards Monitoring approach used by JNCC and the Biodiversity Metric habitat condition sheets.
How to run it
- Map the site into parcels of one habitat type and pick the condition sheet for that habitat from the guidance.
- Walk a W shaped route across the parcel and stop 20 times at equal intervals.
- At each stop assess 1 sq m: count positive indicator species, note negative indicators, sward height, bare ground and litter.
- Across the whole parcel record scrub cover, invasive species, damage and management as percent classes.
- Compare each attribute to its target and record pass or fail, then give the parcel an overall condition of good, moderate or poor.
Kit list
- Quadrat 1 m (NHBS (UK), Forestry Suppliers (US), or make from PVC pipe)
- Handheld GPS
- Wildflower field guide (NHBS (UK) or a bookshop (US))
- Clipboard
- Drop disc (make from a 30 cm plastic disc and a graduated rod, or NHBS (UK))
The day one mistake: Stopping where the flowers are. The 20 stops must fall at fixed paces on the W whether the ground is rich or poor, or every parcel scores as good. Count paces and stop on the number.
| Parcel ID | Habitat type | Date | Stop number | Positive indicators | Negative indicators | Sward height (cm) | Bare ground (percent) | Scrub cover (percent) | Attribute pass or fail | Overall condition | Management |
|---|---|---|---|---|---|---|---|---|---|---|---|
Water quality field measurements (sonde, turbidity)
Take temperature, dissolved oxygen, pH, conductivity and turbidity at a fixed point with a sonde or handheld meters so the biology has its chemistry. The EPA volunteer monitoring and Environment Agency spot sampling method.
How to run it
- Calibrate the meters the same morning with fresh standards and record the calibration in the log.
- At the station stand downstream and hold the probe 10 cm below the surface in flowing water away from the bank for 2 minutes until it settles.
- Read and record each parameter, then take a grab sample in a clean bottle for turbidity, measured in a tube or nephelometer.
- Note flow, weather and any discharge or colour, and photograph the station.
- Rinse probes with distilled water, cap them wet, Check Clean Dry boots and waders, and return to the same station at the same time of day each month.
The day one mistake: Reading dissolved oxygen as soon as the probe goes in. It takes 2 minutes to settle and the first reading is high. Hold it still, wait for the number to stop moving, then write it down.
| Station | Date | Time | Temperature (C) | Dissolved oxygen (mg per l and percent) | pH | Conductivity (uS per cm) | Turbidity (NTU) | Flow state | Weather | Calibration date | Observer |
|---|---|---|---|---|---|---|---|---|---|---|---|
River Habitat Survey and MoRPh
Record the physical structure of a river reach, its banks, channel features, vegetation and modifications, following the Environment Agency River Habitat Survey or the citizen science MoRPh method of the Modular River Survey.
How to run it
- Complete the RHS or MoRPh training and choose a 500 m reach (RHS) or a module of 10 times the channel width (MoRPh).
- At each of the 10 spot checks 50 m apart record bank material, bank modifications, channel substrate, flow type and channel vegetation on both banks.
- Between spot checks note land use, bankside trees, features such as bars, riffles, pools and eroding cliffs, and every artificial structure.
- Photograph each spot check, measure bankfull width and depth at one representative point, and Check Clean Dry waders before the next reach.
- Enter data in the RHS or Modular River Survey database, which returns the Habitat Quality and Habitat Modification scores.
Kit list
- Tape measure 30 m
- Ranging poles (Forestry Suppliers (US) or NHBS (UK))
- Handheld GPS
- Rugged digital camera
- Chest waders
The day one mistake: Estimating the spot check spacing by eye. Spot checks that drift to 30 m or 80 m apart break the comparability with 25,000 other reaches. Pace or tape the 50 m every time.
| Reach or module ID | Date | Spot check | Bank material | Bank modification | Channel substrate | Flow type | Channel vegetation | Bankfull width (m) | Land use 50 m | Structures | Photo ID |
|---|---|---|---|---|---|---|---|---|---|---|---|
Peatland condition and peat depth probing
Push a rod through the peat to the mineral base to map depth, and score the surface for bare peat, erosion, Sphagnum cover and drainage. The IUCN UK Peatland Programme and Peatland Code condition categories.
How to run it
- Lay a 100 m grid over the site with GPS and load the points into the handheld.
- At each point push the probe until it stops on mineral ground, add extension rods, and record depth to the nearest 10 cm.
- Score a 2 by 2 m quadrat at the point: Sphagnum cover, bare peat, cotton grass, heather, erosion gullies and hagging, and any drain within 10 m.
- Assign the point to the Peatland Code category (near natural, modified, drained, eroded) and photograph it.
- Map peat depth and condition in the GIS and note the water table state and grazing.
Kit list
- Peat probe (make from 1 m threaded steel rods with a T handle, or Van Walt (UK) or Forestry Suppliers (US))
- Handheld GPS
- Quadrat 2 by 2 m (make from four 2 m canes and string, or NHBS (UK))
- Rugged digital camera
- Mosses field guide (FSC or NHBS (UK); a bookshop (US))
The day one mistake: Stopping the probe on a buried tree stump and calling it the base. Bog wood gives a sharp stop at 1 m where the peat goes on to 4 m. If the stop feels sharp and shallow, probe again 1 m away.
| Point ID | GPS | Date | Peat depth (cm) | Sphagnum cover (percent) | Bare peat (percent) | Erosion features | Drain within 10 m (Y/N) | Condition category | Water at surface (Y/N) | Grazing | Photo ID |
|---|---|---|---|---|---|---|---|---|---|---|---|
Water table dipwells and soil moisture
Sink perforated tubes into the ground and measure the depth to water in each on a regular cycle to track the water table that drives wetland plants and peat. The standard for restoration monitoring under the Peatland Code and ditch blocking projects.
How to run it
- Cut a 1 m length of 32 mm perforated pipe with a cap, and install 5 to 10 along a transect at 5, 10, 20, 40 and 80 m from a drain.
- Auger a hole, push the pipe in with 10 cm proud of the surface, and measure the height of the top above ground.
- Read weekly with a dip tape or blow tube, recording depth from the pipe top and correcting to ground level.
- For continuous data hang a pressure logger at the bottom of one well and a barometric logger nearby, downloading monthly.
- Take a soil moisture reading with a probe at 3 points around each well on every visit and note rainfall in the previous 7 days.
The day one mistake: Reading the depth from the top of the pipe and never measuring how far the pipe sticks out. Pipes heave and sink, and the record becomes noise. Measure pipe height above ground on every visit and correct every reading.
| Well ID | Distance from drain (m) | Date | Time | Pipe height above ground (cm) | Depth to water from pipe top (cm) | Water table below ground (cm) | Soil moisture (percent) | Rain last 7 days (mm) | Logger ID | Observer | Notes |
|---|---|---|---|---|---|---|---|---|---|---|---|
Soil sampling for ecology (pH, organic matter, bulk density)
Take soil cores for pH, organic matter and bulk density so vegetation and invertebrate data can be explained by soil. Follows the standard methods of the UK Countryside Survey and USDA NRCS soil sampling guidance.
How to run it
- Choose 5 to 10 points per parcel at random and at each take 5 cores to 10 cm in a 2 m circle, mix them in a bag as one composite.
- Push a 100 cc steel ring into the soil at 3 points, dig it out level, trim, bag and later dry at 105 C for 24 h to get bulk density.
- At home air dry the composite samples, sieve to 2 mm and measure pH in a 1 to 2.5 soil to water mix with a calibrated meter.
- Measure organic matter by loss on ignition at 550 C for 4 h, or send to a lab for carbon.
- Record soil texture by hand, colour, depth to stones or bedrock, and drainage class at each point.
Kit list
- Soil corer
- Bulk density rings (Van Walt (UK) or Forestry Suppliers (US), or make from 5 cm steel pipe)
- Soil pH meter
- Sieve 2 mm
- Zip sample bags
The day one mistake: Sampling one pit per field. Soil pH can change by 2 units across a field and one pit is a guess. Composite 5 cores at each of several points so the mean is real.
| Parcel | Point ID | GPS | Date | Cores per composite | Depth (cm) | pH | Organic matter (percent) | Bulk density (g per cc) | Texture | Depth to stones (cm) | Drainage class |
|---|---|---|---|---|---|---|---|---|---|---|---|
Canopy cover and light (densiometer, hemispherical photos)
Estimate canopy cover with a spherical densiometer or a fisheye photo so light reaching the ground can be linked to regeneration, ground flora and butterflies. The USFS Forest Inventory and the UK Woodland Survey Handbook use this.
How to run it
- Stand at the plot centre and hold the densiometer level at 1.3 m, 30 cm from your body, facing north.
- Count the dots or squares covered by canopy in the mirror grid, and repeat facing east, south and west; average the 4 and convert to percent.
- For photos set a camera with a fisheye lens level on a tripod at 1 m, top of image to north, and shoot in even overcast light or at dawn.
- Process photos in free software such as ImageJ or Gap Light Analyzer for canopy openness and leaf area index.
- Record tree species and height at each plot and repeat in the same month each year.
Kit list
- Densiometer (Forestry Suppliers (US) or NHBS (UK))
- Fisheye lens clip
- Tripod
- Compass
- Bubble level
The day one mistake: Taking photos in full sun. Sun flare and bright leaves read as sky and the openness value is far too high. Shoot in uniform overcast or in the half hour before sunrise.
| Plot ID | Date | Time | Height (m) | Method | Reading N | Reading E | Reading S | Reading W | Canopy cover (percent) | Sky condition | Photo ID |
|---|---|---|---|---|---|---|---|---|---|---|---|
Microclimate loggers
Leave small temperature and humidity loggers in shields at ground or canopy level to measure the microclimate that animals and plants actually feel. The SoilTemp and TMS network standards.
How to run it
- Decide the question first and place loggers in pairs or along the gradient it needs, for example open versus shaded or slope top to bottom.
- Mount each logger in a radiation shield at a fixed height (5 cm, 15 cm, 1.5 m) on a stake, away from direct sun on the sensor.
- Set a 30 to 60 minute interval, synchronise the clocks, and log GPS, height, aspect and canopy cover for each unit.
- Download every 3 to 6 months, check for gaps and drift against a reference, and replace batteries.
- Archive the raw files with the metadata and report daily minimum, mean and maximum by site.
The day one mistake: Hanging a bare logger on a tree. Sun on the case gives 10 C errors at midday and the data is unusable. Put every sensor in a shield and note its height and aspect.
| Logger ID | GPS | Date deployed | Date downloaded | Height (cm) | Aspect | Canopy cover (percent) | Interval (min) | Daily min (C) | Daily max (C) | Mean humidity (percent) | Gaps (days) |
|---|---|---|---|---|---|---|---|---|---|---|---|
Deadwood line intersect surveys
Walk fixed lines and measure the diameter of every dead log that crosses them to estimate deadwood volume per hectare, and count snags. The Van Wagner line intersect method used by the USFS and Forestry Commission.
How to run it
- At the plot centre lay 3 tapes of 50 m in a triangle at bearings 0, 120 and 240 degrees.
- Walk each line and at every log over 7.5 cm diameter that crosses it measure the diameter at the crossing point and note species and decay class 1 to 5.
- Count and measure standing dead trees over 10 cm diameter within a 20 m radius of the centre.
- Note fine woody debris under 7.5 cm as a count on the first 10 m of each line.
- Calculate volume as pi squared times the sum of squared diameters divided by 8 times the line length, and report cubic metres per hectare.
Kit list
- Tape measure 50 m
- Diameter tape (Forestry Suppliers (US) or NHBS (UK))
- Forestry calipers (Haglof via Forestry Suppliers (US) or NHBS (UK))
- Compass
- Decay class card (print from the Forestry Commission or USFS guidance)
The day one mistake: Measuring the widest diameter of the log. The formula wants the diameter at the exact point where the line crosses it. Hold the tape on the line and measure there.
| Plot ID | Line bearing | Date | Line length (m) | Piece number | Diameter at crossing (cm) | Species | Decay class | Snags in 20 m | Snag diameter (cm) | Fine debris count | Volume per ha |
|---|---|---|---|---|---|---|---|---|---|---|---|
Fixed point photography
Photograph the same view from a marked post at the same time each year to show habitat change that numbers miss. Used in every long term management plan and by the Natural England monitoring guidance.
How to run it
- Choose views that show the management question, install a post or use a permanent feature, and record GPS, bearing and camera height for each.
- Photograph at 1.5 m on a tripod with a 35 mm equivalent lens, using the previous photo on a phone to match the frame.
- Take the photo in the same month and similar light each year, and include a scale bar or the post in the foreground.
- Log camera, lens, time, weather and any changes to the post in the register.
- File photos by post and date with a copy in a shared archive, and print pairs for the annual report.
The day one mistake: Zooming to make the shot look good. A different focal length cannot be compared with last year. Fix the lens, the height and the bearing and let the picture be dull.
| Post ID | GPS | Bearing | Date | Time | Camera and lens | Height (m) | Weather | Photo file | Post condition | Changes noted | Observer |
|---|---|---|---|---|---|---|---|---|---|---|---|
Sward height and structure (drop disc)
Drop a light disc down a graduated rod and read where it rests on the grass to measure sward height and structure for grazing management and bird and invertebrate habitat. The RSPB and Natural England sward measurement method.
How to run it
- Make or buy a disc of 30 cm diameter and about 200 g on a rod marked in 0.5 cm.
- Walk a W across the field and drop the disc from 30 cm above the sward at 20 to 50 evenly spaced points.
- Read the height where the disc rests to 0.5 cm and note whether the vegetation is grass, herb, rush or bare.
- Also record the sward as a structure class (short, tussocky, tall) and any litter mat at each point.
- Report the mean, the percent of drops under 5 cm and over 15 cm, and repeat monthly through the grazing season.
Kit list
- Drop disc (make from a 30 cm plastic disc and a graduated rod, or NHBS (UK))
- Tally counter
- Handheld GPS
- Clipboard
The day one mistake: Pressing the disc down or dropping from head height. Both change the reading by centimetres and the months cannot be compared. Drop from 30 cm every time and let it settle.
| Field ID | Date | Drop number | Height (cm) | Vegetation type | Structure class | Litter (Y/N) | Bare ground (Y/N) | Grazing animals | Stocking rate | Mean height (cm) | Percent under 5 cm |
|---|---|---|---|---|---|---|---|---|---|---|---|
Citizen science recording (iNaturalist, eBird)
Record what you see with the phone apps that feed the global databases, so casual records become usable data. eBird wants complete checklists with effort, and iNaturalist wants a photo or sound with a location.
How to run it
- Install eBird and iNaturalist, set the location accuracy to on, and read the app guidance on complete checklists and obscured locations.
- For birds start a checklist at the start of the walk, record every species and count, and stop it at the end so the app has distance and time.
- For everything else photograph the organism with a clear view of the key features and one wider shot of the habitat.
- Add a species name if you know it or leave the app to suggest, and mark captive or planted organisms as such.
- Submit the same day, respond to identifications from other users, and download your own data each year as a backup.
The day one mistake: Uploading a photo of a rare orchid with an exact grid reference. Collectors search the databases. Set the geoprivacy to obscured for anything protected or vulnerable before you press submit.
| Date | Start time | Duration (min) | Distance (km) | Location | Protocol (travelling, stationary, casual) | Species | Count | Photo or sound (Y/N) | Complete checklist (Y/N) | Geoprivacy | Observer |
|---|---|---|---|---|---|---|---|---|---|---|---|
Ecological survey calendar
Number of methods in season each month for each group, northern hemisphere. Shift by six months in the south. Hover a cell for the methods.
| Group | Jan | Feb | Mar | Apr | May | Jun | Jul | Aug | Sep | Oct | Nov | Dec |
|---|---|---|---|---|---|---|---|---|---|---|---|---|
| Birds | 1 | 2 | 8 | 10 | 10 | 9 | 8 | 3 | 2 | 2 | 3 | 1 |
| Bats | 1 | 1 | 3 | 7 | 7 | 8 | 8 | 8 | 4 | 1 | ||
| Small mammals | 2 | 2 | 3 | 5 | 5 | 5 | 5 | 5 | 5 | 5 | 3 | 2 |
| Medium and large mammals | 3 | 6 | 6 | 5 | 2 | 2 | 2 | 2 | 2 | 5 | 4 | 3 |
| Marine mammals and seabirds | 1 | 1 | 1 | 3 | 5 | 5 | 5 | 3 | 2 | 3 | 1 | 1 |
| Amphibians | 4 | 11 | 13 | 11 | 9 | 5 | 4 | 5 | 4 | 2 | ||
| Reptiles | 2 | 8 | 9 | 9 | 8 | 8 | 9 | 5 | ||||
| Fish | 1 | 1 | 3 | 4 | 8 | 8 | 8 | 8 | 5 | 1 | 1 | |
| Freshwater invertebrates and plankton | 1 | 3 | 5 | 5 | 5 | 4 | 6 | 4 | 1 | |||
| Terrestrial invertebrates and pollinators | 1 | 1 | 5 | 12 | 18 | 17 | 18 | 16 | 17 | 8 | 3 | 1 |
| Plants and vegetation | 1 | 9 | 13 | 13 | 13 | 7 | ||||||
| Fungi, lichens and bryophytes | 1 | 2 | 3 | 3 | 3 | |||||||
| Marine benthos, reefs and shore | 1 | 3 | 3 | 3 | 3 | 3 | 4 | 3 | 1 | |||
| Habitat and environment | 1 | 2 | 5 | 5 | 5 | 5 | 6 | 2 | 1 |
All 188 survey methods by group
Birds
- Point counts: Stand at a fixed point and record every bird seen or heard, usually within 50 or 100 m bands.
- Line transects: Walk a fixed line and record birds with their perpendicular distance from the line.
- Territory mapping: Map every singing male and breeding behaviour on repeated visits, then cluster the registrations into territories.
- Nest searching and monitoring: Find nests by behaviour cues and check them on a fixed schedule to measure clutch size, hatching and fledging success.
- Acoustic recorders (passive monitoring): Leave autonomous recorders to capture dawn chorus or night calls, then identify species with software and manual checking.
- Mist netting and ringing: Catch birds in fine nets for ringing, measurement and survival estimates.
- Nocturnal playback surveys (owls, nightjars, rails): Broadcast the species' call at fixed points and record responses.
- Waterbird core counts (wetland counts): Count every waterbird on a defined wetland or estuary sector once a month through the non breeding season.
- Vantage point watches (raptors and flight lines): Watch a fixed arc from a high point and map every flight of target species with height and duration.
- Wind and solar farm carcass searches (birds and bats): Systematic searches under turbines or solar arrays for dead birds and bats, corrected for the carcasses searchers miss and the carcasses scavengers remove.
- Breeding wader surveys (Brown and Shepherd): Walk the whole site in daylight so that no ground is more than 100 m away, mapping every wader and its behaviour, then estimate breeding pairs from the three visits.
- Nest box monitoring (tits, flycatchers, owls, kestrels): Check numbered nest boxes on a weekly schedule to record first egg date, clutch size, hatching and fledging under the BTO Nest Record Scheme or NestWatch (Cornell) rules.
- Heronry and colonial waterbird counts: Count apparently occupied nests in heronries, egret colonies, cormorant colonies and other tree or reed nesting waterbirds from outside the colony.
- Visible migration counts (fixed point): Stand at a fixed point on a headland, ridge or valley edge and count every bird flying through with its direction, in hourly blocks.
- Low tide feeding distribution and high tide roost counts (WeBS Low Tide Counts): Count waders and wildfowl on the intertidal flats around low water so their feeding distribution can be mapped, and count the roosts at high water so the total population is known.
- Colour ring and tag resighting: Read the colour rings, flags and wing tags of marked birds and report them to the ringing scheme so survival, movements and site fidelity can be estimated.
- Avian influenza dead bird surveillance and swabbing: Walk fixed sections during avian influenza outbreaks, report dead wild birds to the national helpline and, where you are trained and permitted, take oropharyngeal and cloacal swabs for testing.
Bats
- Roost emergence and re entry counts: Surveyors watch a building or tree and count bats leaving at dusk, with a detector to identify species.
- Activity transects with a handheld detector: Walk a fixed route after sunset with a detector, recording passes and species.
- Static detectors (automated): Leave recording detectors out for several nights per month to capture activity you would never hear on a walk.
- Harp trapping and mist netting: Capture bats on commuting routes for identification, measurement and tagging.
- Hibernation site counts: Count and identify torpid bats in caves, mines, tunnels and cellars in winter.
- Preliminary roost assessment and tree inspection: Look for droppings, staining, feeding remains and roost features by day, and grade the structure for bat suitability.
- Bat radio tracking to roosts (VHF): Attach a 0.
- Infrared and thermal camera emergence surveys (BCT 2023): Record emergence with infrared or thermal cameras so that every bat leaving a roost is captured and can be counted on screen, as required by the BCT Bat Surveys for Professional Ecologists Good Practice Guidelines 4th edition (2023).
- Bat box monitoring: Check numbered bat boxes on a monthly schedule for bats, droppings and other occupants.
- Autumn swarming surveys: Survey caves, mines, tunnels and cellars in late summer and autumn when bats gather at the entrance to mate before hibernation.
- Driven bat transects (NBMP car survey, iBats): Drive a fixed route at low speed with a bat detector held out of the window recording continuously, so that bat calls can be identified and mapped afterwards.
- Dropping collection for DNA species identification: Collect fresh bat droppings from roosts and send them to a lab that amplifies mitochondrial DNA to identify the species.
Small mammals
- Live trapping grids (Sherman or Longworth): Set baited box traps in a grid, mark and release animals, and estimate abundance by mark recapture.
- Footprint tunnels and tracking plates: Baited tunnels with inked pads and paper record footprints of hedgehogs, small mammals and mustelids without handling.
- Hair tubes and hair traps: Baited tubes with sticky pads collect hair for identification of dormice, squirrels and martens.
- Owl pellet analysis: Dissect barn owl or other pellets to recover skulls and jaws, giving a cheap picture of small mammal communities across an area.
- Dormouse nest tubes and nest boxes: Nest tubes and boxes on branches attract hazel dormice to build nests.
- Water vole and riparian mammal sign surveys: Search banks for burrows, latrines, feeding stations and prints of water voles, and for otter spraints and beaver sign.
- Camera trap tunnels and Mostela boxes: A wooden box with a plastic tunnel inside and a camera trap facing the tunnel, so that stoats, weasels and small mammals are filmed as they investigate.
- Squirrel drey counts and feeding sign transects: Count squirrel dreys along winter transects and score cone and nut feeding remains to estimate relative density and, from the cone and nut damage, which species is present.
- Harvest mouse nest searches: Search tall tussocky grass, reed and bramble for the woven grass nests of harvest mice, which are visible after the vegetation dies back.
- Hedgehog torch and thermal transects: Walk a fixed route after dark with a spotlight or thermal camera and count every hedgehog seen, giving an encounter rate per km.
- Invasive rodent tracking tunnels, chew cards and wax tags (island eradication standard): Ink tracking tunnels, chew cards and wax tags detect rats and mice at very low density, which is what island eradication projects and seabird island biosecurity need.
- Live pitfall trapping for shrews: Bury open topped containers flush with the ground so shrews fall in and are held alive with food and bedding.
Medium and large mammals
- Camera trapping: Motion triggered cameras record mammals day and night.
- Sign surveys: tracks, scat and trails: Walk transects recording tracks, scat, digging and trails.
- Distance sampling line transects (deer, antelope, primates): Walk or drive straight lines and record the perpendicular distance to every group seen.
- Spotlight counts: Drive fixed routes at night with a spotlight and count eyeshine.
- Pellet group counts (deer, hares, lagomorphs): Count dung pellet groups in plots to index or estimate deer and lagomorph density from defecation and decay rates.
- Burrow, sett and den surveys: Systematic search for badger setts, fox earths, rabbit warrens and burrow systems, classified by activity.
- GPS collaring and telemetry: Capture and fit GPS collars to track movement, home range and habitat selection.
- Hair snares and scat DNA sampling: Collect hair on barbed wire corrals or scat along transects and identify individuals by DNA for capture recapture.
- Drone and aerial surveys: Fly pre planned strips with an RGB or thermal camera and count animals on the imagery.
- Badger bait marking: Feed peanuts mixed with coloured plastic pellets at each sett, then map which colours appear in which latrines to draw territory boundaries.
- Pine marten scat transects and den box checks: Walk forest tracks for pine marten scats, which are deposited on paths as territorial marks, and check den boxes for use.
- Mink rafts: A floating raft with a clay pad under a tunnel records the footprints of mink passing along the bank, and the same raft carries a live trap once mink are confirmed.
- VHF radio tracking and triangulation: Fit an animal with a VHF transmitter and locate it by taking compass bearings to the strongest signal from two or more known points.
- Roadkill surveys: Record every dead animal on a fixed stretch of road to map collision hotspots and track relative abundance of species such as hedgehogs, badgers, otters and deer.
- Thermal imaging transects for deer, hares and nocturnal mammals: Walk or drive fixed lines at night with a thermal camera and record every warm body with its distance and bearing.
- Scent stations and track plates: A smoothed disc of sand or a sooted metal plate with a scent lure in the middle records the footprints of carnivores that visit overnight.
- Deer browsing and impact assessment: Score browsing on seedlings, coppice regrowth and shrubs to measure the effect of deer on woodland structure.
- Behavioural sampling (focal follows, scan sampling, activity budgets, ethograms): Watch animals in a structured way and record what they do using a written ethogram, so activity budgets and social interactions can be compared between sites or seasons.
- Snow tracking transects: Walk a fixed route after fresh snow and record every track crossing to give an index of lynx, marten, hare, fox and wolf abundance.
- Wildlife crossing and underpass monitoring: Record which species use underpasses, green bridges, culverts and fence gaps and how often, to test whether mitigation on a road or railway works.
Marine mammals and seabirds
- Boat based cetacean and seabird line transects: Observers scan from a vessel along pre planned lines recording every sighting with angle and distance.
- Seabird colony counts: Count apparently occupied nests or sites from vantage points or photographs during the incubation window set for each species.
- Shore counts and strandings surveys: Walk fixed beach sections recording stranded animals, seals hauled out and shore birds.
- Land based cetacean watches: Scan a fixed sea area from a headland with binoculars and record every cetacean sighting with bearing, distance and behaviour.
- Seal haul out counts: Count seals hauled out on a known site at low water, by species and age class, without disturbing them.
- Photo identification (mark recapture): Photograph dorsal fins, flukes or scars and match individuals across encounters.
- Passive acoustic monitoring (hydrophones and click detectors): Moored detectors log echolocation clicks or full audio around the clock, giving presence and activity through weather and darkness that visual surveys miss.
- Marine mammal observer and PAM mitigation watches (JNCC protocol): Trained marine mammal observers and passive acoustic monitoring operators watch a mitigation zone around seismic, piling or explosive work and delay operations if a marine mammal is inside it.
- Seabird productivity plots and chick provisioning watches: Mark nests on cliff plots and follow them to fledging to measure chicks fledged per pair, and watch nests to record how often adults bring food and what they bring.
- Burrow nesting seabird playback surveys (shearwaters and storm petrels): Play the species' call at burrow entrances by day and count the burrows that reply, then convert to apparently occupied burrows using a calibration of the response rate.
- Beached bird surveys with oiling scores: Walk fixed beach sections and record every dead seabird with its species, age and whether it is oiled, giving corpses per km and an oil rate.
Amphibians
- Pond surveys: torch counts and netting: Walk the pond edge at night with a torch counting newts and frogs, then net the margins.
- Egg mass counts: Count frog and salamander egg masses in a pond to estimate the breeding female population without handling adults.
- Bottle and funnel trapping: Funnel traps set overnight along pond margins catch newts and larvae that torching misses.
- Call surveys (frogs and toads): Listen at fixed points and score calling intensity by species.
- Environmental DNA sampling: Collect water samples and test for species DNA in a lab.
- Drift fences with pitfalls: A low fence directs migrating amphibians into buckets, counting every animal entering or leaving a pond.
- Artificial cover objects for terrestrial salamanders: Untreated wooden boards laid on the forest floor draw terrestrial salamanders that no other method finds.
- Chytrid and ranavirus swabbing: Rub a sterile swab over the skin of each amphibian and send the swabs to a lab for qPCR detection of Batrachochytrium dendrobatidis, B.
- Toad patrols and road crossing surveys: Volunteers walk a road crossing point on migration nights, count and carry toads, frogs and newts across, and record the dead.
- Mitigation capture and translocation with exclusion fencing: On development sites, amphibians and reptiles are fenced out, trapped and moved to a prepared receptor site before construction.
- Terrestrial and stream visual encounter surveys: Search a fixed area or stream length for a fixed time, turning rocks, logs and leaf litter and replacing them, to record salamanders, frogs and newts on land.
- Larval dip netting and tadpole counts: Sweep a dip net through pond margins and count and identify the tadpoles and larvae caught to confirm breeding and compare larval abundance between ponds.
- Automated frog call recorders: Leave an AudioMoth or Song Meter beside the water to record frog and toad choruses through the night, then score calling activity from the files.
Reptiles
- Refugia (tin and felt) surveys: Lay sheets of tin or roofing felt that reptiles bask under, then lift them on repeated visits.
- Visual encounter transects: Walk slowly along edges and basking sites, recording every reptile seen.
- Drift fences with pitfall and funnel traps: Fences funnel moving reptiles into buckets and funnel traps.
- Sea turtle nesting beach surveys: Walk the beach at dawn counting fresh tracks and nests by species, and patrol at night to tag females and protect nests.
- Freshwater turtle hoop net trapping: Baited hoop nets set in shallow water catch freshwater turtles for marking and population estimates.
- Crocodilian spotlight eyeshine counts: Drive a boat along a fixed stretch at night and count the red eyeshine of crocodiles, alligators and caimans, estimating size class for each.
- Sea turtle in water surveys: Count sea turtles at sea from a boat or by snorkelling on reef flats and seagrass, and capture them by hand for tagging and measurement where permitted.
- Basking turtle counts: Count freshwater turtles hauled out on logs and banks from a distance with binoculars or a scope to index abundance and detect invasive sliders.
- Lizard noosing, hand capture and mark recapture: Catch lizards with a noose of fishing line on a pole or by hand, mark them with paint or toe codes, and recapture to estimate population size.
- Tortoise burrow surveys with burrow camera: Find gopher or desert tortoise burrows on transects, measure them, and push a burrow camera in to see whether a tortoise is home.
Fish
- Electrofishing (assisting): A licensed operator stuns fish with an electric field while assistants net, hold and process them.
- Fyke, minnow and crayfish traps: Baited or unbaited traps left overnight catch fish, crayfish and amphibian larvae for presence and relative abundance.
- Snorkel surveys: Snorkel upstream counting fish by species and size class.
- Environmental DNA for fish: Filter water and test for fish DNA in the lab.
- Seine netting: Drag a weighted net through shallow water to enclose fish over a known area.
- Salmonid redd counts: Count and map the gravel nests (redds) of spawning salmon and trout to index spawning stock.
- Multi mesh gill netting (lakes): Standardised multi mesh gill nets set overnight across depth strata give a repeatable picture of lake fish communities.
- Baited remote underwater video, BRUV: Drop a weighted frame with a camera and a bait bag to the seabed for an hour and count the fish that visit.
- PIT tagging and antenna detection: Inject a glass passive integrated transponder into an animal and detect it when it passes an antenna in the stream or at a pond entrance.
- Acoustic telemetry for fish: Surgically implant an acoustic transmitter and moor receivers that log every fish passing within a few hundred metres.
- Smolt traps, rotary screw traps and fish counters: A rotating cone in the current catches migrating salmon and trout smolts in a live box so they can be counted, measured and marked before release, while resistivity or video counters count returning adults at a weir.
- Larval fish light traps and ichthyoplankton tows: Light traps attract fish larvae and juveniles at night while plankton nets towed behind a boat sample eggs and larvae in the water column.
- Lamprey ammocoete surveys: Electrofish or scoop the fine sediment margins of a river to catch lamprey larvae, which live buried for 3 to 7 years and are the only reliable stage to survey.
- Trawl and beam trawl surveys: A net towed along the seabed by a research vessel catches bottom fish and shellfish at fixed stations so that stock size and age structure can be tracked year on year.
- Hydroacoustic echo sounder surveys: A scientific echo sounder sends pulses down through the water and the returned echoes give the number and size of fish in the column across the whole lake or shelf in one night.
Freshwater invertebrates and plankton
- Kick sampling for macroinvertebrates: Disturb the river bed upstream of a net for a timed period and sort what you catch.
- Zooplankton and plankton sampling: Tow a fine mesh net through the water column and identify and count what you catch under a microscope.
- Pond invertebrate netting (timed hand net): A timed hand net sample across all pond habitats, sorted live, gives the family list behind pond quality scores such as PSYM.
- Benthic diatom sampling: Brush the biofilm off submerged stones, preserve it and identify the diatoms under a microscope.
- Phytoplankton and chlorophyll sampling: Sample the water column for phytoplankton counts and chlorophyll a to track algal blooms and lake trophic state.
- Freshwater mussel searches (bathyscope, excavation, settlement plates): Look for native mussels on the bed with a bathyscope, then excavate small quadrats to find buried juveniles, and set settlement plates where zebra or quagga mussels are suspected.
- Crayfish hand search, night torching and refuge traps: Find crayfish by lifting stones by hand, by torching the shallows at night when they are active, and by leaving artificial refuge traps overnight.
- Dragonfly exuviae searches and larval sampling: Collect the cast larval skins left on emergent stems and sample larvae with a pond net to prove breeding rather than just visiting adults.
- Surber and Hess quantitative sampling: Sample a fixed area of stream bed with a Surber (0.
- eDNA metabarcoding for invertebrate communities: Filter water and sequence the trace DNA to list the invertebrate taxa present in a river or pond without sorting a sample.
- Invasive non native species checks with Check Clean Dry: Look for the main freshwater invaders (killer shrimp, zebra mussel, signal crayfish, floating pennywort, New Zealand pygmyweed) at every site and follow the Check Clean Dry biosecurity routine so you never move them.
Terrestrial invertebrates and pollinators
- Pitfall trapping: Cups sunk flush with the ground catch ground beetles, spiders and ants.
- Sweep netting: Sweep a net through vegetation a set number of times and count the catch.
- Malaise traps: A tent like trap intercepts flying insects and funnels them into a collecting bottle.
- Light trapping (moths): A mercury vapour or actinic light attracts moths into a box overnight.
- Pollard walks (butterflies and dragonflies): Walk a fixed route weekly recording every butterfly within a 5 m box ahead.
- Pan traps (pollinators): Coloured bowls of soapy water attract bees and hoverflies.
- Soil and litter extraction (Tullgren funnels and earthworm surveys): Collect soil or litter samples and drive the animals out with heat and light into alcohol, or dig and hand sort pits for earthworms.
- Bumblebee transects and flower insect timed counts: Walk a fixed route counting bumblebees by species and caste, or watch a flower patch for ten minutes counting every insect visitor.
- Beating trays for canopy invertebrates: Hold a white tray under a branch and strike the branch so the insects fall onto the cloth, then collect them with a pooter.
- Timed searches for snails and slugs with litter sieving: Search under logs, stones and at grass bases for a fixed time, then sieve leaf litter to find the small snails that hand searching misses.
- Butterfly egg, larval and web searches: Search the larval foodplant for eggs, caterpillars or silk webs, which proves breeding and can be counted when the adults are hard to see.
- Orthoptera surveys with bat detector and sweep net: Walk a transect with a bat detector to hear the songs of grasshoppers and bush crickets that are too high for most ears, and sweep the vegetation to confirm identity.
- Saproxylic beetle surveys (flight interception and vane traps on veteran trees): Hang flight interception or window traps on trees with deadwood features to catch the beetles that breed in decaying wood.
- Stag beetle dusk transects: Walk a fixed route at dusk and count flying and walking stag beetles, following the PTES Great Stag Hunt method.
- Ant surveys (baiting cards, nest counts): Lay baits of tuna and honey on cards to draw foraging ants, and count nest mounds in a plot to estimate colony density.
- Spider and grassland suction sampling (G vac): Use a converted garden vacuum to suck spiders, bugs and beetles out of short vegetation over a known area.
- Glow worm transects: Walk a route after dark and count the glowing females, following the UK Glow worm Survey method.
- Tick drag sampling: Drag a white cloth over vegetation so questing ticks attach, then count them per 100 sq m.
- Mosquito trapping and larval dipping: Run a baited light or BG trap overnight for adult mosquitoes and dip standing water with a ladle for larvae.
- Dung beetle baited pitfalls: Sink a pot in the ground with fresh dung suspended above it to catch the beetles that fly to it.
Plants and vegetation
- Quadrat sampling: Record species and cover inside a frame.
- Line and belt transects: Lay a tape across a gradient (dune, shore, slope) and record species along it.
- Relevés and community classification plots: Full species lists with cover in homogenous stands, used to classify vegetation communities.
- Habitat mapping and walkover surveys: Walk the site mapping habitat types and dominant species with target notes.
- Point intercept: Lower a pin at fixed points and record every species it touches.
- Permanent plots and tree monitoring: Tag and measure every tree in a fixed plot to track growth, mortality and recruitment.
- Aquatic macrophyte surveys: Record submerged, floating and emergent plants in a water body by wading, grapnel and bathyscope.
- Rare plant population counts: Census a rare plant population by counting individuals, flowering stems or occupied grid cells on a fixed date each year.
- Invasive plant mapping: Walk a site and map every stand of Japanese knotweed, Himalayan balsam, giant hogweed or the local invaders with GPS and a size class.
- Hedgerow surveys (structure and species): Record the woody species, height, width, gaps and base condition of a hedge in 30 m sections, following the UK Hedgerow Survey Handbook and the PTES Great British Hedgerow Survey.
- Veteran tree and tree health surveys: Record girth, form and the deadwood features of each old tree for the Ancient Tree Inventory, and check for signs of ash dieback, Dutch elm disease, Phytophthora and bleeding cankers.
- Phenology monitoring: Record the dates of first leaf, first flower, fruit and leaf fall on the same marked plants each year to track climate response.
- Saltmarsh zonation transects: Run a line from the low marsh up to the terrestrial edge and record species cover and height in quadrats, so the zonation and any squeeze against sea walls can be tracked.
- Dune vegetation transects: Walk a line from the beach across the dune ridges and slacks recording species cover and the ground profile, to track succession, bare sand and scrub invasion.
- Seed rain traps and seed bank germination: Catch falling seed in funnel traps to measure seed rain, and germinate soil cores in a greenhouse to count the viable seed bank.
- Tree regeneration plots: Count seedlings and saplings by height class in small plots to measure whether a wood is regenerating and whether deer browsing is stopping it.
- Biomass clip plots: Cut all the vegetation inside a small quadrat, dry it and weigh it to give standing crop in grams per square metre.
Fungi, lichens and bryophytes
- Fixed route fungal forays: Walk the same route repeatedly recording every fruiting body.
- Grassland fungi (waxcap) surveys: Count waxcaps, clubs, corals and earthtongues to grade grassland conservation value.
- Lichen and bryophyte quadrats on trees and rock: Record lichen and moss cover on trunks or rock faces in small quadrats.
- Bryophyte relevés: Full moss and liverwort lists with cover in small plots by substrate.
- Deadwood fungi fixed log surveys: Tag a set of fallen logs and record every fungal fruit body on them each year, with the log decay stage, so species turnover can be followed through decomposition.
Marine benthos, reefs and shore
- Intertidal belt transects and quadrats: Work down the shore on the lowest tides recording species in quadrats at fixed heights.
- Rocky shore timed searches: Search every microhabitat in a zone for a fixed time, recording every species.
- Underwater visual census (reef fish): Divers swim a tape counting fish by species and size within a belt.
- Benthic grab and core sampling: Lower a grab or corer to the seabed to sample sediment infauna, sieve it and identify the animals.
- Coral reef line intercept and photo quadrats: Record what lies under a tape or in photo quadrats along a reef transect to measure coral cover, bleaching and algae.
- Seaweed and kelp surveys: Record seaweed species and cover on the shore, and kelp density and canopy along belts below the tide, to track habitat condition and non native species.
- Seagrass transects and quadrats: Lay a tape across a seagrass bed and score percent cover, shoot density and canopy height in quadrats, following Seagrass Watch and the SeagrassNet protocol.
- Mangrove plots and transects: Run transects across the mangrove and measure every tree in fixed plots for species, diameter and height, with seedling counts in subplots.
- Drop down video, towed camera and ROV seabed surveys: Lower a camera to the seabed on a frame or tow it slowly to record habitat and epifauna where divers cannot go.
- Intertidal sediment cores for infauna: Push a core tube into mud or sand at low water and sieve the sediment to count the worms, bivalves and crustaceans that feed shorebirds and fish.
- Strandline surveys: Walk the tide line and record the shells, egg cases, seaweeds, litter and dead animals cast up, following the Marine Conservation Society Beachwatch and the Shark Trust Great Eggcase Hunt methods.
- Reef invertebrate belt transects (Reef Check): Swim a 5 m wide belt along a fixed 100 m line and count the indicator invertebrates and impacts, then use a line intercept for substrate.
- Seasearch style subtidal dive surveys (SACFOR): Dive a site and describe every habitat met with its depth, substrate and conspicuous species scored on the SACFOR scale.
Habitat and environment
- Habitat condition assessment: Walk a W across each habitat parcel and score indicator species, sward structure, bare ground, scrub and negative indicators at 20 stops against a target.
- Water quality field measurements (sonde, turbidity): Take temperature, dissolved oxygen, pH, conductivity and turbidity at a fixed point with a sonde or handheld meters so the biology has its chemistry.
- River Habitat Survey and MoRPh: Record the physical structure of a river reach, its banks, channel features, vegetation and modifications, following the Environment Agency River Habitat Survey or the citizen science MoRPh method of the Modular River Survey.
- Peatland condition and peat depth probing: Push a rod through the peat to the mineral base to map depth, and score the surface for bare peat, erosion, Sphagnum cover and drainage.
- Water table dipwells and soil moisture: Sink perforated tubes into the ground and measure the depth to water in each on a regular cycle to track the water table that drives wetland plants and peat.
- Soil sampling for ecology (pH, organic matter, bulk density): Take soil cores for pH, organic matter and bulk density so vegetation and invertebrate data can be explained by soil.
- Canopy cover and light (densiometer, hemispherical photos): Estimate canopy cover with a spherical densiometer or a fisheye photo so light reaching the ground can be linked to regeneration, ground flora and butterflies.
- Microclimate loggers: Leave small temperature and humidity loggers in shields at ground or canopy level to measure the microclimate that animals and plants actually feel.
- Deadwood line intersect surveys: Walk fixed lines and measure the diameter of every dead log that crosses them to estimate deadwood volume per hectare, and count snags.
- Fixed point photography: Photograph the same view from a marked post at the same time each year to show habitat change that numbers miss.
- Sward height and structure (drop disc): Drop a light disc down a graduated rod and read where it rests on the grass to measure sward height and structure for grazing management and bird and invertebrate habitat.
- Citizen science recording (iNaturalist, eBird): Record what you see with the phone apps that feed the global databases, so casual records become usable data.
Methods follow standard published protocols (national monitoring schemes, Sutherland’s Ecological Census Techniques, agency guidance). Always follow your project’s own protocol and licence conditions where they differ. Kit links to Amazon are affiliate links. Tool by Erzsebet Frey, Simply Ecologist.
If you would rather find animals than survey them, the same field logic sits behind this guide to wildlife in the USA, park by park.

Erzsebet Frey (Eli Frey) is an ecologist and online entrepreneur with a Master of Science in Ecology from the University of Belgrade. Originally from Serbia, she has lived in Sri Lanka since 2017. Eli has worked internationally in countries like Oman, Brazil, Germany, and Sri Lanka. In 2018, she expanded into SEO and blogging, completing courses from UC Davis and Edinburgh. Eli has founded multiple websites focused on biology, ecology, environmental science, sustainable and simple living, and outdoor activities. She enjoys creating nature and simple living videos on YouTube and participates in speleology, diving, and hiking.
Share this
From the shop
Gifts for people who love the wild
Wildlife themed t-shirts, notebooks, tote bags, bandanas and guides, designed by an ecologist.
Visit the shop